Tag Archive for: hiking

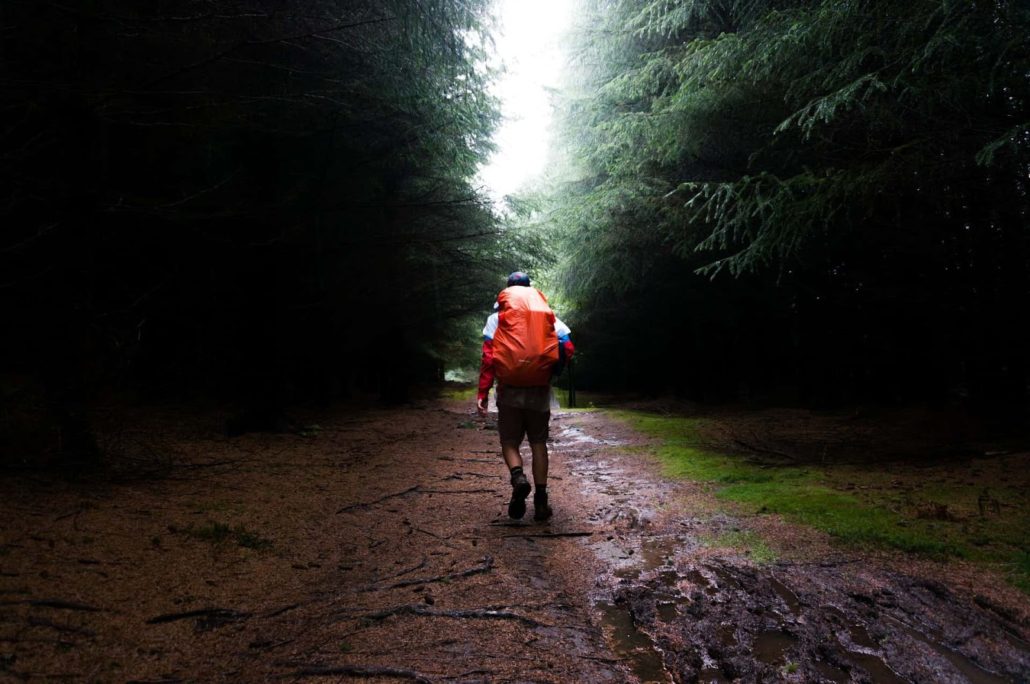
If you’re new to backpacking, it can be hard to know what gear you need for days on the trail. Backpacking and outdoor sports are more popular than ever, and you’ve probably seen a huge number of companies advertising their hiking backpacks and touting all the spectacular features they have. While these backpacks are great, and they are necessary for some things like backpacking, you won’t always need to choose best, shiniest product on the market.

In some cases, yes, you can use a regular hiking pack for backpacking. If you aren’t doing any serious trips, won’t be in poor weather conditions, or just need to carry some extra things on an impromptu trek in the woods, a regular backpack is more than sufficient. However, if you are going for multiple days, carrying a lot of weight, or in bad weather, you may be wondering how to choose a backpacking pack.

Like always, that answer will vary based on your plans, distance traveled, and needs on your trip. A good rule of thumb is that under 5 miles, your regular backpacks will work relatively well. Beyond that, you’ll begin to notice discomfort, and may start wishing for the features of a proper backpacking packs. 

How Do I Know If I Need a Backpacking Pack?

How Do I Know If I Need a Hiking Backpack?

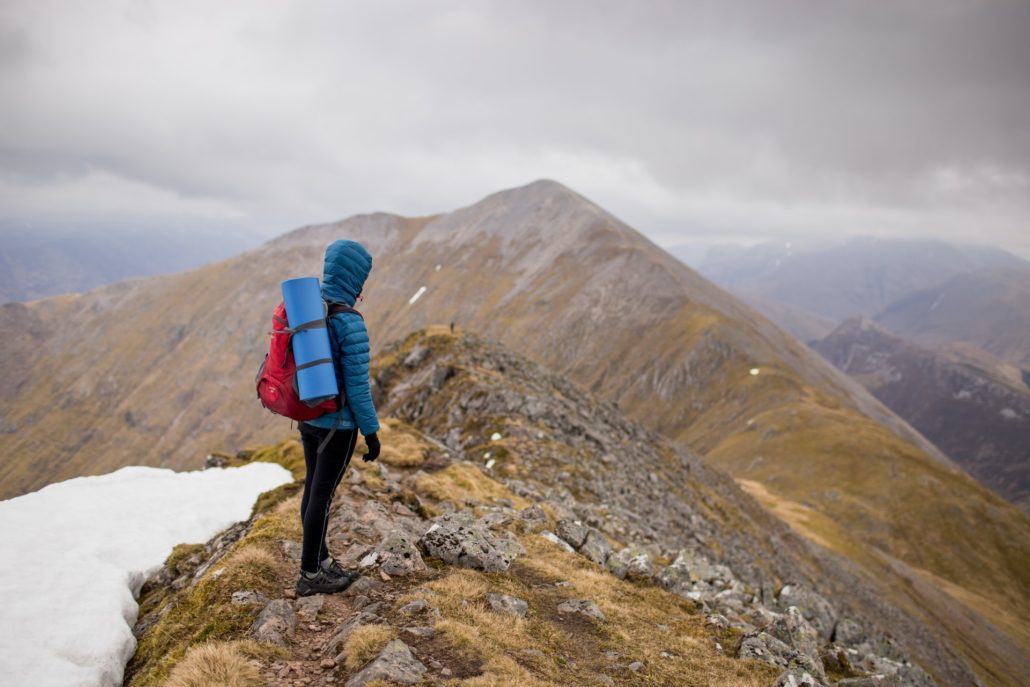
You may want to consider upgrading from a regular backpack if you’re taking longer backpacking trips and need more capacity, or you’re noticing discomfort due to the style of backpack you have chosen. Most types of backpacking packs have extra padding, straps, and a more ergonomic construction compared to a backpack you may just use for school books.

This means you can carry your gear for longer periods, and higher amounts of weight will be more comfortable to carry. If you’re backpacking for more than a day, or your pack is getting to be on the heavier side, you should probably start looking into a more suitable option than a regular backpack.

What features are important when choosing a backpacking pack?

The most imperative thing is to simply plan for the trip you are taking. If you’re on a day hike, you need a much different pack than you would for backpacking. If you’re carrying heavy weight or traveling great distances in a day, a school backpack will likely become uncomfortable or challenging to use effectively. If your regular backpack is lacking in technical features or isn’t cutting it on your longer hikes, look out for backpacks with features like those listed below:

  • Top loading design
  • Extra pockets
  • Additional padding
  • Waist and/or sternum straps
  • Adjustability 
  • Water-bladder pocket/Hydration reservoir
  • Sleeping bag stash
  • Attachment points and/or tool loops
  • Raincover
  • Ventilation features
  • Greater variability of sizes
  • More comfortable weight distribution
  • Removable daypack

I also recommend a waterproof option if you expect a trip in less than perfect conditions. One positive is that many backpacks made for general use have hiking features, and there’s a good chance you may have a North Face or Osprey bag you use already around the house. If that’s the case, you’ve already got a great tool that will hold up to a lot of your needs.

What are the different types of backpacking packs to choose from?

Generally, backpacking packs are defined by their size and style. The 3 different types of backpacking packs are the external frame, internal frame, and frameless backpacks. As far as size, they are measured in liters and you will often see different sizes listed as Daypacks, weekend backpacks, multi-day backpacks, and extended trip/expedition packs.

The different styles of the frame can be confusing, especially if you don’t have experience backpacking or rucking. Frameless backpacks are very light with flexible construction and are designed to carry light loads. However, choosing a frameless backpacking pack means you will not have any rods or frame sheets to distribute weight.

Yes! You can use a regular backpack for hiking

They generally don’t hold more than 40 liters and are not meant to carry a heavy load. Internal frame backpacks are the most popular type of backpacking pack available, and feature a more rigid construction that distributes weight more, and keeps the backpacking pack from collapsing. They’re often made with a frame-sheet on the inside. External frame packs feature a frame often made of aluminum on the outside, with a harness attached to it.

They’re used for carrying very heavy loads. They are not as commonly available in modern times, but some companies still offer this style due to their highly adjustable style, and customizable nature.

Sizes are often defined as follows: daypacks (1 day or less) are what you use for very short adventures, and often hold under 30 liters. A weekend pack (1-3 days) measures about 30-50 liters. Multi-day backpacks (3-5 days) hold 50-80 liters, and extended trip backpacks (5+ days) hold 70+ liters.

Depending on your needs and what outdoor sport you perform, you obviously may need a larger or smaller pack. For instance, if you’re a climber and need to carry ropes, shoes, harnesses, protection, and so on, a bigger backpacking pack may be necessary.

Many people also prefer small packs in which they carry very little gear so they can travel faster. You can choose a smaller backpacking pack if you’re disciplined about what you pack and comfortable with a lack of supplies. The reverse also works, if you want a more comfortable experience and you’re alright with the extra weight. 

Each option has its advantages, but the average hiker will be perfectly fine with a mid-sized, internal frame backpack. This is what makes up the vast majority of the market, and most people won’t need anything beyond that. 

What are the best brands of backpacking packs?

I can’t give you a fully comprehensive list of brands that will suit every need when choosing a backpacking pack, but generally, you’ll see excellent products in outdoor stores, or from the companies, you commonly associate with outdoor products. Ideally, I would recommend going to a local outdoor store and seeing what packs fit you comfortably and suit your needs, but researching products online is a great option. You should choose your backpack based on your specific needs.

With all the different types of backpacking packs, there are a massive number of brands, and I’m just going to list a few. If you choose a backpacking pack from a brand that isn’t listed, that doesn’t mean it’s a bad option. I still recommend looking for reviews online or checking forums for information. Another great method is to see what type of pack people in your area or sport use. A few brands to check out are below:

  • Osprey
  • REI
  • North Face
  • Patagonia
  • Hyperlite Mountain Gear
  • Granite Gear
  • Mountainsmith
  • Deuter
  • Mystery Ranch
  • ULA Equipment

One thing you may have noticed is that many of these companies make “regular” backpacks that you may see daily. For me, seeing North Face, Osprey, Patagonia, and REI packs on a school campus was never uncommon. I even use a North Face backpack when going on short hikes or to carry gear when bouldering. My North Face pack is just a mid-sized backpack with hiking features, and it works great if I’m not on a longer trip.

A “regular” backpack from an outdoor gear company generally has several hiking features like waist straps, extra pockets, and so on. If you’re just going on some moderate hikes where you need to carry a bit of gear, you probably already have a backpack in this style that you can use. 

Should I choose an internal or external frame pack?

Generally, most hiking backpacks these days are internal frames, but there are still some models featuring an external frame. If you aren’t aware, external frame packs are a style of backpack that feature a frame on the outside of the pack, generally constructed out of aluminum or composite material.

There’s also often space on the frame above or below the pack itself so you can attach larger gear like backpacking tents or sleeping bags. They were once the standard for backpacking, and they’re generally meant to be used for heavier loads. You can sometimes find external frame packs for a cheaper price compared to internal frame packs, but since internal frames are so common now that isn’t as true as it once was. 

If you’re wondering how to choose a backpacking pack and aren’t sure if you should get an external frame model, just consider what activities you will be performing, and how much weight you will carry. This type of backpacking pack is spectacular for long trips and heavy loads, but for an average hike, they are completely unnecessary.

There’s a good chance you’ve never even seen an external frame backpacking pack in a store. If you happen to try one and find it comfortable, there’s no problem using it, just keep in mind they’re generally for more serious adventures. Another thing to note, there are frameless backpacks as well, but they are generally designed for very light loads. 

Are there any alternatives to backpacking packs?

If you’re on a short trip but you don’t want to carry a traditional backpack, you may be wondering what alternatives are available. While backpacks are the best option for most scenarios, there are some alternatives. Shoulder/sling bags are a smaller option that can be easier to carry than a two-strap backpack, and they’re excellent if you don’t have much you want to carry.

Lumbar packs are another alternative. They sit in the lumbar area of the back and are smaller capacity options that may be more comfortable for you. Fanny packs are another good choice if you don’t have many pockets but you want to carry some essentials on the trail. Each of these options comes in several sizes from reputable outdoor companies, but it’s important to note that most of these products hold under 20 liters. 

Conclusion

It can be difficult to know if your backpack will work on the trail, or if you need to invest in a new type of backpacking pack to hike in. With outdoor sports being so popular, and more options available than ever, it may be tempting to choose a fancy hiking backpack for your next trek in the woods. Personally, I think that you’ll know when your pack isn’t working. For most of my days outside, a simple North Face backpack with fairly basic features is more than sufficient.

I can fit most of my hiking gear on or in it, and it’s comfortable for day hikes. Once you get into the range of multi-day trips, backpacking adventures, or have a lot of gear, it becomes apparent that a hiking backpack is necessary. Without the extra features, you’ll likely become uncomfortable, or leave out a necessary piece of gear. I always recommend further research, and it’s imperative to choose a backpack that is comfortable for you. If your bag isn’t comfortable, then there’s little chance you’re going to enjoy a great day in nature.

We all know Miami for its awesome beaches and fantastic cuisine. However, Miami has different kinds of hiking spots that will allow you to experience Miami off the beaten path. While you won’t be scrambling up rocks or climbing hills, you’ll be able to take in the unique natural beauty of Miami on these wondering hiking paths.

To ensure you have a great hiking experience in Miami, be sure to get the AllTrails app before you go. The app has reviews from other hikers to keep you up to date on the latest trail conditions. You can filter by trail difficulty, length, and suitability and download trail maps to help keep you on track even when you’re offline.

In today’s topic, we will be talking about 7 of the best places to go hiking in Miami. So, what are we waiting for? Let’s dive straight into it!

Myres Bayside Park Commodore Hiking Trail

Distance: 7.1km

Difficulty: Easy

Located in the heart of Miami, Kenneth M Myres Bayside Park is a perfect place for short trips and outings with families. The park draws a sharp contrast between the sky-high buildings and a beautiful bay. The park is family-friendly and it also has an outdoor gym and auditorium. It has been a picnic spot for a long time now and people also enjoy riding bikes through the greenery of nature.

Speaking of best trail, the Commodore Trail holds this prestigious title. The trail starts parallel to the highway and then gradually heads to the coconut grooves. The path is made of concrete surrounded by trees and plants on both sides. As you move through the trees, the city noises fade, and you will experience a peaceful atmosphere off the beaten path in Miami. The beautiful bay also falls on this trail and if you are lucky you can also get to see some iguanas on your way. The trail is pet-friendly for dogs, but make sure they stay on a leash all the time.

Big Cypress Florida Trail- Blue Orange Trail

Distance: 24km

Difficulty: Easy

Hiking near Miami on Big Cypress Florida Trail- Blue Orange Trail

Big Cypress Florida Trail- Blue Orange Trail

Want to spend more quality time with mother nature? How about a long hiking trip off the beaten path in Miami? Sounds great? Well, in that case, Big Cypress National Preserve should be on the top spot of your holiday list. Conserving over 729,000 acres of a vast swamp, this preserve is home to diverse flora and fauna including the endangered species, The Florida Panther. It is a lovely place to go on a scenic drive with your family. There are lots of picnic spots, swamp tours, and tons of outdoor activities along with 8 different campgrounds.

You can find many hiking and driving trails throughout the preserve with each having its own set of unique experiences. The trail that we love the most is the Blue Orange Trail Loop as it is lightly trafficked and perfect for all sorts of skill levels. The trail is covered with wildflowers and contains both tropical and temperate climate trees. You might also find some alligators in the swamp so it is recommended to take a guide with you. 

Tropical Park Tropical Park Loop

Distance: 6km

Difficulty: Easy

It’s time for some lake time! Situated on a former race track, Tropical Park is a place that attracts tourists throughout the year with its scenic view. The park features three beautiful lakes and a green river bank which is home to many birds and other wildlife species. You will find many picnic tables with barbeque grills and many outdoor recreations including a sports center and boxing center. Dogs aren’t allowed on the trails but there is a different dog park area.

Topical Park Loop is a beautiful place to go hiking in Miami with a beautiful view of the river and the surrounding greenery. The trail has a hill for people to run up and down and have some fun. Beside the lake, you can find raccoons, ducks, iguanas, and many other varieties of animals. The landscape is breathtaking and the view of the blue lake under the blue sky is just beyond words. People also love the food here so don’t miss to check out the food trucks.

Oleta River State Park Trail

Distance: 4.8km

Difficulty: Moderate

Oleta River State Park Trail

Oleta River State Park Trail

Oleta River State Park is the largest urban park in Florida. It is situated on an oasis just around 30 minutes drive from downtown Miami. There are off-road bicycling trails, hiking trails, paddle boat trails throughout the park. If you are an adventure lover, this place is made for you! Old rustic cabins with air conditioners can also be found inside the state park. Activities like fishing and swimming are also allowed by the river. Though you won’t be far from Miami, you’ll truly feel off the beaten path.

Oleta River State Park Trail passes through mangrove forests and is slightly more challenging than the other trails. The trail is great for traveling away from the hustle and bustle of the city. The best part is that the trails are interconnected, so you can start from one and end on a completely different trail.  The mangrove trees also do a good job of blocking off the direct sunlight, so you don’t have to carry sunscreen with you. Your pet friend is allowed to company you on this trip, but he must be on a leash on the trails.

Everglades National Park Anhinga Trail

Distance: 1.3km

Difficulty: Easy

Just outside Miami - go hiking on the Anhinga Trail in the Florida Everglades

Just outside Miami – go hiking on the Anhinga Trail in the Florida Everglades

One of the central attractions near Miami is the Everglades National Park. This national park is the third-largest national park and largest subtropical wilderness in the US. As a UNESCO World Heritage site, there are many different kinds of endangered species and wildlife in the vicinity. The landscape of this park is wonderful and you can go on boating trips to the rivers and lakes. If you are planning to stay overnight amid nature, you will also find several campgrounds in the park.

For such a large park, like Everglades, Anhinga Trail is relatively short, yet people love this trail more than any other. The trail features beautiful wildflowers and during the winter season, you can witness numerous wildlife species. You can also go birdwatching in this family-friendly tour of a lifetime. The winter season is the best time for visiting the park as the water level remains low and birds migrate to take shelter during the winters. A delight for the bird lovers!

Bill Baggs Cape Florida State Park Lighthouse Loop

Distance: 4.8km

Difficulty: Easy

Bill Baggs Cape Florida State Park Lighthouse Loop

Bill Baggs Cape Florida State Park Lighthouse Loop

Bill Baggs Cape Florida State Park is a beach park and is often considered one of the top 10 beaches nationwide. This place is historically diverse, as Cape Florida has been a symbol of revolution in the pages of history. Nowadays, the park is used as a relaxing spot for hikers or bikers who want to get off the beaten path in Miami. You can go on guided tours and explore the history of the park, or you can enjoy the lovely natural landscape. You will also find many cottages and a lighthouse in the park. 

The Cape Florida lighthouse was built around 1825 and because of its rich historical value, visitors love visiting the Lighthouse Loop throughout the year. The trail is family-friendly presenting beautiful scenarios of rivers, trees, and wildflowers. You can also take a tour of the lighthouse and also take a tour of the park by boat or kayak. Make sure you stay till the evening as the view of the sunset over the bay is stunning.

Biscayne National Park Black Creek Canal Trail

Distance: 2.7km

Difficulty: Easy

Hiking near downtown Miami on Biscayne National Park Black Creek Canal Trail

Biscayne National Park Black Creek Canal Trail

Last but not least is the Biscayne National Park. Located right in Miami, yet feeling like a world away, this park has a lot to offer starting from hiking, boating, fishing, canoeing, and lobstering as well. This place is an ideal spot for water activities and birdwatching. Biscayne National Park also has its fair share of historical importance. You can opt-out for scuba diving and explore the vibrant colors of the coral reef.

 Take a short trip along the beachside and enjoy the scenic beauty and pleasing sounds of the ocean with your family through the Black Creek Canal Trail. The trail features a short hiking trip down the mangrove lined-shore that leads to the Colonial Bird Protection area. The place has lots of resting spots and some picnic tables too. There are information panels throughout the trail which give you directions and interesting information regarding the vivid history of the park. 

Start your Hiking Adventure in Miami

Miami is one of the largest cities in Florida and also one of the most common tourist destinations. But if you’re looking to experience Miami off the beaten path, you can find beautiful nature and wildlife while hiking in Miami. Enjoy your trip!

Hiking is meant to be a restful, restorative form of exercise. It should bring you both mental and physical benefits as, in the famous words of John Muir, we “climb the mountains and get their good tidings.” However, for some folks, climbing and hiking can bring on anxiety — and that’s ok. If you aren’t used to backpacking and hiking — or have had a bad experience in the backcountry — it’s entirely normal to experience anxiety about hiking away from civilization into the wilderness.

Despite the pangs of anxiety you may feel, getting out into the wild can still be a wonderful, invigorating experience that boosts your mental health and leaves you with memories that last.

So, here are a few ways you can manage and overcome your anxiety the next time you step onto the trail.

Prepare in advance to reduce your anxiety around hiking

A lot of the anxiety people feel around hiking and backpacking comes from a lack of preparation. Either they haven’t properly researched the trail they’re following, don’t have the necessary experience to navigate the environment, or haven’t packed the appropriate supplies.

Preparing well in advance takes care of these worries, and should be seen as an essential part of your hike.

The way you prepare depends on the context, as the gear and food you will need depend largely on the weather, terrain, and time of year that you intend to go hiking.

Additionally, you need to have an effective exit plan in case anything goes wrong while you’re out in nature. This means you need to know what to do if your car breaks down. You should practice replacing your tire before you take a long road trip, and should keep recovery information in an easy-to-access glovebox or compartment.

Anxiety Attacks

If you suffer from anxiety attacks, you should seek help from a medical professional. But, if you haven’t yet had an anxiety attack, it’s good to know how you can manage one before it occurs.

Anxiety attacks come on suddenly and provoke several symptoms. Your heart starts to race, you feel breathless and may notice your body is trembling excessively. These attacks are also typically coupled with a deep sense of fear, and a dissociation from yourself or the world around you.

When you’re experiencing an anxiety attack, you have to find ways to slow your heart rate and pay attention to your physical symptoms. You can do this by talking to someone you trust, taking deep breaths, and slowly counting to 10 with repetitions.

You must take these steps to calm yourself, as you cannot remove yourself from the situation when you’re hiking — you simply need to trust your ability to calm your physical response to stress.

Choose an Appropriate Hike

You know what triggers your anxiety better than anyone else. Whether it’s a fear of heights, the unknown, or wild animals, you should plan ahead and choose an appropriate hike that is unlikely to make you feel anxious.

If, for example, you have a fear of large wild animals, you may want to hike south of areas where brown bears and wolves live. Or, if this isn’t possible, you’d be best off hiking near your local town or city where large wild animals are less likely to roam in, and you will meet other hikers who can help you feel safe.

You also need to choose an appropriate “difficulty” when hiking in order to manage your anxiety. This can be tough to determine on your own, and recommendations don’t always help — a stroll in the park for one person might be like climbing to Mordor for the next.

Luckily, there are plenty of apps online that record hiking trails and loops for you. Oftentimes, these hikes will come with a difficulty level, and you can filter appropriately. Some of the best apps currently available are AllTrails and Gaia GPS.

Remember the Benefits of Hiking

While the thought of going hiking may be anxiety-inducing, try to remember that spending time in nature is usually good for your mental health, and can help you get through difficult challenges caused by work or school.

For example, if you’re currently in grad school, it’s easy to get caught up in the stressful cycle of research, writing, working, and learning. A hike may be what you need to improve your mental health as a student, as you will likely “switch off” from student mode. This could give you the “eureka!” moment you need later on, and will make a difficult semester that much easier.

It’s also worth noting that hiking has real physical health benefits. Hiking recruits a lot of the muscles that remain unused during our 9-5 lives, and regular cardio lowers your risk of heart diseases, increases bone density, and improves your balance.

By keeping the benefits in mind when you start to feel the first signs of anxiety when hiking, you can overcome feelings of nervousness and convince yourself to carry on when your anxiety is telling you to turn back.

Conclusion

Anxiety when hiking is entirely normal and is to be expected. Even the best hiker can get in over their heads, and sometimes need to calm themselves down to continue.

You shouldn’t feel any shame about feeling anxious when hiking. Instead, you can learn to recognize the early signs of an anxiety attack and should plan ahead by ensuring you have an effective exit plan, plenty of food, and the right gear. You should also consider hiking with a loved one who can remind you of the wonderful benefits of spending time in the great outdoors.

Whether you’re planning to hike in unpredictable weather or your upcoming backpacking trip is threatened by an encroaching storm, backpacking in the rain poses a challenge. Dealing with rain can make backpacking interesting and much more difficult, but if you plan properly it’s nothing to worry about.

Don't let a little rain get in the way of your backpacking trip!

Don’t let a little rain get in the way of your backpacking trip!

Many people find that backpacking in the rain makes the experience feel more peaceful, and it’s very fun if you make sure you’re ready for it. Without planning, you may end up drenched, miserable, and regretting your trip, so make sure to know how to deal with it!

If you use synthetic clothing and fleece, rainproof layers, waterproof footwear or gaiters, and a waterproof pack, you shouldn’t end up too wet or cold when it rains hard. It’s also good to pack some extra clothing to change into.

Picking a good campsite, setting up properly, and ventilating your tent are also vital. Blisters are also more likely, so giving extra effort to prevention and care is important.

There are more dangers like hypothermia, slick trails, and dehydration, but if you’re careful and pay attention to potential problems you won’t have issues. 

What to Wear Backpacking in the Rain

Layering is your best friend in a heavy downpour. Synthetics or a merino wool base layer are a good start to keep you warm and dry quickly. An insulating layer may be necessary depending on temperature, but obviously, this depends on the situation. A good rain jacket as your outer layer is ideal.

If you’re looking for a rain jacket for hiking, backpacking, and other outdoor sports I recommend looking into products that make gear for those activities. While there are plenty of great options on the market, a few brands to look into sited below:

These are not the only options, just examples that are good to start researching. Outdoor companies make products that will be more comfortable, ventilated, and suitable for higher levels of movement than other clothing brands.

Hardshell Jackets

Hardshell jackets are more suitable for higher amounts of rain, snow, and wind, and they’ll keep you protected in more hardcore weather.

Softshell Jacket

A softshell jacket will also often be waterproof, but will not offer the same protection as a hardshell jacket. Softshell jackets are generally more comfortable and breathable but offer less protection. 

Picking your ideal options comes down to the conditions of your backpacking trip, and how bad of weather you are expecting. There’s no need to break the bank, but especially if you’re going on a longer backpacking trip, making an at least mid-range investment will pay off.

Rain clothing with vents also makes wet, humid weather a bit more bearable. In especially rainy areas a pair of rain pants may be helpful as well. A waterproof, breathable pair of pants and gaiters go a long way when backpacking in the rain, especially in lower temperatures.

If it’s very warm, you may be better off shedding layers instead of adding them. On a hot day, if you’re comfortable with wearing a pair of shorts with a rain jacket or light shirt. If you’re comfortable with it and the weather is warm, hiking in the rain without a shirt feels great.

When Your Clothes Are Wet

When backpacking in the rain, if you’re soaked through your layers, do your best to evaluate your warmth. Generally, it’s alright to keep on your wet clothing, especially if you’re wearing multiple layers of synthetic or wool items. 

As the saying goes, there is no such thing as bad weather, just the wrong clothing!

As the saying goes, there is no such thing as bad weather, just the wrong clothing!

It may not be comfortable, but unlike cotton, it will dry over time. When you get into camp and you’re set up, change into dry clothing. If possible, hang up your wet clothes to dry.

If you do not have the opportunity to set up a clothesline or dry them in the sun, putting wet clothing under a sleeping pad if you have one can help them dry quicker. 

You should always have some dry clothing if hiking in bad weather, especially if the forecast is expected to stay bleak and rainy. In a pinch, staying in wet clothing can dry it off. It may be uncomfortable and take a while, but if you’re relatively warm and safe it won’t be a problem. 

Type of Backpack To Bring Backpacking in the Rain

Be sure to bring the right equipment if you'll be backpacking in the rain

Be sure to bring the right equipment if you’ll be backpacking in the rain

I recommend using dry bags (trash bags and baggies work as well) for clothing and sensitive items in your pack, and a waterproof backpacking cover if your backpack’s waterproofing isn’t reliable. Trashbags aren’t bad in a pinch, but a waterproof backpack is a better option by far.

The extra cost means your gear won’t end up drenched on the trail. Most outdoor companies offer waterproof backpacks made for hiking and backpacking. 

Check The Weather

Checking the weather is perhaps the most important piece of advice I can offer. It’s great to have all the best gear and know-how to use it, but if you don’t know what’s coming it won’t help you.

Knowing the weather can help you avoid poor conditions if you don’t want to deal with them, and be ready for them if you do.

It’s also good to know if you’re in for a storm or a shower, which can prevent potential issues down the line. Check the weather often, and be ready for the conditions coming your way. 

Picking a Campsite and Staying Dry

Especially when faced with rain, picking the right campsite is crucial

Especially when faced with rain, picking the right campsite is crucial

Picking the wrong campsite when backpacking in the rain can easily leave you in a puddle with your tent waterlogged. Look for a flat spot that’s not in a depression or low ground ideally with some tree coverage overhead. Never camp in a dry riverbed.

It’s also important to orient leeward of the wind, along with some sort of protection like boulders or trees. Make sure to avoid especially moist ground, and dead branches.

If you notice any dead branches above you, it’s a good idea to move your tent. A branch falling on you in the middle of the night is a less than ideal way to wake you from a deep sleep after a hard day of hiking in bad weather.

A tent footprint or a tarp is also ideal to prevent damage and leaks on the floor of your tent. If your tent has vents, put them to good use. Condensation buildup is no joke, and properly ventilating your tent when you have the chance will make your setup much more comfortable.

Otherwise, make sure your tent is waterproofed properly (You can manually waterproof it if an older tent is beginning to have trouble keeping water out), and utilize your rain fly or shield, or even a tarp rigged overtop of it. 

Practice Before Backpacking in the Rain

For the experienced and newbie alike, practicing the proper use of your equipment can be a huge time saver in a bad situation. If you’ve never pitched your tent but you need to in a storm, you’re most likely going to make mistakes, and at worst have to redo your setup at a less than opportune time.

Practice using any equipment you’re unfamiliar with, because you may not always have the time to learn on the fly. This rule is especially important for tents, as it can be the most essential item to put up in heavy rain, but you can easily end up drenched for the night if you do it wrong.

Terrain Dangers

Backpacking in the rain means taking extra precautions

Backpacking in the rain means taking extra precautions

I’m sure you’re already aware of the fact that you’ll face slick, puddled trails and that rocks, logs, and slopes will be hazardous, but you should be conscious of other potential problems ahead of you.

The most common danger you will encounter will be slick surfaces. Navigating difficult terrain can be hard already, but slippery rocks, hills, and so on can easily leave you injured.

Trekking poles can be very useful if you know you’ll end up on some especially slick terrain. The two added points of contact with the ground might save you if you need some extra balance.

If hiking in bad weather, sticking to forested areas can also assist in avoiding many of the problems faced when backpacking in the rain. The added coverage from trees often makes rainfall less intense to deal with. 

Larger rainstorms could make a river crossing much more dangerous. Surging river levels could make a generally easy crossing challenging. The same rules apply to most river crossings.

Be aware of what is downstream in case you’ve swept away, be wary of strainers to catch logs, brush, and debris in streams. Water flows through, a person can’t. If you have to cross, look for an area where the water is running slower, like undercuts or straight stretches to cross. Use extra caution if utilizing things like logs as a bridge, and have a contingency plan in case something goes wrong in a potentially dangerous crossing. 

Flash flooding, mud, and rock slides are all more common in rain as well. If you plan to hike in a canyon, make sure to frequently check the weather in case of flash floods, and be aware of how to quickly get to high ground if necessary.

Heavier rains also make mud and/or rock slides more likely, a danger that occasionally kills hikers. Be aware of your surroundings, listen for sounds indicating moving debris, and be alert to changes in weather. 

Know When to Bail

If you aren’t prepared for hardcore rain on your backpacking trip, if you’re miserable because of how drenched you are and how hard it’s getting, or if you’re unsafe due to heavier storms and lightning with little shelter, it’s ok to bail.

It’s not an especially fun option, and you may feel the need to press on, but the thing to remember is that it’s more important to be safe if you’re doubtful.

I’m not saying that you have to quit at the sight of a cloud that’s a little too gray or once you smell rain in the air, I’m saying that you will know when you should hang it up for the day. Like most things in hiking, the time you decide the weather is too much for your backpacking trip will vary from person to person.

If you’re a more casual hiker who wants a short, comfortable, and fun trip, you may not enjoy your experience beyond light to moderate rain. If you like a challenging trip, it’s perfectly acceptable to be outdoors in heavier rainfall or storms. It all comes down to what you want your experience to be, and if you’re prepared for the task at hand. 

Conclusion

While there are obstacles to backpacking in the rain, if you’re prepared it can be a great time. You’ll probably be one of the few people on the trail, and it can be extraordinarily peaceful. I personally love to be in the woods or on the trail in the rain.

If you properly prepare and make sure you’re aware of the potential dangers, you’ll have no problems. You’ll probably end up wet, and it may not always be a great time, but there’s no reason to fear a day backpacking in rain.

The exquisite Valley of Flowers National Park is dream come true for all visitors and hikers alike. It is abundant in gorgeous and exotic floral kinds, as well as species threatened with extinction.

The Valley of Flowers is situated in the Western Front of the Himalayas of Uttarakhand, at an elevation of 3,658 metres above sea level in the picturesque Bhyundar Valley. The Valley of Flowers, located in the Chamoli area, is an 87-square-kilometre landscape encompassing tumbling waterfalls, whispering streams, verdant meadows, gleaming glaciers, and vibrant himalayan flowers.

Majestic snowy mountain peaks, beautiful meadows, and vast vibrant flower arrays abound in this magnificent valley. Diverse foliage, uncommon himalayan flowers, and, most significantly, therapeutic herbs may be found along the Valley of Flowers trek.

With the changing of the seasons, this diverse array of nature takes on new colours and tones, providing distinct varied outlook in changing seasons. The sun sets over the Valley of Flowers National Park, which is a sight not to miss. At this hour, the undulating landscapes and beautiful mountain ranges take on a breathtaking quality.

Cobra Lily, Brahma Kamal, and Blue Poppy are among the unusual himalayan flowers found in this Valley of Flowers. Snow leopards, musk deer, Asiatic black deer, red fox, brown bear, and flying squirrels all live in this dynamic National Park.

Keen photographers, biologists, and flower enthusiasts flock to this location in quest of surreal environs and unspoiled splendour.

Until Frank S Smythe, a hiker, found it in 1931, this lovely valley was absolutely unknown and unexplored. It was originally known as Bhyundar Valley, but Smythe renamed it Valley of Flowers in 1931.

This Valley was proclaimed a National Park in 1982 for its outstanding spectacular natural characteristics, a wealth of high altitude species, and conservation and preservation standing, and UNESCO recognised it as a World Heritage Site in 2005.

The Valley of Flowers National Park offers a variety of activities to attract visitors. Trekkers and environment enthusiasts may hike up to this valley to enjoy the tranquil waterfalls, pristine sceneries, lush forests of oak and pine trees overflowing with snow-capped mountains and different types of flowers that are not accessible elsewhere.

It also has a wonderful location in sight for worshippers and vacationers. Devotees ascend the difficult trek path to the Hemkund Sahib, a well-known Sikh temple in Uttarakhand. It also enables you to visit places such as Ghangaria and Bhyundar.

The best time to visit the Valley of Flowers is during the monsoon season, which runs from July to September. After the monsoon rains, the Himalayan flowers and meadows are in full bloom. The Valley of Flowers begins on June 1st and concludes on October 31st. The admission charge to the Valley is INR 150 for native trekkers and INR 600 for foreign visitors.

Attractions in the Valley of Flowers National Park

Joshimath

Joshimath town blanketed in snow

Joshimath town blanketed in snow

The hallowed town of Joshimath, snuggled in Uttarakhand’s Chamoli district within the valley of flowers radiates its divine atmosphere over the whole Garhwal area. Lord Badri’s idol is carried from Badrinath to Vasudeva temple in Joshimath, and Joshimath is renowned as his winter abode.

For its startling height of 1890 metres above sea level, the town of Joshimath is also known as a hill station. In addition, the Alaknanda and Dhauliganga rivers converge at the Vishnuprayag convergence, which is visible from Joshimath.

Hathi Parvat and other Himalayan peaks provide a bewildering vista. Joshimath, tucked away in the Himalayas, is also regarded as the renowned entrance to mountaineering, with numerous treks available.

Ghangria

Every trekker would drool over the prospect of enjoying the serenity, tranquillity of one of the most exquisite regions of the Garhwal Himalayas, the Ghangaria village. The trekkers who embark on the Hemkund Sahib and Valley of Flowers short trek frequently visit the town of Ghangaria.

Ghangaria is 6 kilometres from Hemkund Sahib and 5 kilometres from the Valley of Flowers. The hamlet is situated at the intersection of the Bhyundar and Pushpawati rivers, which compose the Lakshman Ganga. Ghangria is known to be the last human settlement in Bhyundar Valley which serves as a base camp for trekkers to Hemkund and the Valley of Flowers.

During the winter Ghangaria village is carpeted with layers of snow. It is only navigable in between the months of May and September. At Ghangaria, you may completely unplug yourself from the city’s frantic hustle and bustle and restore your health and spirit. Ghangaria is a haven for thrill-seekers and anyone looking to experience the Himalayan landscape’s untapped grandeur.

Hemkund Sahib and Hemkund Sahib Lake

Valley of Flowers, located in the famed Nanda Devi National Park, is home to hundreds of different flower species, making for a delightful trip. This valley displays a stunning explosion of colours that is beyond description.

You may also do the Hemkund Sahib trek as an add-on to your Valley of Flowers short trek. The Hemkund Sahib journey begins in Ghangaria and winds its way through lush pine and oak woods, alpine meadows, and murmuring streams.

Visiting Hemkund Sahib is a once-in-a-lifetime opportunity. It requires a difficult ascent from Ghangaria. Hemkund Sahib is 6 kilometres away from Valley of Flowers. It will take roughly 6 to 7 hours to get from Valley of Flowers to Hemkund Sahib.

Hemkund Sahib is 4633 metres above sea level, and this beautiful hike concludes with the Sikh Gurudwara in Hemkund. This hike is made worthwhile by the appealing landscape of Hemkund Sahib and the lake.

Reflection of Nanda Devi Hills on Hemkund Sahib Lake

Reflection of Nanda Devi National Park Hills on Hemkund Sahib Lake

The Hemkund Sahib lake is a stunning high-altitude lake this is commonly referred to as Hemkund, which literally translates as “Snow Lake.” This spectacular location is bordered by snow-capped peaks and nourished by gleaming glaciers.

A little stream named Himganga runs out of this lake from the glaciers of the HathiParvat and Saptshring peaks. The tourists are enthralled by the reflections of the enticing surroundings in this crystal-clear lake that is as frigid as snow.

Flower Valley

Valley of Flowers Short Trek

Breathtaking views in the Valley of Flowers

The valley of Himalayan flowers as explained above is the major attraction of this trek as it lives up to its name with an endless supply of blooms throughout the season. The Valley of Flowers’ unique environment is like a done deal: an exquisite valley bedecked with enormous spreads of flowers.

Amidst the rocky mountainous regions of Zanskar and the Great Himalayas are lovely meadows studded with indigenous highland wildflowers. Horticulturists, flower admirers, bird watchers, wildlife shooters, hikers, environment enthusiasts, and thrill-seekers from all over the globe are drawn to this valley’s pristine splendour.

Local Culture

Rishikesh is well-known as the World Yoga Capital. Several yoga-related festivals are held here on a regular basis. When it comes to the question of the well-being of our physical system through practising yoga, the first name that comes to mind is the International Yoga Festival which specializes in teaching the methods of asanas.

Every year, during January and February, Basant Panchami is observed. According to the Hindu calendar, this is the second final month of the year and is known as Magh (January-February). On this day, people honour the Goddess Saraswati and dress in yellow.

Uttarakhand celebrates Ganga Dusshera with great zeal. According to the Hindu calendar, this event begins on the tenth day of Jaishtha (May-June). The River Ganges is venerated for a span of 10 days during the Ganga Dusshera.

The festival of Holi is also widely celebrated, with a focus on joy, dancing, and colours. During the month of Phalgun, the celebration colours the city with gaiety and affection. These are some of the divine customs and traditions amongst many followed in Uttarakhand in the valley of flowers.

Valley of Flowers Short Trek Itinerary

Day 1: Haridwar to Joshimath

Distance Covered: 290 km
Time Taken: 10 Hours

On the first day, you arrive in Haridwar and travel 290 kilometres in 10 hours to reach Joshimath. The perfect road ride from Haridwar to Joshimath is a visual feast for the eyes and the spirit.

Day 2: Govindghat to Ghangaria

Distance Covered: 40KM Drive and 9 km Trek
Time Taken: 6 Hours

Board a cab to Govindghat, followed by a 4-kilometre journey to Pulna. Pulna is the location in this region which is accessible by transport. Govindghat, located 22 kilometres from Joshimath and at a height of 5,500 feet, is a popular Sikh pilgrimage site.

It’s the closest town to Hemkund Lake. You will then have to climb 9 kilometres from Pulna to Ghangaria which is this trek’s base camp.

Day 3: Ghangaria to Hemkund Sahib and Hemkund Lake and Back Again

Distance Covered: 10 km
Time Taken: 7 Hours

The Hemkund Sahib Gurudwara and Hemkundlakefrom here is a 10-kilometer journey known as the Hemkund Sahib Yatra. At an elevation of 14,200 feet, you will find the the Hemkund Sahib Gurudwara, the most awaited part of the Valley of Flowers trek and the world’s tallest Gurudwara.

The last 5 kilometres of the journey from Ghangaria to Hemkund Sahib particularly is very tough.   Hemkund Sahib does not permit overnight accommodation. It is recommended that you depart Hemkund Sahib by 2 p.m. in order to return to Ghangaria before dark.

Day 4: Ghangaria to Valley of Flowers and Back

Distance Covered: 5 km
Time Taken: 4 Hours

You get up early in order to spend as much time as possible in the gorgeous Valley of Flowers. The 5-kilometre hike is not particularly strenuous and follows a nearly level path throughout. It will take you to the most vibrant valley, which is adorned with beautiful himalayan flowers of all colours.

This magnificent scene, complete with snow-capped peaks, fluffy clouds overhead, and a flowing creek cutting across the valley, is reminiscent of a painting. Spend considerable time in this natural wonderland before returning to Ghangaria for the night.

Day 5: Trekking Back From Ghangaria to Govindghat and Driving Back to Joshimath

On Day 5, it is time to return to Govindghat through a 14-kilometre hike. Reaching Govindghat, you can spend the night in Joshimath accommodating yourself in a local guest house.

Day 6: Drive Back From Joshimath to Haridwar

Head back to Haridwar via Uttarakhand’s bewitching topography, inhaling the lovely sights and reminiscing over your six-day trip in the wild Himalayan foothills.