Embarking on a backpacking adventure is an exhilarating experience, but it doesn’t mean sacrificing style for practicality. Navigating the trails and embracing the great outdoors doesn’t have to come at the expense of looking cute and put together. Whether you’re a seasoned backpacker or a novice explorer, there are savvy ways to ensure you maintain your sense of style amidst the wilderness.

From choosing versatile and comfortable clothing options to streamlining your beauty routine, this guide will provide you with practical tips on how to stay stylish and look put-together while backpacking, allowing you to embrace the rugged charm of nature without compromising on your personal aesthetic.

So, gear up for an Instagram-worthy journey as we explore the perfect balance between functionality and fashion in the heart of the great outdoors.

Packing a Cute Backpacking Wardrobe

1.    Choose Versatile Neutrals

Stick to versatile neutral pieces in black, gray, olive, and tan shades. Neutral colors pair together easily so you can mix and match for multiple outfits. They also hide dirt and wear better than bright hues. Focus on neutrals to get the most mileage from fewer pieces.

2.    Layer Light, Quick-Dry Fabrics

Lightweight, quick-drying technical fabrics are perfect for backpacking. Look for moisture-wicking synthetics, wool, and linen. Avoid bulky materials like denim that take forever to dry. Light layers allow endless outfit combinations.

3.    Include One Statement Piece

While neutral layers are key, don’t forget to pack one fun statement accessory or top. This could be a colorful scarf, funky hat, or printed tank. One eye-catching piece pairs with your neutrals to instantly turn an outfit from drab to fab.

4.    Pack Multi-Functional Clothing

Choose pieces that serve multiple purposes, like convertible pants, 2-in-1 jackets, and quick-dry dresses you can layer. Multi-functional clothing maximizes your options from just a few essential items. Look for strategic straps, zip-offs, and reversible options.

5.    Accessorize Smartly

Accessories take up little pack space but provide endless styling potential. Scarves add color, hats protect from the sun, and statement sunglasses complete any outfit. Jewelry like layered necklaces, bracelets and dangly earrings make you look put together, even on the trail.

Keeping up with Your Appearance on the Trail

1.    Refresh Hair with Dry Shampoo

Pack some dry shampoo to absorb oil and add volume when you can’t wash your hair. Focus on the roots and massage it in with your fingers. Let it sit a few minutes before brushing out. Dry shampoo makes dirty hair look and feel freshly washed.

2.    Add Bounce with Curl-Enhancing Shampoo

When you can shower, use a sulfate-free, curl-enhancing shampoo and conditioner. The gentle cleansers won’t dry out your hair while boosting natural waves and movement. Scrunch in some curl cream or mousse while hair is damp. Air dry for spirited, bouncy locks.

3.    Braid Damp Hair

Braids disguise greasy roots while adding a cute, feminine vibe. Braid your hair while slightly damp and allow it to dry undisturbed overnight. For extra polish, sweep up front pieces and do a loose braid across the crown of your head.

4.    Use Dry Shampoo on Oily Scalp

If your scalp gets oily, massage in some dry shampoo right at the roots. Leave it on for 5 minutes to fully absorb grease, then brush it out. This mattifies and freshens up dirty hair at the scalp so you can go longer between washes.

5.    Pack Hair Accessories

Cute hair accessories like bandanas, silk scrunchies, clips and headbands transform the simplest braids and ponytails. Wrap a bright bandana over a ponytail for a pop of color. Pin back front sections with bobby pins for a chic half updo. Accessories glam up dirty hair.

With the right strategies, you can look just a chic backpacking as you do at home. Cute outfits, styled hair and natural makeup let your beauty shine through, even on the most rugged trails.

The key is packing smartly, opting for feminine yet functional pieces. With some creativity, you can use a minimal wardrobe to create varied looks. A little dry shampoo, makeup and accessories go a long way in pulling you together after dusty days hiking.

Have fun planning your cute backpacking ensembles! Wherever your travels take you, rest assured you can make a stylish impression.


Whether you’re just getting started with your backpacking hobby or have already explored the great backpacking routes of the world, you may have realized that something is lacking in the world of packaged backpacking food. Either they’re too expensive, too bland, or too artificial. The good news is that making homemade dehydrated backpacking meals is not as complicated as it seems! There are plenty of easy DIY dehydrated meal recipes that can easily be done at home.

There are generally 2 approaches to assembling a DIY dehydrated meal. The first option is to simply cook the full meal at home, dehydrate it and then rehydrate it on the trail. The other option is to assemble a meal made from individual dehydrated or freeze-dried ingredients.

Both methods have their pros and cons, so we usually bring a combination of meal types on the trail with us. Read on for tips and tricks on how to make your own DIY backpacking meals

Method #1: Dehydrate a Home-Cooked Recipe

Dehydrating a dish that you can make at home is generally the most fool-proof and inexpensive way to go. It doesn’t require you to buy individually dehydrated or freeze-dried ingredients, it just requires your own kitchen equipment plus a good food dehydrator.

With this method, you can control the taste of the recipe before your trip, so you won’t be unpleasantly surprised when you’re ravenous on the trail.
Dehydrating Your own Home-Cooked Meals

Dehydrating Your own Home-Cooked Food for Backpacking

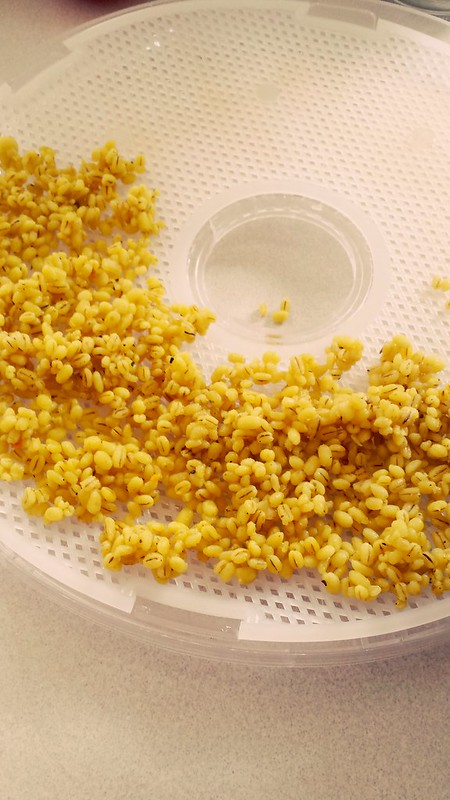
The simplest way to get started with dehydrating your own backpacking meals is to brainstorm a few of your favorite dishes that you can fully cook at home. The best DIY dehydrated meals will be sauce-based and full of hearty ingredients. Stews, pasta, and casseroles work best for this method.

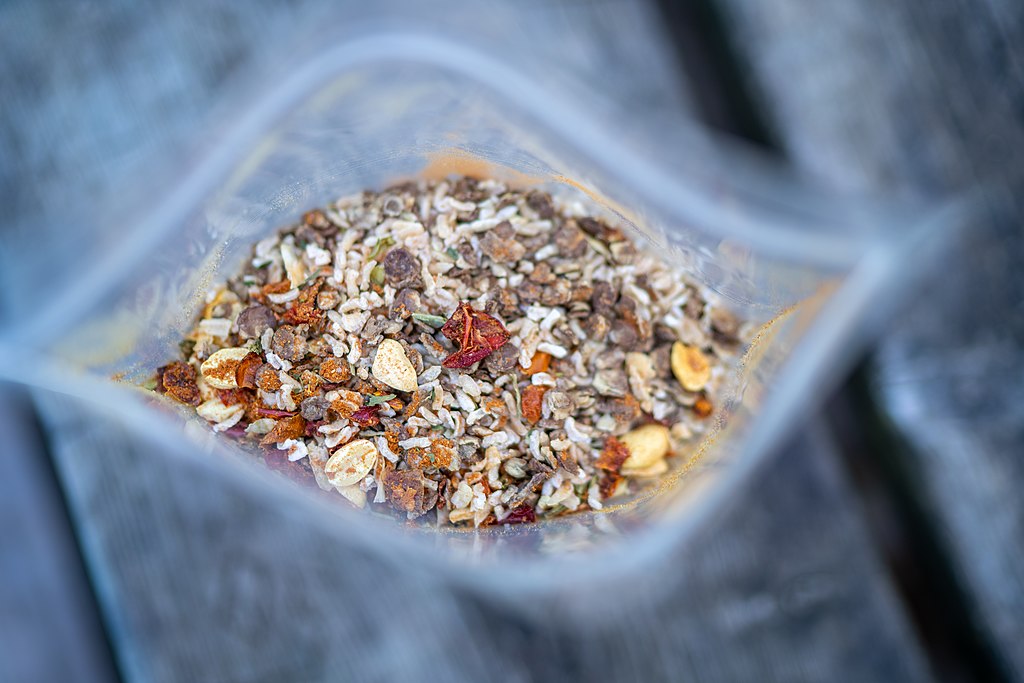
After cooking the meal, you will dehydrate the mixture using a food dehydrator. Once the mixture is fully dehydrated, you will crumble it into uniformly-small pieces, and pack it in a ziplock bag for the trail.

To rehydrate on the trail, all you need is a lightweight camping stove, water, and a cooking vessel!

Cooking your own food at home is the easiest method in terms of simplicity, but it’s by far a more time-consuming option. Not only do you have to cook everything at home first, but dehydrating the final mixture at home can take up to half a day per portion. 

For a week-long trip, you might need to start weeks before you embark on your trip, depending on how many meals you plan to bring with you. If you have the time, we say go for it! 

Pro-Tips for Preparing and Dehydrating Full Meals at Home

The good news for those interested in DIY dehydrated backpacking meals, is that it’s really not rocket science. However, there are a few adjustments you should follow to make sure the DIY dehydrated meal will dehydrate and rehydrate properly.

  1. Don’t use butter or oil when cooking! Doing so will cause problems during the dehydration process. Cook with a little bit of water in the pan only. If you want to add some fat to the recipe, you can bring olive oil packets or powdered butter and add it later to the recipe on the trail when you rehydrate the meal.
  2. Use plenty of seasoning. Dehydration will reduce the flavor, so add more seasoning than you normally would, to give the food a robust flavor on the trail.
  3. If the recipe includes ground meat, combine it first with plenty of breadcrumbs and seasoning before adding it to the overall recipe. This will help with the rehydration and help prevent the dreaded crunchy or grainy rehydrated meat. 
  4. If the recipe includes noodles, chop them into small pieces once they’re cooked. This will help them dehydrate and rehydrate uniformly.
  5. Let your finished recipe sit overnight in the fridge before dehydrating it. This will give it time to let the flavors combine, and will allow ingredients like pasta or rice to absorb the sauce and flavors.

At-Home Equipment for DIY Dehydrated Backpacking Meals: A Food Dehydrator

The only extra equipment you’ll need for this method is a food dehydrator. There are plenty of low-cost dehydrators available on amazon which will certainly do the trick.

If you’re going on a longer trip or know that you’ll be using the food dehydrator many times in the future, you might want to invest in a larger, more high-quality machine. We have this food dehydrator from Cosori and consider it essential backpacker equipment.

Method #2: Assembling Meals using Dehydrated or Freeze-Dried Ingredients
DIY Backpacking Meals

DIY dehydrated backpacking meals

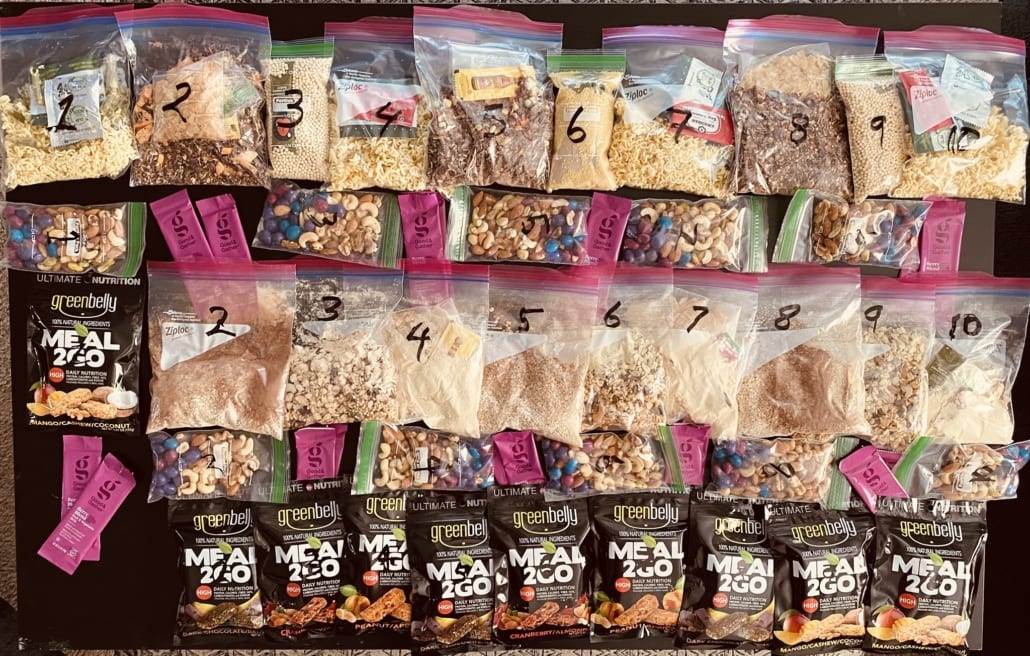
With this method, you will combine various dehydrated or freeze-dried ingredients, and rehydrate them together on the trail to make a complete meal. If you have a variety of freeze-dried or dehydrated ingredients on hand, the combinations are endless!

You can still go the full DIY route by dehydrating individual ingredients using a food dehydrator, or you can purchase the dehydrated ingredients in most grocery stores and camping supply stores.

If you plan to make a variety of backpacking meals, you can even purchase sampler kits full of dehydrated ingredients. This food sampler from Harmony House includes a variety of beans, dehydrated veggies, and meatless options for vegetarian meals.

Another option is this freeze-dried fruit and veggie kit that comes with freeze-dried strawberries, bananas, peas, broccoli, and corn. There are 120 servings in the kit, and you just need to add water to rehydrate. 

At-Home Equipment for DIY Dehydrated Backpacking Meals

1. Food Dehydrator

Most of the dry ingredients required for these dehydrated meals can be found at camping supply stores. However, specialized dehydrated ingredients can be pricey, so you might want to dehydrate the ingredients yourself.

Investing in a low-cost dehydrator will help you save money in the long run and will allow you to get creative with your ingredients and DIY dehydrated backpacking meals. This food dehydrator comes highly recommended by fellow backpackers and can be found on Amazon for around $50.

Or if you know you’ll be relying on dehydrated backpacking food and want to get a more robust machine, this food dehydrator from Cosori comes highly recommended.

2. Freeze-Dried or dehydrated ingredient sampler pack

To get started with a variety of meal options, you can start with this food sampler from Harmony House.  It comes with a variety of beans, dehydrated veggies, and meatless options for vegetarian meals.

For freeze-dried ingredients, start with this freeze-dried fruit and veggie kit. There are 120 servings in the kit, so you’re bound to be able to come up with some exciting backpacking recipes.

Dehydrated or Freeze-Dried Ingredients

The staple of DIY backpacking food is a good sampling of freeze-dried and dehydrated ingredients. There are pros and cons to both ingredients. In a nutshell, freeze-dried wins over dehydrated in terms of nutrition, shelf-life, and texture, but it comes at a high cost! If you’re interested, you can learn more in our write-up about the difference between dehydrated vs. freeze-dried ingredients.

After you assemble a good collection of ingredients, you can basically throw things together as you would when cooking your typical dinner at home! Here are some staple ingredients to get you started:

Freeze-Dried or Dehydrated Meat & Meat Alternatives

Dehydrated Beans

Make sure you buy beans that have been cooked and then dehydrated or freeze-dried! If you just buy plain dried beans, they will not have been cooked, and will not hydrate properly in a meal.

Grains

  • Dry couscous (you can use normal dried couscous in recipes that you plan to rehydrate for at least 10 minutes)
  • Dehydrated rice (Knorr Minute Rice sides are a staple for all backpackers)

Dehydrated and freeze-dried vegetables

Add Flavor

For creating a variety of flavors, there are a few versatile ingredients that will come in handy for your DIY backpacking food

DIY Dehydrated Backpacking Meal Recipes

Luckily there are gourmet-loving backpackers out there who have come up with lots of delicious options. When preparing the mixture, it’s best if you stick to either dehydrated or freeze-dried components within one recipe. It is technically possible to mix and match, but then you’ll have keep an eye on the rehydration time for each ingredient.

As a general rule of thumb, freeze-dried ingredients take around 5 minutes to rehydrate, while dehydrated ingredients can take between 10-20 minutes.

Chili con Carne

Curry with different types of meat

  • Freeze-dried or dehydrated meat of choice (see above)
  • Freeze-dried or dehydrated veggies of choice (see above)
  • Knorr’s minute rice
  • Curry, Coriander, and Cumin powder

Chicken Fajitas

Thanksgiving-inspired Meal

Pad Thai

How to Cook your DIY Dehydrated Backpacking Meals on the Trail
How to cook DIY Backpacking Meals on the Trail

How to cook DIY Dehydrated Backpacking Meals on the Trail

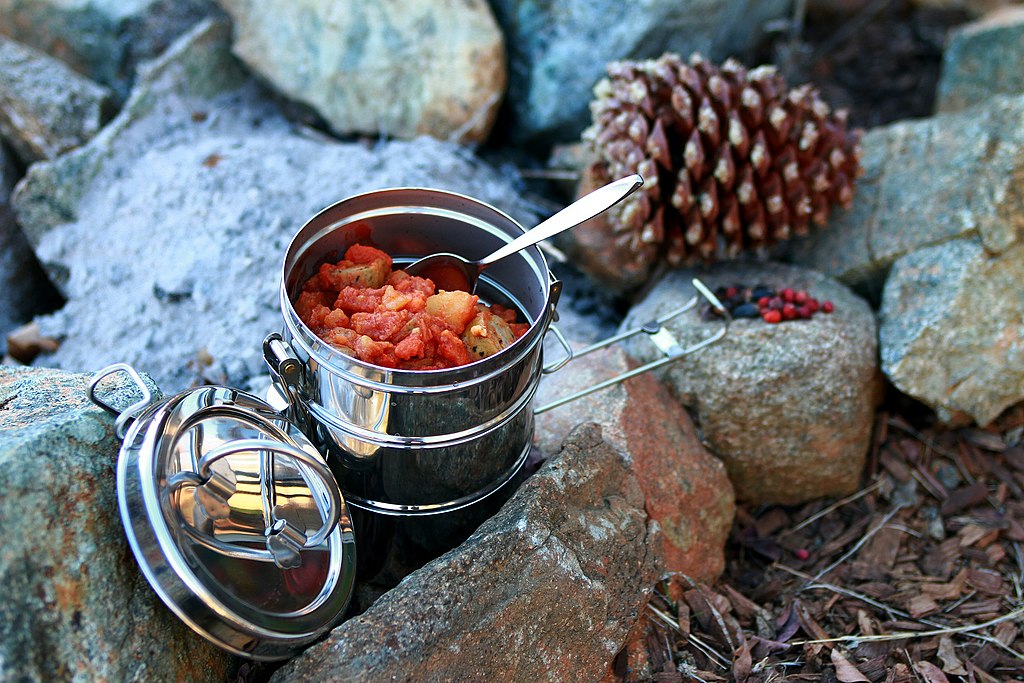
Regardless of which method you chose, the cooking process is generally the same. Since these are all ‘just add water’ dehydrated backpacking meals, the only cooking equipment you really need is a device to boil water and a cooking vessel. 

Lightweight Camping Stove

The most popular camping stove among backpackers is the Jetboil Stove. We don’t go backpacking without it. It’s lightweight, compact, and simple. It comes with a simple burner and a vessel for preparing boiling water.

Another option is this lightweight backpacking stove is under $20 and is popular among the Ultralight Backpacker community. It’s compact and weighs just .96 ounces (25 grams), but don’t forget to factor in the weight of fuel and a cooking vessel.

A Cooking Vessel

Rehydrating is a lot different from cooking on the trail. Theoretically, you could rehydrate your meals over a campfire in a camping pot, but as rehydration can take up to 20 minutes, this would use a lot of fuel. It’s much more energy efficient to boil the water, add it to your mixture, and then let the mixture soak and rehydrate.

Once you’ve boiled your water, combine it with the dehydrated meal in a heat-tolerant cooking vessel. The vessel should be sealable in order to retain as much heat as possible during the rehydration process. There are a few different cooking vessel option, each with their own pros and cons, so you’ll have to decide based on your preference.

  1. Mylar bags – Heat-tolerant Mylar bags are a great lightweight option. You can use them to transport each meal, and then just add boiling water directly to the ingredients when on the trail. These bags can tolerate boiling water, are resealable, washable, and reusable. Since rehydration usually takes at least 20 minutes, the Mylar bags are great at retaining the heat during this time.
    • Pros: affordable, convenient, and good for ultralight backpacking
    • Cons: Plastic, difficult to wash and reuse
  2. Resealable silicone bags – These are reusable, easy to clean, and durable enough to last multiple backpacking trips. When using the silicone bags to transport the dry food, be sure to add oxygen-absorbing moisture packets to keep the dry ingredients stable.
    • Pros: Reusable, sustainable option
    • Cons: Expensive, not the most lightweight option
  3. Freezer bagsThis is the extreme ultralight backpacker’s method. You can transport the dry mixtures in freezer bags and just add boiling water directly to the freezer bags. If you go the freezer bag route, it’s important that you wrap it in an insulating bag to retain heat during rehydration. Some people even make a DIY coozie out of a car windshield shield!
    • Pros: Cheap and easy to find in the grocery store, ultralight
    • Cons: Not as sturdy, difficult to eat out of. Plus, conflicting opinions about how safe it is to heat plastic for food consumption
  4. Stainless steel camping pot with lid
    • Pros: Environmentally friendly option, healthier than cooking in Ziplock bags, gives the feeling of really cooking on the trail
    • Cons: Added weight

The cook time will vary depending on the type of ingredient. The general rule of thumb is that freeze-dried meals take around 5 minutes to rehydrate, while dehydrated meals will take 10-20 minutes.

Trying to reduce the weight of your pack and wondering if you can ditch the cooking equipment? As any seasoned backpacker will tell you, every ounce counts! Although some people love the ritual of cooking a meal at the end of the day, our recipes guarantee you won’t miss out on any comfort when backpacking without a stove. The secret is using the cold soak method to rehydrate dry ingredients. Here’s a list of stoveless backpacking meals that will help you feel as if you’re ‘cooking’ on the trail – without the added weight of extra cooking gear.

DIY Backpacking Meals Using the Cold Soak Method

Cold soaking is the process of rehydrating food using nothing but, you guessed it, cold water. The critical difference is that the rehydration process takes more time without heat. So before you start each day, you’ll learn to mix the dry ingredients for your lunch or dinner with cold water and carry it in a container so that it’s ready to go by mealtime.

An ultralight backpacking pro-tip is to prepare the dry ingredients for each cold soak recipe in individual plastic bags before you start your trip. Because there is no risk of the boiling water warping the lightweight bags, you can cold soak your DIY backpacking meals directly in each pre-measured bag. This saves time on the trail and reduces the weight of extra food packaging.

Cold Soak Food Prep when backpacking without a stove

Photo by Dave W. from Facebook

Cold Soak Staple Ingredients

The following ingredients serve as the building blocks of all cold-soak backpacking meals. You can follow our recipes when you’re first getting started, but over time you’ll likely come up with some specialties of your own. You can find most of these ingredients in grocery stores or camping supply shops, but we’ve linked to more specialized ingredients that can be found on Amazon.

Cold Soak Breakfast Recipes

A standard cold soak breakfast starts with oatmeal or muesli. These nutrient-dense staples are a part of every hiker’s menu because they provide sustained energy. And there’s something so comforting about starting your day with a nice bowl of oatmeal porridge! Mix everything the night before so that it’s ready to go by breakfast.

Mix and Match Oatmeal

  • ¼ cup rolled oats
  • 1 TBS powdered milk
  • ⅓ cup dried fruit
  • Add cereal or granola after cold soaking

Overnight Oats

  • ¼ cup steel oats
  • 14 banana chips
  • ⅓ cup dried cranberries or raisins
  • 3 tsp cacao nibs
  • 1 scoop powdered soy milk

Muesli Coconut Power Breakfast

  • ¼ cup nut/seed muesli
  • ⅓ cup dried fruit
  • 1 TBS shredded coconut
  • 1 tsp coconut milk powder
  • 1 scoop protein powder

Cold Soak Couscous Recipes

Pearl couscous is a staple ingredient for cold soak backpacking meals because it rehydrates easily, even with cold water. The combinations are endless with couscous, so feel free to get creative! It’s a great base for a vegetarian meal, or you can throw in some dehydrated meat. Here are a few cold soak couscous recipes to get you started:

Salmon and Couscous

Vegan Curry Couscous

Instant Potato DIY Backpacking Meals

Some would argue that instant mashed potatoes are almost indistinguishable from the real thing! Mashed potatoes are a traditional comfort food and can be mixed with a variety of ingredients. We found this recipe for Thanksgiving Dinner in a Cup a few years ago, and it’s one of the meals we look forward to on the trail. It’s crave-worthy!

Thanksgiving Dinner in a Cup

Creamy Mashed Potatoes

  • Instant mashed potatoes
  • Add mayonnaise for max calories and creaminess
  • Garlic powder to taste
  • S&P to taste
  • Optional: shredded Parmesan cheese or nutritional yeast

Ramen Noodle Cold Soak Recipes

Ramen noodles: the staple of college students and seasoned backpackers. The noodles rehydrate easily and make the perfect foundation for a filling meal at the end of a long day. Over the years, the backpacking community has created some delicious cold soak meals which elevate basic ramen noodles to the next level.

Ramen Noodle Pad Thai

Pesto Noodles

  • Ramen noodles without seasoning packet
  • .8 oz sun-dried tomatoes
  • 1 olive oil packet
  • .1 oz garlic powder
  • lots of dried basil
  • .1 oz Parmesan cheese

Noodles & Peanut Sauce

Cold Soak Recipes with Dehydrated Beans or Lentils

A great source of protein, dehydrated beans and lentils make an ideal base for stoveless backpacking meals. And you can add lots of spices to beans, which means that your DIY backpacking meals will be anything but bland. Make sure you are buying dehydrated beans or lentils that have been precooked, not just raw dry beans or lentils. 

Taco Casserole

Vegan Curry Lentils

Instant Rice Stoveless Backpacking Meals

Instant rice is another great base for delicious meals without a stove. Again, the possibilities are endless, but here are some classic cold soak recipes from the backpacking community:

Cheesy Broccoli Rice

Frito Pie

  • 2 oz instant refried beans
  • 1.5 oz minute rice
  • .2 oz taco seasoning
  • 1 oz Fritos
  • 1 oz extra sharp cheddar

Rice Curry

Using Grits for Stoveless Backpacking Meals

Grits belong on any meal plan for backpacking without a stove. They can be used in a breakfast mix or as the foundation in this creamy polenta recipe:

Polenta & Peppers

  • 2.5 oz grits
  • 0.75 oz dehydrated peppers
  • 0.5 oz tomato powder
  • 0.1 oz garlic powder
  • 1-2 olive oil packets

Tortilla Wraps – Ideal for a Backpacking Lunch

Super versatile, nutrient-dense, and lightweight, a pack of tortillas is a great base for many types of DIY backpacking meals.

Veggie and Hummus Tortilla

  • You can use raw veggies and real hummus, or you can cold-soak dehydrated veggies and hummus powder.

Tortilla with sliced meat and cheese

  • Feel free to use sliced meat and cheese, or you can cold soak dehydrated meat for an ultralight backpacking meal

Tortilla with peanut butter, banana, dried fruit, cinnamon

  • To keep it lightweight, bring dried fruit, banana chips, and powdered peanut butter that you can cold soak during the day.

High-Nutrition Snacks for Stoveless Backpackers

Having lots of options for a snack on the go will keep you satiated so that stopping to eat isn’t a big demand on your time.

  • Dried fruit that has been cold soaked – having juicy pineapple on the trail is so refreshing
  • Nuts
  • Bars
  • Dried fruits
  • Chips
  • Chocolate
  • Beef jerky
  • Powdered hummus

Pre-Trip Prep: Cold Soak Essential Gear

While backpacking without a stove will reduce the gear that you carry on your back, there is some important gear that will come in handy during the planning phase of your trip.

Sample Pack of Dehydrated Veggies

If you’re interested in making DIY backpacking meals and prefer to experiment with a variety of dehydrated ingredients, a great starting point is to get a sampler kit with various ingredients. You can mix and match ingredients to create your own meals, or just add a scoop of healthy veggies to a pre-made freeze-dried meal. This food sampler from Harmony House includes a variety of beans, dehydrated veggies, and meatless options for vegetarian meals. The pack comes with easy-to-follow recipes and allows you to incorporate a variety of different ingredients in your backpacking menu.

Another option is this freeze-dried fruit and veggie kit that comes with freeze-dried strawberries, bananas, peas, broccoli, and corn. There are 120 servings in the kit, and you just need to add water to rehydrate. 

Food Dehydrator

Most of the dry ingredients required for these cold soak meals can be found at camping supply stores. However, specialized dehydrated ingredients can be pricey. Investing in a low-cost dehydrator will help you save money in the long run and will allow you to get creative with your ingredients and DIY backpacking meals. This food dehydrator comes highly recommended by fellow backpackers and can be found on Amazon for around $50. Or if you know you’ll be relying on dehydrated backpacking meals and want to get a more robust machine, this food dehydrator from Cosori comes highly recommended.

Low-Cost Dehydrator – Available on Amazon

Premium Food Dehydrator – Available on Amazon

Digital Scale

Anyone focused on ultralight backpacking is obsessive about the weight of everything in their pack. This also applies to every ingredient in their food supply, which is why recipes for most DIY backpacking meals give measurements in ounces. Instead of doing all the work to convert ounces to standard kitchen measuring volumes, do yourself a favor and invest in a cheap digital kitchen scale. We have this scale which is under $15.

Available on Amazon

Not ready to give up the heat?

For some, cooking on the trail is part of the joy of backpacking. The recipes above are all possible to make with hot water – if you have a lightweight stove with you, you can just heat the water and mix once you’ve set up camp for the night. 

This lightweight backpacking stove is under $20 and is popular among the Ultralight Backpacker community. It’s compact and weighs just .96 ounces (25 grams), but don’t forget to factor in the weight of fuel and a cooking vessel.

Available on Amazon


Do you have any tried and true backpacking meals? Add them in the comments! And be sure to check out our other blog posts for more gear recommendations.

Are you planning your first European backpacking travel adventure? Packing for a trip can be exciting but stressful, especially if you don’t know what to bring. Whether you’re going for a week or for an entire summer, there are a few backpacking Europe essentials for your packing list. To help you get started, take a look at our backpacking Europe checklist, which will ensure you have everything you need for your trip. 

1. The Right Backpack

The right backpacking can make or break your trip. A backpack that’s too big can make traveling uncomfortable, while a backpack that’s too small won’t allow you to fit all your belongings in it. 

When backpacking Europe, you won’t want to bring a large, rolling suitcase. European cities were built before the age of elevators, which means that you’ll be walking lots of stairs. When navigating the metro, the old buildings, and the hotels, you’ll be happy to be able to take the stairs instead of lugging around an unwieldy backpack.

When it comes to essentials for your backpacking Europe packing list, it’s best to bring a carry-on sized backpack to avoid baggage fees on budget airlines. A carry-on sized backpack will also be small enough to keep nearby if you’re taking a bus or train tour in Europe.

Backpacking backpacks come in sizes based on the liter volume that they can carry. A 30-40 liter bag is comparable to a carry-on size suitcase, while a bag that’s 50-65 liters will be too big to take with you as a carry on.

Make sure you choose a bag that fits comfortably on your body. If you’re visiting a store, the employees will be more than happy to help you select a few bags that are suited to your body size. 

If you’re looking for the best backpack for backpacking Europe, the Osprey brand has some great all-rounder backpacks. Osprey is the go-to essential Europe backpacking option and fits most people comfortably. 

2. Day bag

When you’re taking a day trip or going on a hike, you won’t want to bring your huge backpack with you. Leave most of your items locked safely at your accommodation and take along a day bag. Your best bet would be to purchase a foldable daypack that can fit into your bigger backpack.

It will need to fit essentials such as money, a snack, water, and maybe a change of clothes, so it shouldn’t be too big or bulky.

3. Padlocks

Padlocks are a quick, convenient, and inexpensive way to secure your bags and hostel lockers. When assembling your backpacking Europe essentials for your packing list, a small item like this can be a lifesaver! You can also use your luggage lock on your backpack during travel days, ensuring all your belongings are safe, including your passport.

4. Universal travel adapter

Your Europe backpacking packing list should include a universal travel adapter, which will work for your phone charger or any other electronic devices. 

The outlets in continental Europe use the same 2-pronged plug, but if you’re traveling in the UK and Ireland, you’ll need a different 3-pronged system. Rather than taking multiple chargers with you, a multifunctional adapter will do. 

5. Camera

The best travel camera for backpacking europe

Your phone camera is sufficient for everyday life, but backpacking around the world is an incredible experience that you will never want to forget!

Your travel photos will prove invaluable once you return from your epic journey, so be sure to capture all the incredible things you encounter along the way. Bring a camera that not only takes great pictures but also fits easily into your backpack.

These days, the majority of cameras are equipped with Bluetooth or Wi-Fi capabilities, so they can be transmitted easily to your laptop or phone to post them online.

You may wish to bring a high-tech DSLR camera to take stunning photographs.

If you want to take your backpacking adventures to the next level, then consider bringing along a waterproof GoPro, which will accompany you everywhere from underwater adventures to skydiving during your European backpacking adventures.

6. Travel towel

Your essential backpacking Europe packing list should include a quick-drying travel towel, since you will be moving from hostel to hostel as you backpack between cities. My favorite travel towel is a Turkish towel which is quick to dry and easy to fit in your backpack. You can also use the towel as a privacy screen if you secure a bottom bunk in a hostel.

7. Power Bank

A power bank is one of the essentials on my backpacking Europe packing list, for multiple reasons. While traveling, you’ll be using your phone much more than normal – for navigation, taking photos, videos, or researching travel tips. On days like this, you’ll want to have a backup battery for your phone. 

I’ve also relied on my power bank during long travel journeys when I use my phone and want to make sure I have enough juice to find my way to the next destination.

8. Change purse

Reliance on physical money is surprisingly still pretty high throughout Europe. Plus, having lots of €1 and €2 Euro coins is a good idea if you want to leave behind tips or donate to street musicians that you’ll see on your trip. 

9. The right shoes

For your backpacking Europe packing list, don’t forget to throw in a pair of rubber sandals for the hostel showers. You should also bring a pair of comfortable but stylish walking shoes. Some nightlife spots will require a certain dress code, but you can get away with leather-style sneakers. And women can get away with stylish-looking flats that are secretly super comfortable.

10. Hostel survival kit

If you’ll be staying in hostels, don’t forget these 4 backpacking Europe essentials. We call it the hostel survival kit:

11. The Best Apps for Backpacking Europe

The Best Apps for Backpacking Europe

And lastly, before heading off for your European backpacking adventure, you should load up your phone with a few essential apps that will make backpacking Europe a breeze.

Apps to book transportation from place to place

Given the relatively compact size of Europe, you can travel between major cities by train or bus. There are a few useful apps for European transportation that can help make sure you find the best deal while sticking to your schedule.

  • Omio – compare trains, buses, and flight options in Europe and travel using mobile tickets
  • Trainline – a popular app in the UK to find train and bus tickets 
  • Flixbus – a long-distance bus company that is a favorite mode of travel for budget backpackers
  • Kiwi – a flight search comparison site that helps you find the lowest prices
  • Skyscanner – another classic flight search website that has powerful flexible search options
  • DiscoverCars – car rental search engine with direct booking to 500+ suppliers

Apps for Finding Accommodation in Europe

Apps to book discounted activities and Skip the Line tickets

Apps to stay in touch with friends and family back home

If you don’t want to change to an international mobile plan, you can use these apps over free public WiFi to stay in touch with people back home.

Backpacking is one of the most exciting ways to explore the world and meet new people. When you are backpacking, you enjoy an incredible amount of freedom because all of your belongings are literally strapped to your back.  You can change your travel plans at the drop of a hat and explore interesting locations that you saw while on your way to your next destination.

If you take a lightweight backpacking tent with you on your journey, the freedom you can enjoy is even greater.  Having a tent available means you can camp in the most spectacular locations that each area has to offer.  It also means that you will save a ton of money on accommodation costs — allowing you to make your trip even longer!

We’ve field tested some of the best budget backpacking tents, to make sure you’re getting quality item without breaking the bank. After all, you want a backpacking tent that will hold up for many adventures to come.

This guide will take a closer look at the best budget backpacking tents.  We’ll give you an idea of the kinds of features that are useful in backpacking tents and explain how to choose the best tent possible.

The 5 best budget backpacking tents

Let’s cut to the chase. We’ve done the research, you’re here for our findings.

There’s a lot that goes into choosing the right backpacking tent. To save you the hassle of comparing dozens of tents, here are 5 of the best budget backpacking tents that have the perfect combination of features, ease of use, and durability. 

Featherstone Outdoor UL Granite Backpacking 2-Person Tent Hyke & Byke Yosemite 1 and 2 Person Backpacking Tents ALPS Mountaineering Lynx 1-Person Tent Clostnature Lightweight 2-Person Backpacking Tent WolfWise 2 Person 3-4 Season Lightweight Backpacking Tent
Rating: 4.5/5 Rating: 4.4/5 Rating: 4.6/5 Rating: 4.6/5 Rating: 4.8/5
Floor Size: 84” x 51” x 43” (W x L x H) Floor Size: 88” x 110” x 45” (W x L x H) Floor Size: 32” x 90” x 36” (W x L x H) Floor Size: 87” x 59” x 46” (W x L x H) Floor Size: 82.7” x 55.1” x 43.3” (W x L x H)
Weight: 4lb Weight: 2.5 lb for 1-person, 3.2lb for 2-person Weight: 4lb 4 oz Weight: 5lb 8oz Weight: 4lb
Materials: 75-denier Ripstop Polyester Rainfly and 210-denier Ripstop Polyester Floor (3000mm PU) Materials: 63-denier Ripstop Polyester Rainfly (2000mm PU) and Floor (5000mm PU) Materials: Water resistant Polyester (2000mm PU) Materials: Ripstop Polyester Rainfly (5000mm PU) and Bathtub Floor (5000mm PU) Materials: 190 Thread Ripstop Polyester Rainfly (2000mm PU) and 150 Denier Floor (3000mm PU)
Design: Freestanding Design: Freestanding Design: Freestanding Design: Freestanding Design: Freestanding
Cost: $$ Cost: $$ Cost: $$ Cost: $ Cost: $

Featherstone Outdoor UL Granite Backpacking 2 Person Budget Backpacking Tent
Featherstone Outdoor UL Granite Backpacking 2-Person Tent
Rating: 4.5/5
Floor Size: 84” x 51” x 43” (W x L x H)
Weight: 4lb
Materials: 75-denier Ripstop Polyester Rainfly and 210-denier Ripstop Polyester Floor (3000mm PU)
Design: Freestanding
Cost: $$
Hyke & Byke Yosemite 1 and 2 Person Backpacking Tents
Rating: 4.4/5
Floor Size: 88” x 110” x 45” (W x L x H)
Weight: 2.5 lb for 1-person, 3.2lb for 2-person
Materials: 63-denier Ripstop Polyester Rainfly (2000mm PU) and Floor (5000mm PU)
Design: Freestanding
Cost: $$
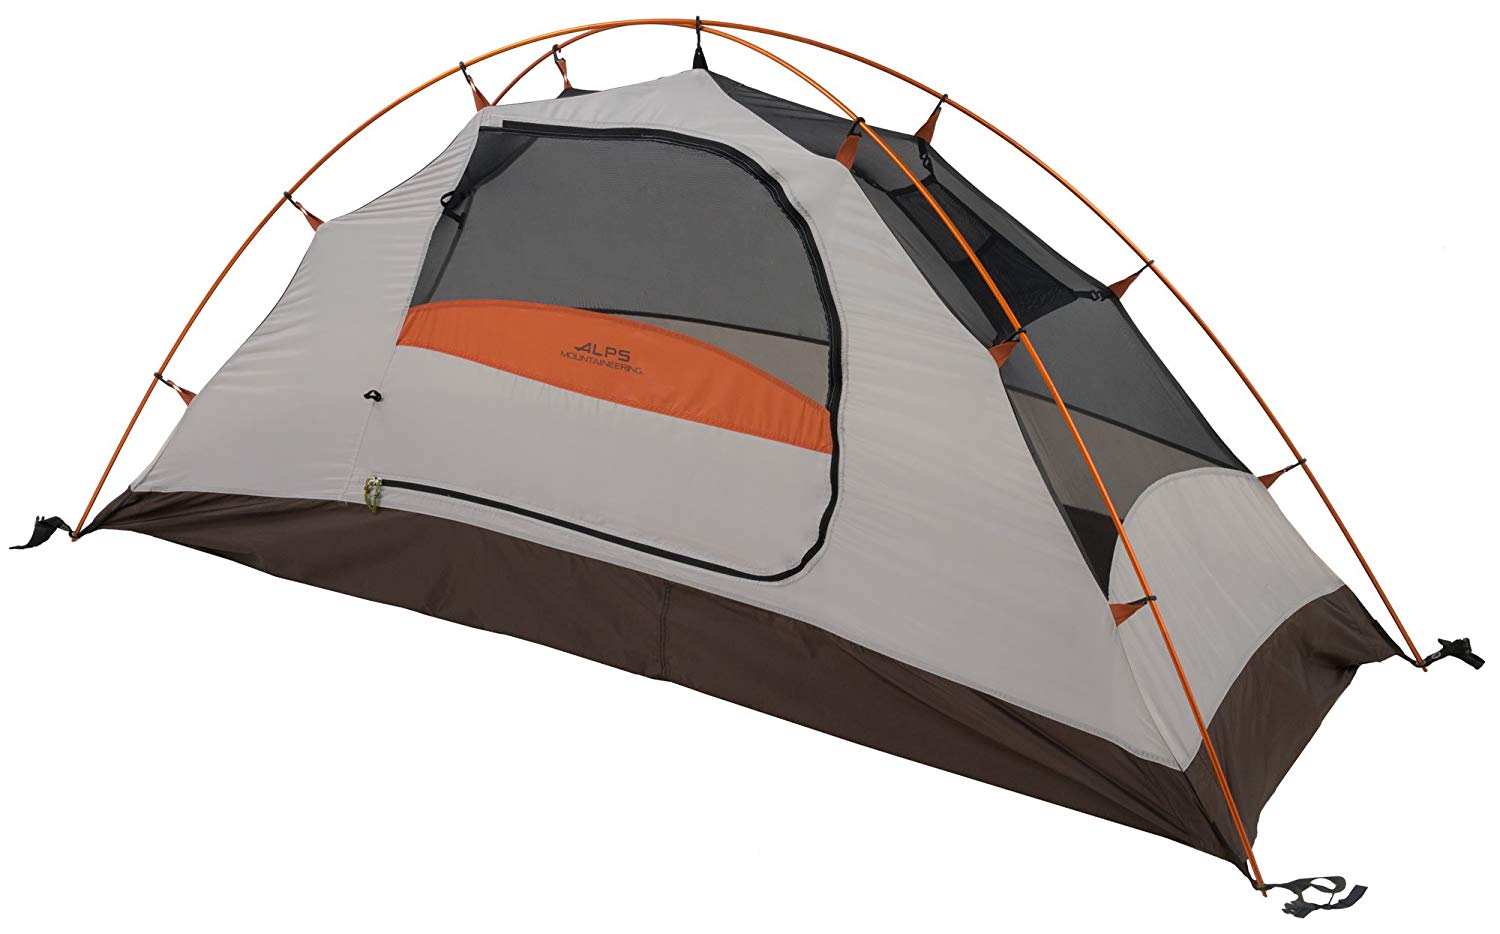
ALPS Mountaineering Lynx 1-Person Tent
Rating: 4.6/5
Floor Size: 32” x 90” x 36” (W x L x H)
Weight: 4lb 4 oz
Materials: Water resistant Polyester (2000mm PU)
Design: Freestanding
Cost: $$
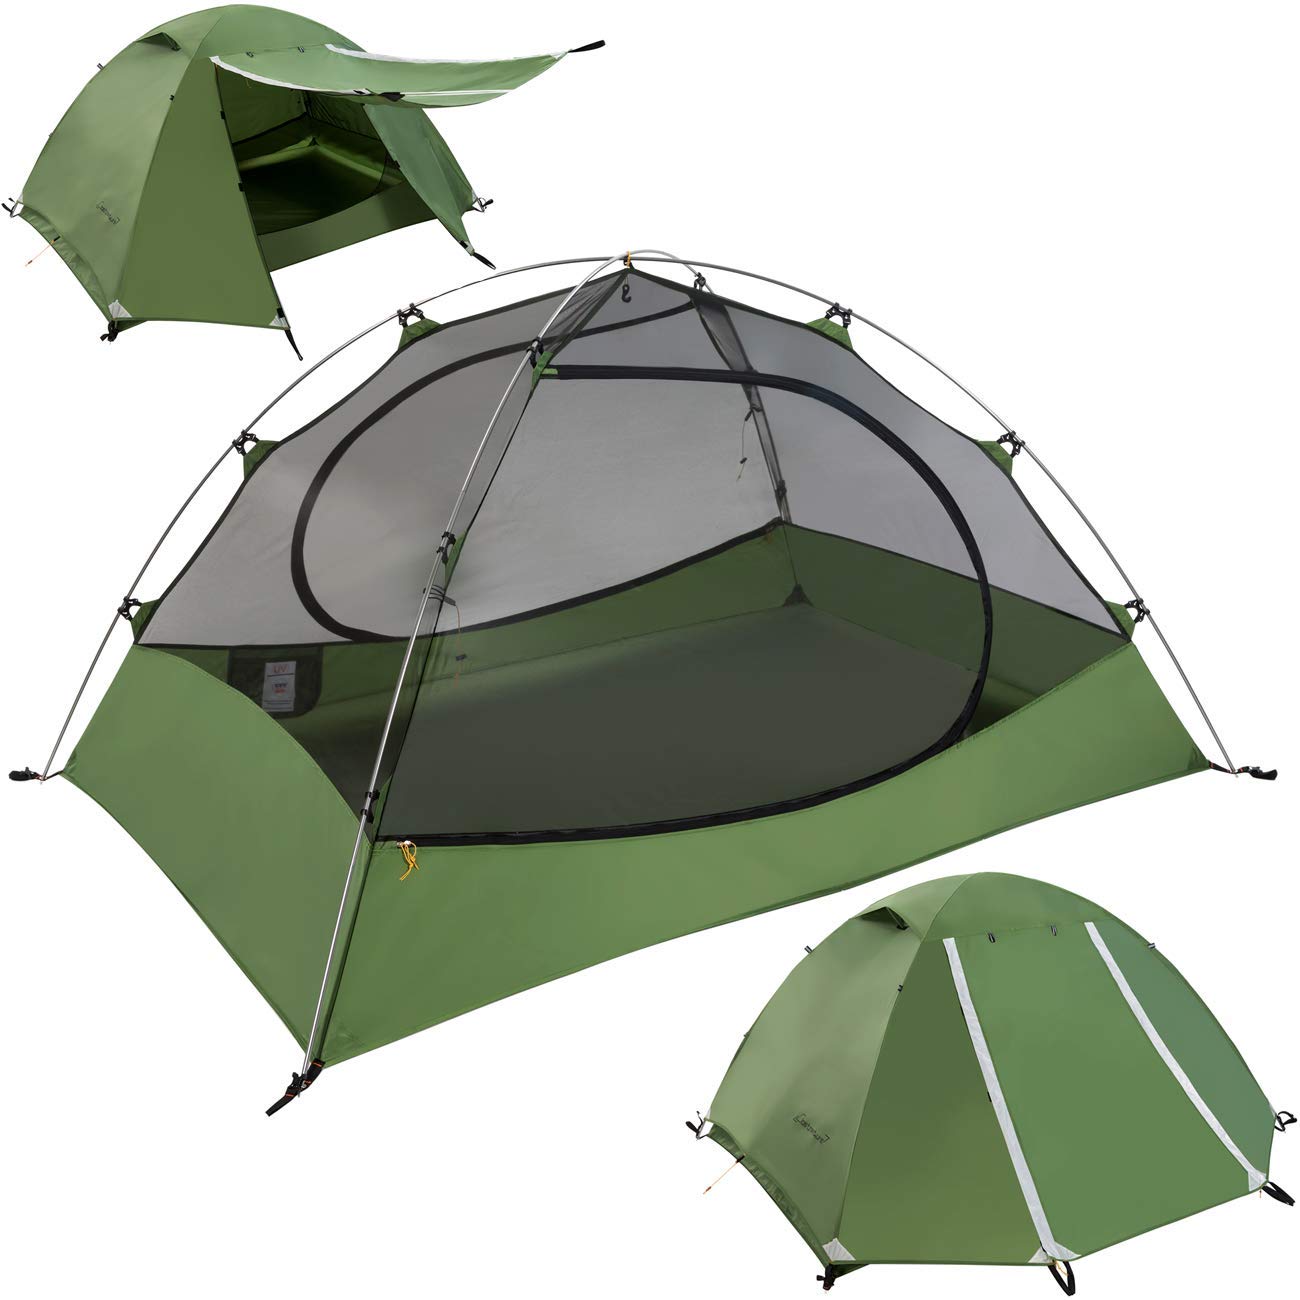
Clostnature Lightweight 2-Person Budget Backpacking Tent
Clostnature Lightweight 2-Person Backpacking Tent
Rating: 4.6/5
Floor Size: 87” x 59” x 46” (W x L x H)
Weight: 5lb 8oz
Materials: Ripstop Polyester Rainfly (5000mm PU) and Bathtub Floor (5000mm PU)
Design: Freestanding
Cost: $
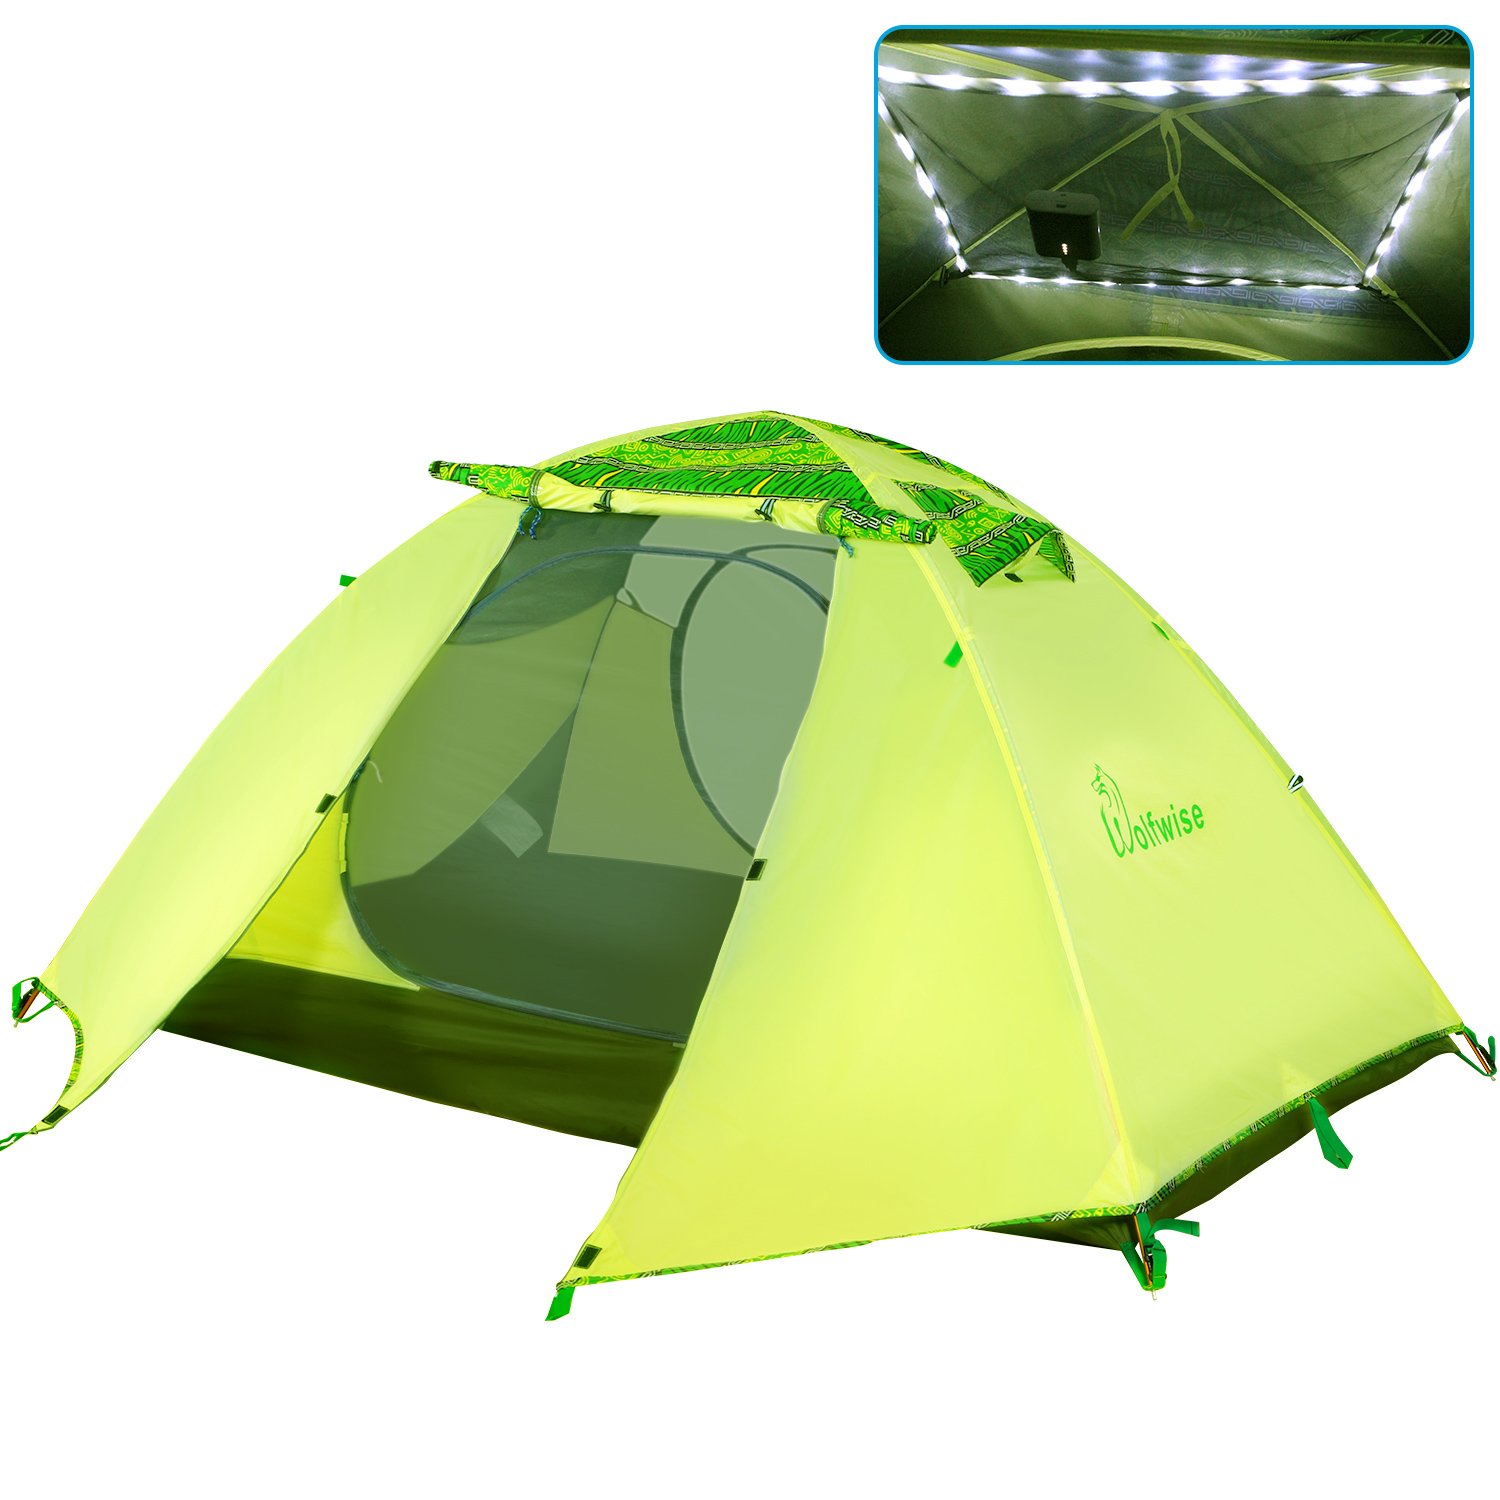
WolfWise 2 Person 3-4 Season Lightweight Backpacking Tent
Rating: 4.8/5
Floor Size: 82.7” x 55.1” x 43.3” (W x L x H)
Weight: 4lb
Materials: 190 Thread Ripstop Polyester Rainfly (2000mm PU) and 150 Denier Floor (3000mm PU)
Design: Freestanding
Cost: $

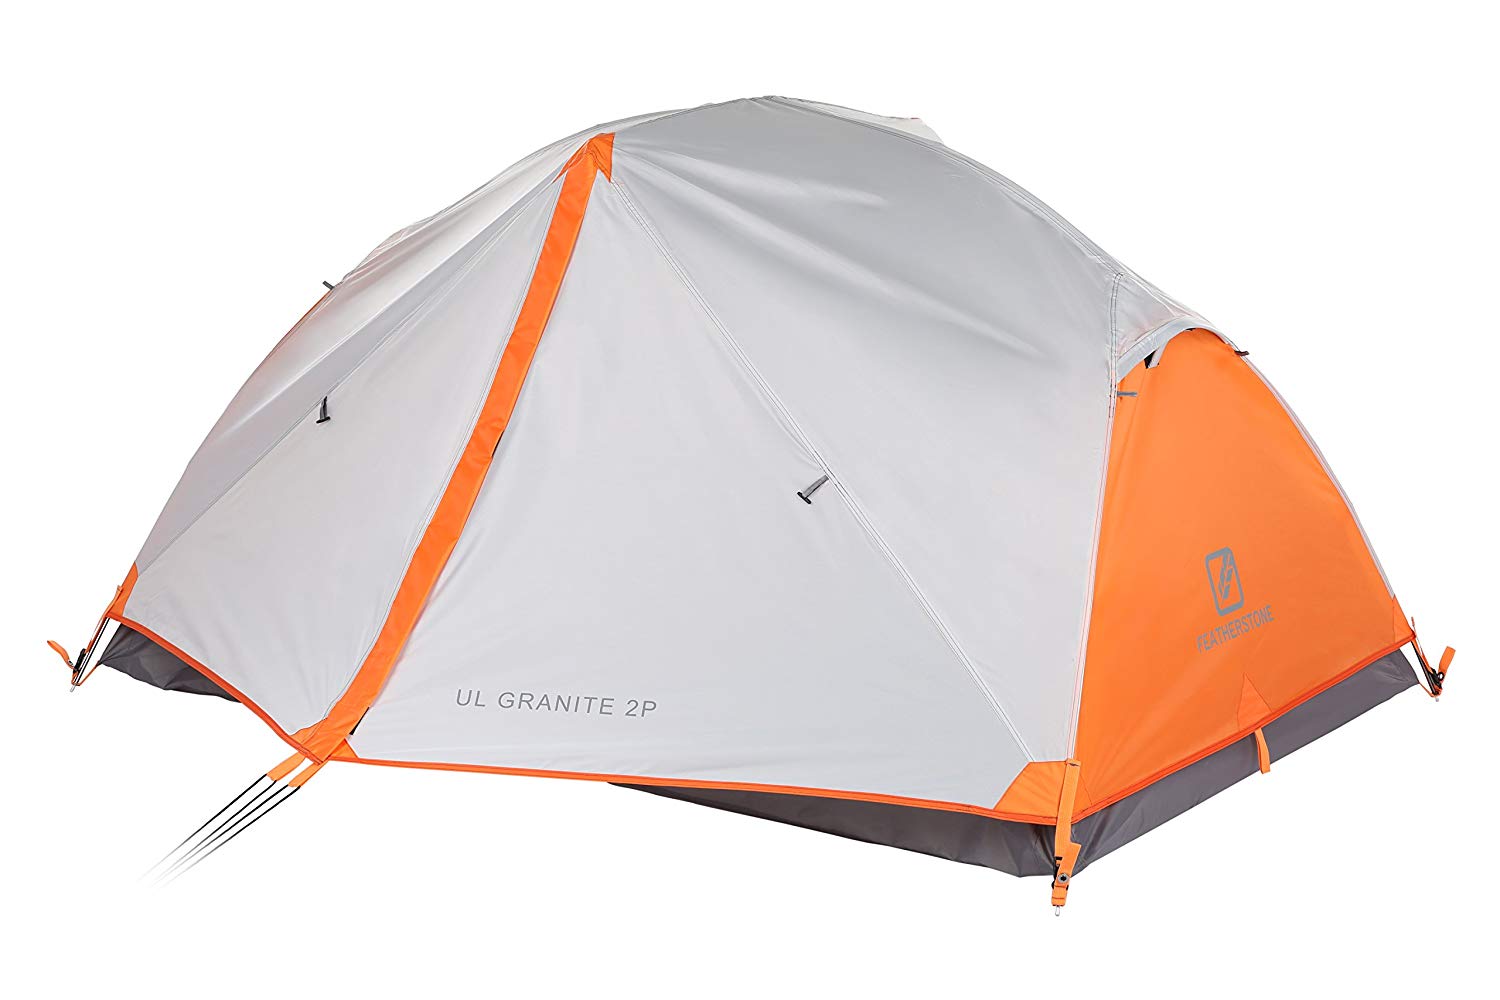
Featherstone Outdoor UL Granite Backpacking 2-Person Tent

This affordable backpacking tent from Featherstone strikes the perfect balance between weight and comfort.  It is a highly durable, breathable, and lightweight tent ideal for backpacking.

The Featherstone Outdoor UL is a spacious lightweight two-person tent measuring with a floor space of  84 x 51 inches.  It includes two doors and two vestibules for storing backpacks.  This product is a 3-season tent made from 75-denier Ripstop Polyester with a 3000mm polyurethane hydrostatic-rated coating.  The floor is made from thick 210-denier Nylon with the same hydrostatic coating.

One of the best features of this tent is how weatherproof it is.  The seam-taped construction forms an impenetrable barrier against moisture — critical when backpacking in the rainy season. The bathtub floor design also prevents water from the ground from leaking into the tent through the walls.

The Featherstone Outdoor UL is fairly easy to set up, with a single aluminum pole design.  It is a freestanding tent, so you can quickly pick it up and move it to another location when necessary.  The generous lifetime warranty, price, and features make this tent an excellent choice.

Pros:

  • Excellent weatherproofing
  • Spacious for two people
  • Lightweight tent
  • Packs into a small space

Cons:

  • Could have stronger zippers


Hyke & Byke Yosemite 1 and 2 Person Budget Backpacking Tent

Hyke & Byke Yosemite 1 and 2 Person Backpacking Tents 

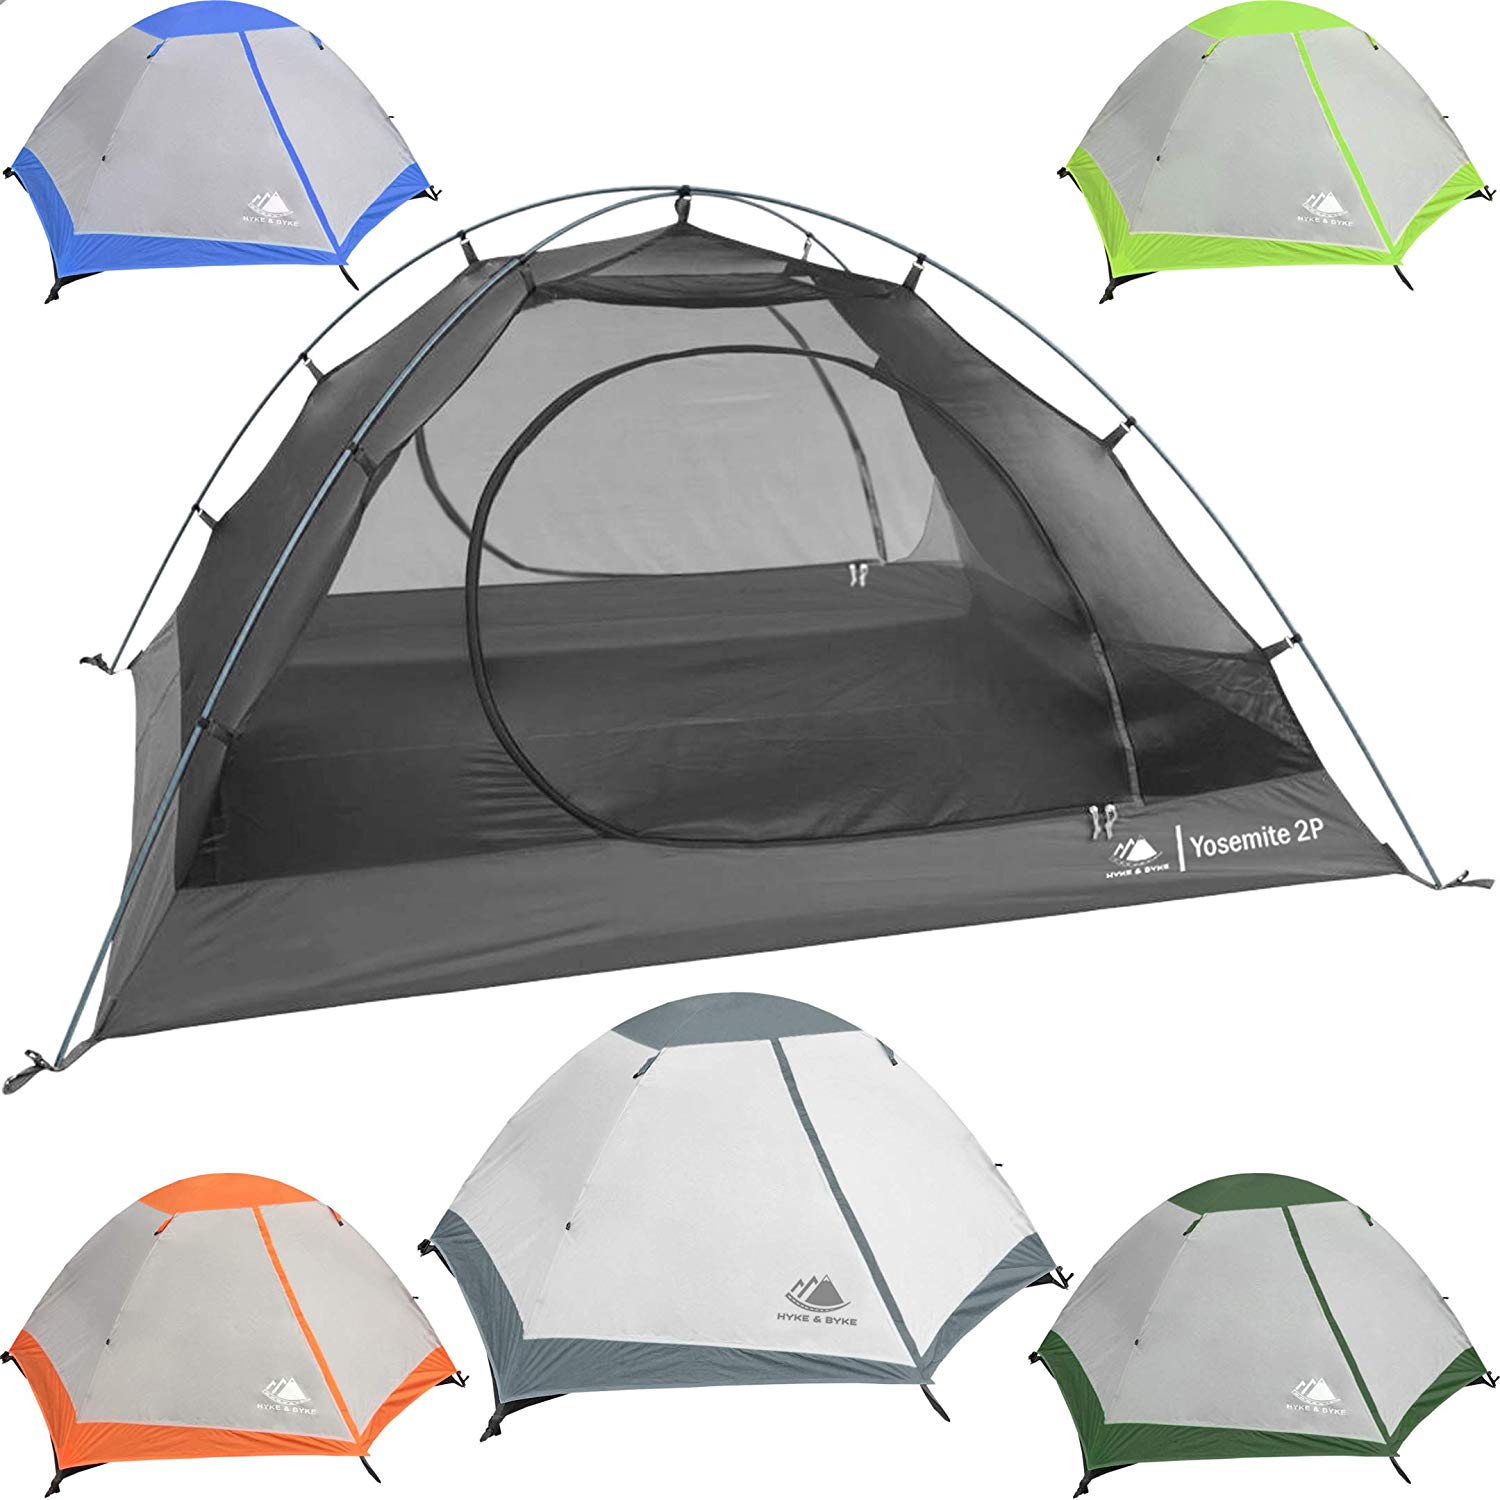
Hyke & Byke have built a reputation for making excellent backpacking tents that are both affordable and highly durable.  Their Yosemite tents are no exception.  This tent is available as both a one-person and two-person tent, with the lightweight one-person tent measuring 88” x 75”, and the two-person tent measuring 88” by 110”.  There is plenty of headroom in these tents with the one-person and two-person having 42” and 45” respectively.

The Yosemite is very easy to set up.  It uses 2 poles with a clip-pole attachment that can be assembled in a couple of minutes.  The poles and stakes are both very lightweight, which is handy for backpackers who are already carrying a fully loaded pack.  The entire tent weighs just 3.2 lbs for the two-person model and 2.5 lbs for the ultralight one-person tent model.  This tent also collapses down to a small size (17.75” by 6.3”).

The materials used to make the Yosemite are all very high quality.  The rainfly is 63 denier polyester with a 190 thread count and 2000mm polyurethane coating.  The inner tent body is made from the same material but also has a B3 Net yarn.  The floor is identical but with a 5000mm polyurethane coating for additional waterproofing.

Pros:

  • One-person tent is ultralight at 2.5 pounds
  • Two-person tent model is particularly spacious
  • Rip-resistant material

Cons:

  • Lower denier compared to some other budget backpacking tents


ALPS Mountaineering Lynx 1-Person Budget Backpacking Tent

ALPS Mountaineering Lynx One-Person Tent

This freestanding one-person tent from ALPS Mountaineering is highly durable, lightweight, and simple to set up.  It has been designed to be an ultraportable tent that packs into a small form factor.  It is perhaps the easiest tent to assemble from the 5 being reviewed in this guide, which makes it useful for when you quickly need some shelter.  Simply thread the two aluminium poles through the tent and stake it in 4 places.

The proportions of this tent are perfectly suited to the solo backpacker or camper, coming in at 32” x 90” x 36”.  The weight is also quite reasonable at 4 lbs 4 oz or 3 lbs 8 oz if you only take the essentials.  This tent is made from high-quality materials including water and UV resistant polyester, and aluminium poles.  A great choice for solo backpackers.

Pros:

  • High-quality zippers
  • Lightweight tent
  • Perfect for the solo backpacker
  • Fantastic value for money
  • Very long, so great for taller backpackers

Cons:

  • The stakes could be higher quality
  • May not stand up to extremely wet conditions


Clostnature Lightweight 2-Person Budget Backpacking Tent

Clostnature Lightweight 2-Person Backpacking Tent

This 2 person backpacking tent from TNH has been designed with convenience and comfort in mind.  The tent measures 7’3” x 4’11” x 3’10” with a maximum height of approximately 45”.  When it is packed up, it measures 16.5” x 5.9” x 5.9”, which is quite compact compared to many other budget backpacking tents. It is by far the best budget backpacking tent under $100, in fact, it’s the most affordable one on our list.

This is another freestanding tent design that uses two aluminium poles and a small number of pegs.  The curved design of this tent makes it a great choice if you expect to be camping in windy conditions.  It also has interior mesh walls, which provide plenty of ventilation if the weather becomes hot.  The two D-shaped doors open up the spacious interior which features 2 vestibules offering plenty of room for storing your backpacks.

This is one of the most waterproof backpacking tents reviewed, thanks to its 201 thread polyester rainfly (5000mm PU), groundsheet, and bathtub design.  The water-resistant coating is quite thick and performs well in harsh weather.

Pros:

  • At under $100, the tent is remarkably affordable for these specifications
  • Very spacious
  • A high level of water resistance
  • Interior accommodates very tall people

Cons:

  • Slightly heavier than some of the other tents at 5lb 8oz


WolfWise 2 Person 3-4 Season Lightweight Budget Backpacking Tent 

WolfWise 2 Person 3-4 Season Lightweight Backpacking Tent 

This WolfWise two-person 3-4 Season tent is made from high-quality anti-tear polyester with 190 thread count, double-stitched seams, PU coating, and stitch taping.  The floor is made from 150 denier anti-tear Oxford cloth and has a waterproof index of 3000mm.

The tent expands to a size of 82.7” x 55.1” x 43.3” from its folded size of 20.9” x 6.7” x 6.7”.  It comes with some fantastic features including a USB LED roof light, wind rope, and shock-corded pole.  The oversized doors make entry and exit simple.

This tent combines high-quality materials with ease-of-use and some excellent features.  The LED roof lights are very useful and the professional construction tent makes it capable of operating in all weather conditions.  The affordability of this tent is a major selling point, especially given the quality of its construction.

Pros:

  • Handy LED roof lights
  • Easy setup
  • Large size

Cons:

  • At over 5 pounds it is heavier than some other tents

How to look after your backpacking tent

Here are a few quick tips for caring for your new backpacking tent!

Storing your backpacking tent dry

If you can, avoid rolling the tent up while it is wet.  This will cause mildew to form on the tent, which will ruin its appearance and may cause a health hazard.  Leaving moisture on a rolled-up tent can also damage the polyurethane coating that is on the rain fly.  A budget backpacking tent with a polyurethane coating will dry very quickly, so simply hang your tent out of the rain for a few minutes or wave it around to remove moisture.

Wash your tent when it needs it

Backpacking can be a dirty business!  You may often be camping in locations that are muddy or dusty.  It is important to remove any debris from your tent as soon as possible because mud, salt, and dust can damage the water-resistant coating on a tent.

Fortunately, cleaning your tent is simple.  Just spray a water hose on the tent until the debris is off.  Never use chemical cleaners on your tent and don’t place it in a washing machine as they may also damage the coating on the tent.

Re-sealing your tent

The water-resistant coating that is applied to your tent’s surfaces is not permanent.  It will gradually wear out over time as it is exposed to harsh weather, dirt, and other contaminants.  Fortunately, you can purchase spray-on water-resistant coatings for tents.  Once you have owned your budget backpacking tent for a year or two (depending on how often you use it), test how water resistant it is by running a hose over it.  If water seems to penetrate into the tent, apply a layer of water-resistant coating.


Thanks for reading Our Gear Review of The Best Budget Backpacking Tent.  For more outdoor gear reviews check out our other blog posts.