Are you planning your first European backpacking travel adventure? Packing for a trip can be exciting but stressful, especially if you don’t know what to bring. Whether you’re going for a week or for an entire summer, there are a few backpacking Europe essentials for your packing list. To help you get started, take a look at our backpacking Europe checklist, which will ensure you have everything you need for your trip.
1. The Right Backpack
The right backpacking can make or break your trip. A backpack that’s too big can make traveling uncomfortable, while a backpack that’s too small won’t allow you to fit all your belongings in it.
When backpacking Europe, you won’t want to bring a large, rolling suitcase. European cities were built before the age of elevators, which means that you’ll be walking lots of stairs. When navigating the metro, the old buildings, and the hotels, you’ll be happy to be able to take the stairs instead of lugging around an unwieldy backpack.
When it comes to essentials for your backpacking Europe packing list, it’s best to bring a carry-on sized backpack to avoid baggage fees on budget airlines. A carry-on sized backpack will also be small enough to keep nearby if you’re taking a bus or train tour in Europe.
Backpacking backpacks come in sizes based on the liter volume that they can carry. A 30-40 liter bag is comparable to a carry-on size suitcase, while a bag that’s 50-65 liters will be too big to take with you as a carry on.
Make sure you choose a bag that fits comfortably on your body. If you’re visiting a store, the employees will be more than happy to help you select a few bags that are suited to your body size.
If you’re looking for the best backpack for backpacking Europe, the Osprey brand has some great all-rounder backpacks. Osprey is the go-to essential Europe backpacking option and fits most people comfortably.
- Carry-on Sized Backpack for Women: Osprey Fairview 40L
- Carry-on Sized Backpacking for Men: Osprey Farpoint 40L
- Larger Women’s Backpack: Osprey Ariel 65L
- Larger Men’s Backpack: Osprey Atmos 65L
2. Day bag
When you’re taking a day trip or going on a hike, you won’t want to bring your huge backpack with you. Leave most of your items locked safely at your accommodation and take along a day bag. Your best bet would be to purchase a foldable daypack that can fit into your bigger backpack.
It will need to fit essentials such as money, a snack, water, and maybe a change of clothes, so it shouldn’t be too big or bulky.
3. Padlocks
Padlocks are a quick, convenient, and inexpensive way to secure your bags and hostel lockers. When assembling your backpacking Europe essentials for your packing list, a small item like this can be a lifesaver! You can also use your luggage lock on your backpack during travel days, ensuring all your belongings are safe, including your passport.
4. Universal travel adapter
Your Europe backpacking packing list should include a universal travel adapter, which will work for your phone charger or any other electronic devices.
The outlets in continental Europe use the same 2-pronged plug, but if you’re traveling in the UK and Ireland, you’ll need a different 3-pronged system. Rather than taking multiple chargers with you, a multifunctional adapter will do.
5. Camera

Your phone camera is sufficient for everyday life, but backpacking around the world is an incredible experience that you will never want to forget!
Your travel photos will prove invaluable once you return from your epic journey, so be sure to capture all the incredible things you encounter along the way. Bring a camera that not only takes great pictures but also fits easily into your backpack.
These days, the majority of cameras are equipped with Bluetooth or Wi-Fi capabilities, so they can be transmitted easily to your laptop or phone to post them online.
You may wish to bring a high-tech DSLR camera to take stunning photographs.
If you want to take your backpacking adventures to the next level, then consider bringing along a waterproof GoPro, which will accompany you everywhere from underwater adventures to skydiving during your European backpacking adventures.
6. Travel towel
Your essential backpacking Europe packing list should include a quick-drying travel towel, since you will be moving from hostel to hostel as you backpack between cities. My favorite travel towel is a Turkish towel which is quick to dry and easy to fit in your backpack. You can also use the towel as a privacy screen if you secure a bottom bunk in a hostel.
7. Power Bank
A power bank is one of the essentials on my backpacking Europe packing list, for multiple reasons. While traveling, you’ll be using your phone much more than normal – for navigation, taking photos, videos, or researching travel tips. On days like this, you’ll want to have a backup battery for your phone.
I’ve also relied on my power bank during long travel journeys when I use my phone and want to make sure I have enough juice to find my way to the next destination.
8. Change purse
Reliance on physical money is surprisingly still pretty high throughout Europe. Plus, having lots of €1 and €2 Euro coins is a good idea if you want to leave behind tips or donate to street musicians that you’ll see on your trip.
9. The right shoes
For your backpacking Europe packing list, don’t forget to throw in a pair of rubber sandals for the hostel showers. You should also bring a pair of comfortable but stylish walking shoes. Some nightlife spots will require a certain dress code, but you can get away with leather-style sneakers. And women can get away with stylish-looking flats that are secretly super comfortable.
10. Hostel survival kit
If you’ll be staying in hostels, don’t forget these 4 backpacking Europe essentials. We call it the hostel survival kit:
- Silk Sleeping Liner
- Ear Plugs
- Eye Mask
- Extra-long charging cable for your phone
11. The Best Apps for Backpacking Europe
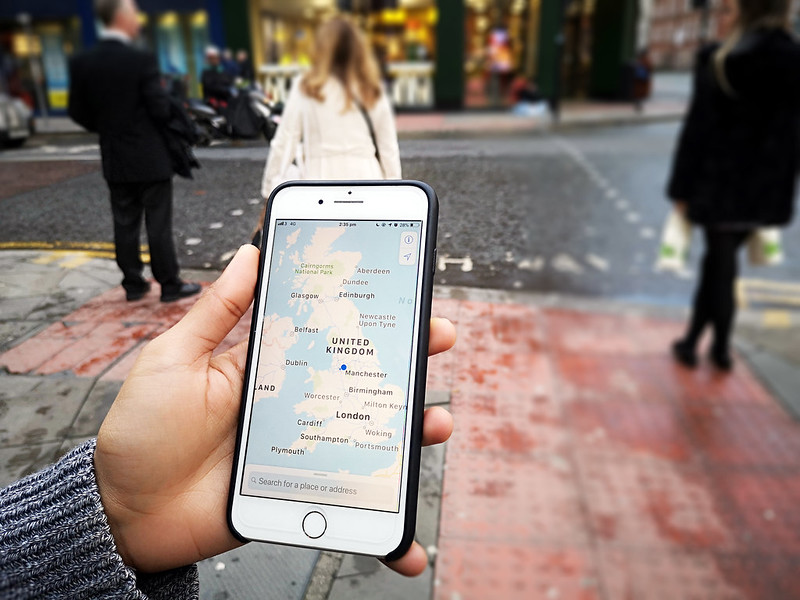
And lastly, before heading off for your European backpacking adventure, you should load up your phone with a few essential apps that will make backpacking Europe a breeze.
Apps to book transportation from place to place
Given the relatively compact size of Europe, you can travel between major cities by train or bus. There are a few useful apps for European transportation that can help make sure you find the best deal while sticking to your schedule.
- Omio – compare trains, buses, and flight options in Europe and travel using mobile tickets
- Trainline – a popular app in the UK to find train and bus tickets
- Flixbus – a long-distance bus company that is a favorite mode of travel for budget backpackers
- Kiwi – a flight search comparison site that helps you find the lowest prices
- Skyscanner – another classic flight search website that has powerful flexible search options
- DiscoverCars – car rental search engine with direct booking to 500+ suppliers
Apps for Finding Accommodation in Europe
Apps to book discounted activities and Skip the Line tickets
Apps to stay in touch with friends and family back home
If you don’t want to change to an international mobile plan, you can use these apps over free public WiFi to stay in touch with people back home.