
DIY Dehydrated Meal Recipes & How-To Tips
Whether you’re just getting started with your backpacking hobby or have already explored the great backpacking routes of the world, you may have realized that something is lacking in the world of packaged backpacking food. Either they’re too expensive, too bland, or too artificial. The good news is that making homemade dehydrated backpacking meals is not as complicated as it seems! There are plenty of easy DIY dehydrated meal recipes that can easily be done at home.
There are generally 2 approaches to assembling a DIY dehydrated meal. The first option is to simply cook the full meal at home, dehydrate it and then rehydrate it on the trail. The other option is to assemble a meal made from individual dehydrated or freeze-dried ingredients.
Both methods have their pros and cons, so we usually bring a combination of meal types on the trail with us. Read on for tips and tricks on how to make your own DIY backpacking meals
Method #1: Dehydrate a Home-Cooked Recipe
Dehydrating a dish that you can make at home is generally the most fool-proof and inexpensive way to go. It doesn’t require you to buy individually dehydrated or freeze-dried ingredients, it just requires your own kitchen equipment plus a good food dehydrator.
With this method, you can control the taste of the recipe before your trip, so you won’t be unpleasantly surprised when you’re ravenous on the trail.
Dehydrating Your own Home-Cooked Food for Backpacking
The simplest way to get started with dehydrating your own backpacking meals is to brainstorm a few of your favorite dishes that you can fully cook at home. The best DIY dehydrated meals will be sauce-based and full of hearty ingredients. Stews, pasta, and casseroles work best for this method.
After cooking the meal, you will dehydrate the mixture using a food dehydrator. Once the mixture is fully dehydrated, you will crumble it into uniformly-small pieces, and pack it in a ziplock bag for the trail.
To rehydrate on the trail, all you need is a lightweight camping stove, water, and a cooking vessel!
Cooking your own food at home is the easiest method in terms of simplicity, but it’s by far a more time-consuming option. Not only do you have to cook everything at home first, but dehydrating the final mixture at home can take up to half a day per portion.
For a week-long trip, you might need to start weeks before you embark on your trip, depending on how many meals you plan to bring with you. If you have the time, we say go for it!
Pro-Tips for Preparing and Dehydrating Full Meals at Home
The good news for those interested in DIY dehydrated backpacking meals, is that it’s really not rocket science. However, there are a few adjustments you should follow to make sure the DIY dehydrated meal will dehydrate and rehydrate properly.
- Don’t use butter or oil when cooking! Doing so will cause problems during the dehydration process. Cook with a little bit of water in the pan only. If you want to add some fat to the recipe, you can bring olive oil packets or powdered butter and add it later to the recipe on the trail when you rehydrate the meal.
- Use plenty of seasoning. Dehydration will reduce the flavor, so add more seasoning than you normally would, to give the food a robust flavor on the trail.
- If the recipe includes ground meat, combine it first with plenty of breadcrumbs and seasoning before adding it to the overall recipe. This will help with the rehydration and help prevent the dreaded crunchy or grainy rehydrated meat.
- If the recipe includes noodles, chop them into small pieces once they’re cooked. This will help them dehydrate and rehydrate uniformly.
- Let your finished recipe sit overnight in the fridge before dehydrating it. This will give it time to let the flavors combine, and will allow ingredients like pasta or rice to absorb the sauce and flavors.
At-Home Equipment for DIY Dehydrated Backpacking Meals: A Food Dehydrator
The only extra equipment you’ll need for this method is a food dehydrator. There are plenty of low-cost dehydrators available on amazon which will certainly do the trick.
If you’re going on a longer trip or know that you’ll be using the food dehydrator many times in the future, you might want to invest in a larger, more high-quality machine. We have this food dehydrator from Cosori and consider it essential backpacker equipment.
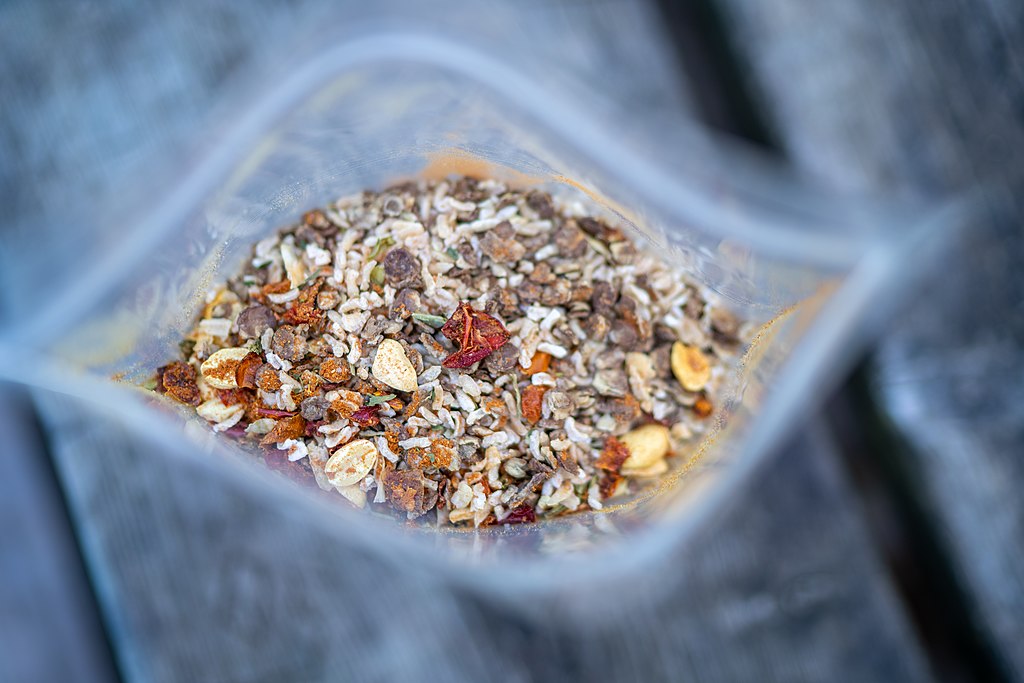
Method #2: Assembling Meals using Dehydrated or Freeze-Dried Ingredients
DIY dehydrated backpacking meals
With this method, you will combine various dehydrated or freeze-dried ingredients, and rehydrate them together on the trail to make a complete meal. If you have a variety of freeze-dried or dehydrated ingredients on hand, the combinations are endless!
You can still go the full DIY route by dehydrating individual ingredients using a food dehydrator, or you can purchase the dehydrated ingredients in most grocery stores and camping supply stores.
If you plan to make a variety of backpacking meals, you can even purchase sampler kits full of dehydrated ingredients. This food sampler from Harmony House includes a variety of beans, dehydrated veggies, and meatless options for vegetarian meals.
Another option is this freeze-dried fruit and veggie kit that comes with freeze-dried strawberries, bananas, peas, broccoli, and corn. There are 120 servings in the kit, and you just need to add water to rehydrate.
At-Home Equipment for DIY Dehydrated Backpacking Meals
1. Food Dehydrator
Most of the dry ingredients required for these dehydrated meals can be found at camping supply stores. However, specialized dehydrated ingredients can be pricey, so you might want to dehydrate the ingredients yourself.
Investing in a low-cost dehydrator will help you save money in the long run and will allow you to get creative with your ingredients and DIY dehydrated backpacking meals. This food dehydrator comes highly recommended by fellow backpackers and can be found on Amazon for around $50.
Or if you know you’ll be relying on dehydrated backpacking food and want to get a more robust machine, this food dehydrator from Cosori comes highly recommended.
2. Freeze-Dried or dehydrated ingredient sampler pack
To get started with a variety of meal options, you can start with this food sampler from Harmony House. It comes with a variety of beans, dehydrated veggies, and meatless options for vegetarian meals.
For freeze-dried ingredients, start with this freeze-dried fruit and veggie kit. There are 120 servings in the kit, so you’re bound to be able to come up with some exciting backpacking recipes.
Dehydrated or Freeze-Dried Ingredients
The staple of DIY backpacking food is a good sampling of freeze-dried and dehydrated ingredients. There are pros and cons to both ingredients. In a nutshell, freeze-dried wins over dehydrated in terms of nutrition, shelf-life, and texture, but it comes at a high cost! If you’re interested, you can learn more in our write-up about the difference between dehydrated vs. freeze-dried ingredients.
After you assemble a good collection of ingredients, you can basically throw things together as you would when cooking your typical dinner at home! Here are some staple ingredients to get you started:
Freeze-Dried or Dehydrated Meat & Meat Alternatives
- Freeze-dried meat variety pack (diced beef, ground beef, chicken, sausage crumbles)
- Freeze-dried ground beef
- Freeze-dried diced beef
- Freeze-dried crumbled pork sausage
- Freeze-dried grilled chicken
- Dehydrated Textured Vegetable Protein (TVP)
- Dehydrated meatless crumbles (to replace ground meat)
Dehydrated Beans
Make sure you buy beans that have been cooked and then dehydrated or freeze-dried! If you just buy plain dried beans, they will not have been cooked, and will not hydrate properly in a meal.
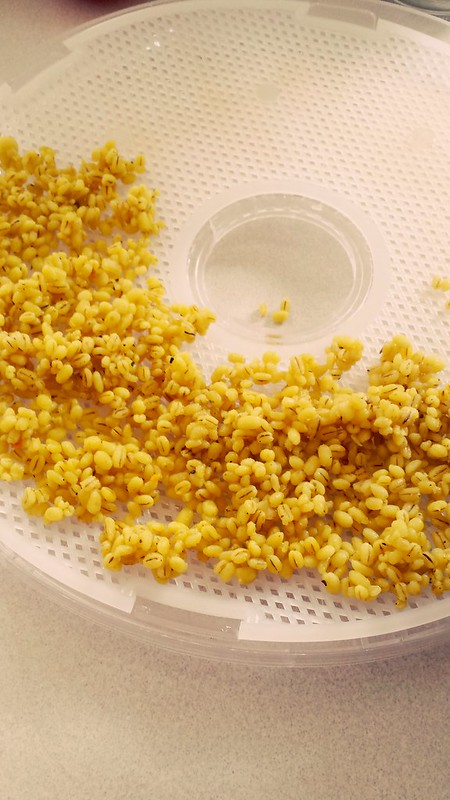
Grains
- Dry couscous (you can use normal dried couscous in recipes that you plan to rehydrate for at least 10 minutes)
- Dehydrated rice (Knorr Minute Rice sides are a staple for all backpackers)
Dehydrated and freeze-dried vegetables
- Harmony house dehydrated vegetable kit, including broccoli, cabbage, carrots, celery, corn, green beans, jalapenos, leeks, onions, peas, bell peppers, potatoes, spinach and tomatoes
- Dehydrated broccoli
- Dehydrated potatoes dices
- Dehydrated mashed potatoes
- Deyhdrated bell peppers
- Freeze-dried peas
- Freeze-dried cauliflower pearls
Add Flavor
For creating a variety of flavors, there are a few versatile ingredients that will come in handy for your DIY backpacking food
- Peanut butter powder
- Powdered milk
- Butter powder
- Sriracha powder
- Powdered cheese
- Powdered coconut milk (vegan)
- Olive oil packets (vegan)
- Nutritional Yeast (vegan cheese substitute)
DIY Dehydrated Backpacking Meal Recipes
Luckily there are gourmet-loving backpackers out there who have come up with lots of delicious options. When preparing the mixture, it’s best if you stick to either dehydrated or freeze-dried components within one recipe. It is technically possible to mix and match, but then you’ll have keep an eye on the rehydration time for each ingredient.
As a general rule of thumb, freeze-dried ingredients take around 5 minutes to rehydrate, while dehydrated ingredients can take between 10-20 minutes.
Chili con Carne
- Freeze-dried or dehydrated meat of choice (check out this freeze-dried meat variety pack for options)
- Freeze-dried or dehydrated veggies of choice (check out this dehydrated vegetable kit for inspiration
- Your favorite chili seasoning
- Knorr’s minute rice
- Freeze-dried cheese
Curry with different types of meat
- Freeze-dried or dehydrated meat of choice (see above)
- Freeze-dried or dehydrated veggies of choice (see above)
- Knorr’s minute rice
- Curry, Coriander, and Cumin powder
Chicken Fajitas
- Freeze-dried or dehydrated fajita vegetables
- Knorr sides spanish rice
- Freeze-dried grilled chicken
- Tortillas for the trail
Thanksgiving-inspired Meal
- Organic instant mashed potatoes
- Spoonful of turkey gravy powder
- Dried dehydrated cranberries
- Freeze-dried grilled chicken
- Crispy fried onions
Pad Thai
- Starkist chicken packet
- Chicken top Ramen
- Peanut butter powder
- Peanuts
- Dehydrated broccoli
- A packet of soy sauce
- Sriracha powder
How to Cook your DIY Dehydrated Backpacking Meals on the Trail
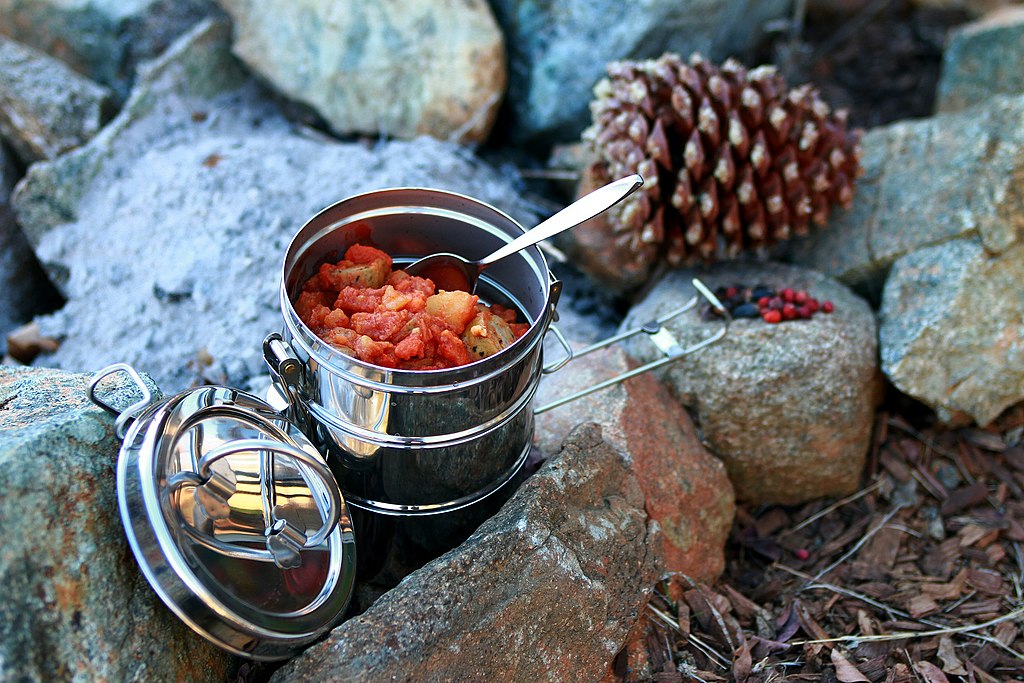
How to cook DIY Dehydrated Backpacking Meals on the Trail
Regardless of which method you chose, the cooking process is generally the same. Since these are all ‘just add water’ dehydrated backpacking meals, the only cooking equipment you really need is a device to boil water and a cooking vessel.
Lightweight Camping Stove
The most popular camping stove among backpackers is the Jetboil Stove. We don’t go backpacking without it. It’s lightweight, compact, and simple. It comes with a simple burner and a vessel for preparing boiling water.
Another option is this lightweight backpacking stove is under $20 and is popular among the Ultralight Backpacker community. It’s compact and weighs just .96 ounces (25 grams), but don’t forget to factor in the weight of fuel and a cooking vessel.
A Cooking Vessel
Rehydrating is a lot different from cooking on the trail. Theoretically, you could rehydrate your meals over a campfire in a camping pot, but as rehydration can take up to 20 minutes, this would use a lot of fuel. It’s much more energy efficient to boil the water, add it to your mixture, and then let the mixture soak and rehydrate.
Once you’ve boiled your water, combine it with the dehydrated meal in a heat-tolerant cooking vessel. The vessel should be sealable in order to retain as much heat as possible during the rehydration process. There are a few different cooking vessel option, each with their own pros and cons, so you’ll have to decide based on your preference.
- Mylar bags – Heat-tolerant Mylar bags are a great lightweight option. You can use them to transport each meal, and then just add boiling water directly to the ingredients when on the trail. These bags can tolerate boiling water, are resealable, washable, and reusable. Since rehydration usually takes at least 20 minutes, the Mylar bags are great at retaining the heat during this time.
- Pros: affordable, convenient, and good for ultralight backpacking
- Cons: Plastic, difficult to wash and reuse
- Resealable silicone bags – These are reusable, easy to clean, and durable enough to last multiple backpacking trips. When using the silicone bags to transport the dry food, be sure to add oxygen-absorbing moisture packets to keep the dry ingredients stable.
- Pros: Reusable, sustainable option
- Cons: Expensive, not the most lightweight option
- Freezer bags – This is the extreme ultralight backpacker’s method. You can transport the dry mixtures in freezer bags and just add boiling water directly to the freezer bags. If you go the freezer bag route, it’s important that you wrap it in an insulating bag to retain heat during rehydration. Some people even make a DIY coozie out of a car windshield shield!
- Pros: Cheap and easy to find in the grocery store, ultralight
- Cons: Not as sturdy, difficult to eat out of. Plus, conflicting opinions about how safe it is to heat plastic for food consumption
- Stainless steel camping pot with lid
- Pros: Environmentally friendly option, healthier than cooking in Ziplock bags, gives the feeling of really cooking on the trail
- Cons: Added weight
The cook time will vary depending on the type of ingredient. The general rule of thumb is that freeze-dried meals take around 5 minutes to rehydrate, while dehydrated meals will take 10-20 minutes.
About the author

Monica Woerner
Monica is an avid traveler and backpacker who seeks to inspire others to embark on great adventures off the beaten path. Originally from California, she has travelled to over 60 countries, most of which she explored while backpacking or camping.


Leave a Reply
Want to join the discussion?Feel free to contribute!