Tag Archive for: sustainability

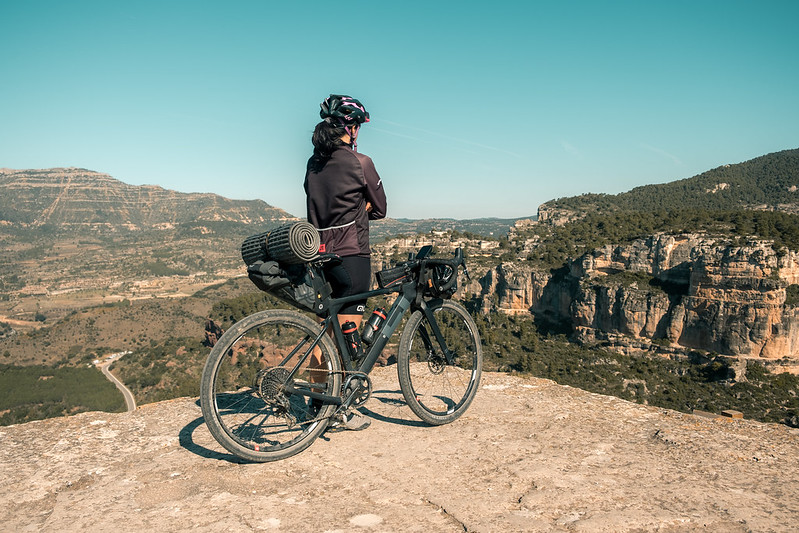
If you’re thinking of taking your outdoor adventures to the next level, bikepacking might be just the thing for you. Bikepacking is perfect for anyone who loves the great outdoors, is comfortable on a bike, and would like to cover great distances on their own two wheels.

The concept is simple, but there is some essential bikepacking gear that any first-time bikepacker needs to take to have a great experience. Who knows, this might become your new favorite vacation hobby!

Here is a list of the 15 bikepacking essentials that any first-timer needs to bring on their trip.

1. The Right Bike

When it comes to finding the best bikepacking bike, there is no easy answer. The bike that you choose depends entirely on the terrain, the distance, and your personal preferences.

That being said, the best bike for a bikepacking trip will be lightweight, sturdy enough to take the weight of your packs, and high quality so that you can minimize repairs along the way.

Bikepacking trips generally fall into three different categories, and each requires a different type of bike. The three different styles of bikepacking trips are multi-day mountain biking, ultralight race & gravel, or expedition & dirt touring.

You can read more about each of these bikepacking trip types and the right bike for each. Regardless of how much research you do, there are a few bikes that are consistently recommended by other bikepackers: 

  • Best Multi-day Mountain Bike: Surly Krampus – a lifetime investment and one of the highest quality bikes for bikepacking. If you have the budget, the Surly is the best choice
  • Best All-Rounder: Salsa Fargo – it’s a good all-rounder bikepacking bike for anyone interested in starting bikepacking as a new hobby. You can do an endless amount of research on the size, fittings, and accessories, but the Salsa Fargo seems to suit the needs of most people.
  • Best Gravel Bike: Specialized Diverge gravel bike This bike is well-regarded for its ability to go anywhere and everywhere. It can handle just about any road and even the average person would do well on a bikepacking trip.

The bike you choose also depends on whether you intend to make this a long-term hobby. It may not be worth shelling out thousands of dollars if this is just something you’ll do once or twice. But if you plan to be out on the trails multiple times a year, it’s worth investing in a high-quality bike that will stand the test of time.
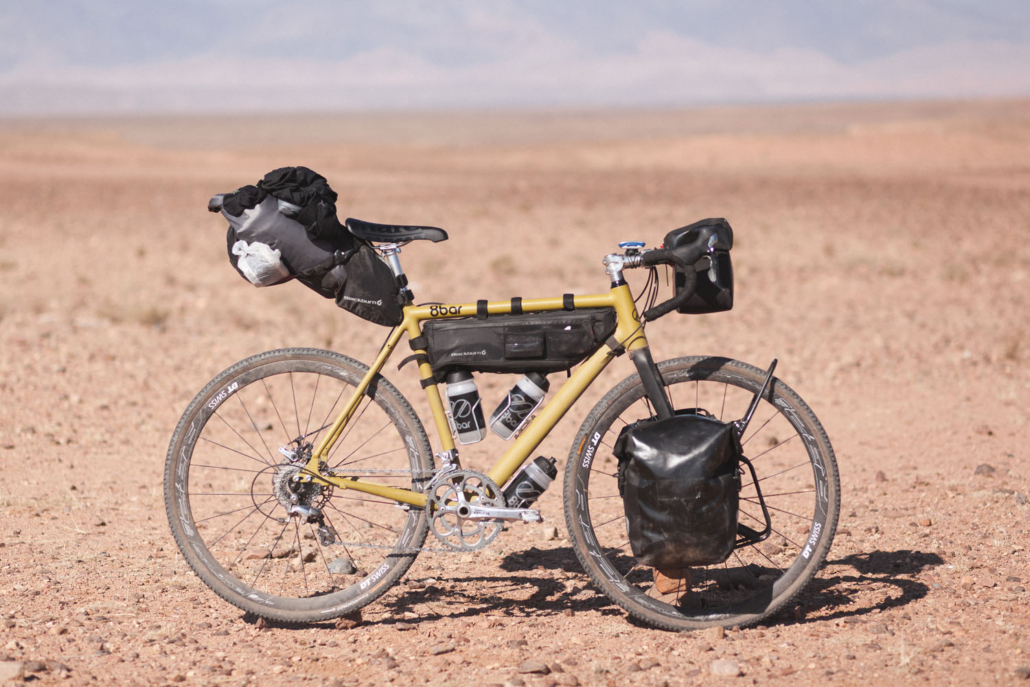
2. The Right Packs

Packing for your bikepacking trip

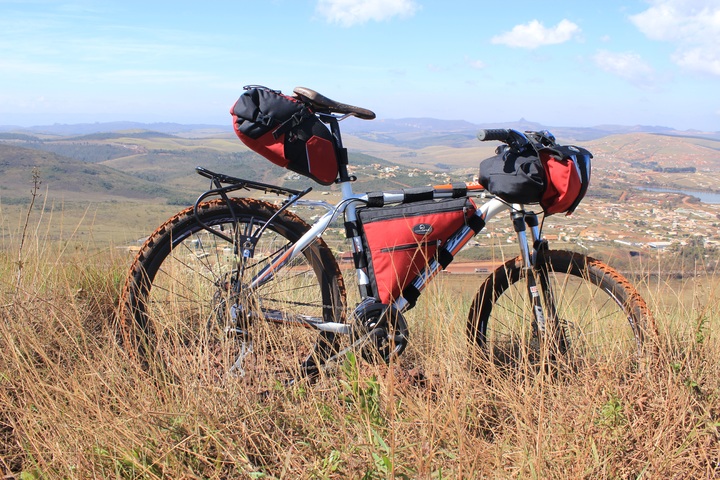
With the increasing popularity of bikepacking, there has been a lot of innovation on how to efficiently transport gear on a bike. You’ll have infinite options for your bikepacking gear setup, but the basic storage locations are side-saddle bags, handlebar bags, under-seat bags, and wedge packs that fit inside the bike frame. You’ll be surprised how much essential bikepacking gear you can bring with you!

The most important thing to keep in mind when determining your bikepacking gear setup is to make sure your bags are appropriate for the specific bike. For example, a typical mountain bike won’t have anywhere to mount side-saddle bags, so you’ll need to focus on under seat and handlebar storage. And of course, if you get a wedge pack, it needs to fit your bike frame perfectly to maximize storage space.

Be careful not to fall into the trap of overpacking! Just because you can load up your bike, doesn’t mean you should. Even though you’re not carrying the gear directly on your back, you’ll still be the one who needs to put in the leg power to transport each ounce up each elevation gain.

The most important factor when it comes to bags is the quality. Don’t skimp by buying cheap bags that are going to rub on tires, need constant adjustment, or have failing zippers and buckles. Just like investing in a quality, reliable bike, you must also invest in quality bags. Bags should be waterproof, lightweight, and durable.

3. Navigation, GPS

Especially when going offroad, a high-quality satellite GPS can be a life-saver. Be sure to get one that has a bright display that can be attached to your handlebars. You don’t want to have to pull over to check your coordinates while you’re trying to make good time on your route.

4. Sun Protection

Bikepacking Gear Essentials

Bikepacking means you’ll be exposed to the elements. You’ll most likely be biking on fire roads or paved surfaces, which usually means there will be little shade. And with the speed and wind chill, you are not likely to notice your sunburn until it’s too late.

A quality pair of polarized sunglasses, a hat, a neck cover, clothing that offers UV protection, and of course, high-grade SPF are essential bikepacking gear to provide sun protection.

5. Extra Jacket for Insulation

Inevitably, you’ll experience a change in the elements, whether you get caught in a rainstorm or climb a high elevation to chillier temperatures. Bring a windproof, lightweight jacket for these times.

You’ll be surprised how often you’ll reach for your jacket, even in warm weather due to the wind chill you’ll experience at high speeds.

6. Illumination

Although it is not advised to cycle at night, a bike light is essential if you are planning to cycle at dusk or dawn. Plus, a light does a lot to increase your visibility which is important for safety, especially if you’ll be sharing the road with cars.

7. First Aid Kit

A basic first aid kit is essential for any active trip, but especially for bike packing. You’ll want to be able to treat any blisters, hotspots, and scrapes along the way. In addition to a basic first aid kit, be sure to bring along some magnesium tablets to help avoid cramping after a long uphill day. You’ll need to rely on your legs day in and day out so be sure to keep them in top condition!

8. Food & Cooking Gear

If you plan to camp along your bikepacking trip, you need to bring lightweight cooking gear to prepare meals. Since packing space is limited, be sure to make the right choice for bikepacking recipes.

The most popular bikepacking cooking gear is the Trangia ultralight camping cook set. Or, if you are making meals where you just add hot water, you can get away with bringing a Jetboil camping stove. If you want to skip the bikepacking cooking gear, check out some of our cold soak recipes to help lighten your pack. 

It’s also helpful to have some easy-to-access snacks that you can rely on during the day. Especially if you’re biking on a schedule or trying to time your rides with the weather, it’s helpful to have some nutrition that you can access on the go, like energy gels for quick carbs and electrolytes.

9. Bike Repair Kit

Do not go bikepacking without a basic bike repair kit and the know-how to make minor repairs along the way. A blown tire or loose screw can ruin your trip if you’re unable to repair them yourself. Bikepacking repair kits are very compact, so this small but invaluable item does not have to take up much space among your essential bikepacking gear.

10. Hydration & Water Storage

Bikepacking gear - add water bottle storage to your bike

Add more water storage to your bike before your bikepacking adventure

In addition to the standard location for a water bottle, you may want to add some more storage. Depending on your bike, you can usually add a few reserve water bottle locations. To cut down on the total weight in your bikepacking gear, you can bring a steri pen filter to purify your water along the way.

Since bikepacking goes hand in hand with a love for the outdoors, check out our article about the most sustainable water bottles and water filters so that your choices are kind to mother nature.

11. Care for your Caboose

If you’ve never been bikepacking before, your rear end will be the first thing to scream in pain. Padded shorts are essential bikepacking gear, but don’t forget to bring along wet wipes with soothing aloe and vitamin E, and bottom butter which works wonders. And be sure to do a few long bike trips before your bikepacking adventure to prepare your rear for the long days on the saddle.

12. Cycling Gloves

It’s not until you forget biking gloves that you realize how important they are. Gloves serve multiple purposes. First of all, your hands will be exposed to the elements, and will quickly dry out and become cracked if you don’t protect them.

Without gloves, the constant gripping of the handlebar can lead to sweaty, slippery palms and can result in painful blisters. Lastly, the best gloves have a layer of padding, which adds a very important buffer against the constant vibration of the bike.

When choosing biking gloves, find a pair that fits you like a second skin. They should be snug, but not so tight that they are restrictive.
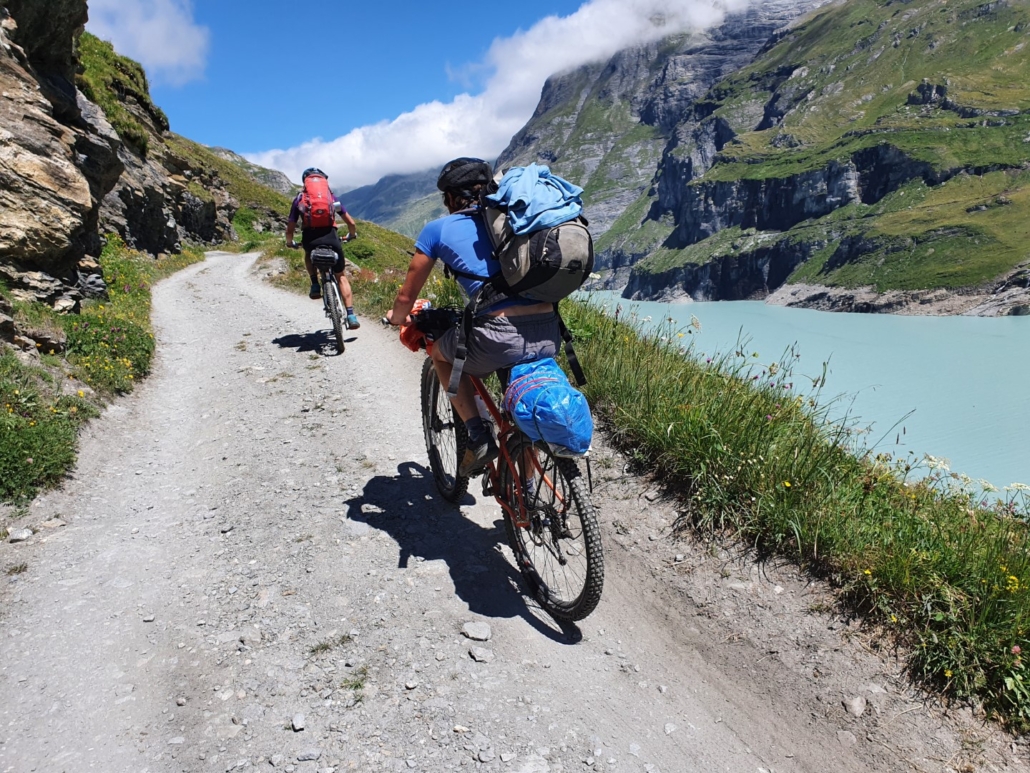
13. Shelter

If you’re planning to go offroad and sleep in the great outdoors, an ultralight tent will be an essential item in your bikepacking gear. Choose one that can be rolled up into a compact size.

The tent will likely be the largest single item that you have to pack, so be sure to balance it correctly on your bike setup. Most people pack the tent in the handlebar section of their bike since it’s a central storage location that doesn’t cause balancing issues.

14. Good Weather

Bikepacking Gear Essentials

Don’t underestimate the value of a sunny, cool day! Try to choose a location and a time of year that will give you dry conditions with moderate temperatures.

The weather could make or break your experience and significantly affects the amount of bikepacking gear that you’ll need to bring. There’s nothing worse than getting caught in the freezing rain when you are directly exposed to the elements. This could also lead to dangerous conditions like slippery roads & impacted visibility.

15. A Positive Attitude

The right mindset is maybe one of the most essential ingredients for a successful bikepacking trip. Be sure to bring a sense of adventure, self-reliance, and a positive attitude.

Relying on your own physical fitness to get you from point A to point B, being subject to the elements and unforeseen factors, and covering large distances with the raw power of your own legs will bring lots of new challenges. But with big challenges come big rewards, just keep a positive attitude along the way.

Liked this Article? Pin it!

Bikepacking Gear for Beginners

Bikepacking essential gear

Campervan Hugo tells his story: Hi! I’m Hugo – at least that’s what my new owners (Johannes and Birgit) named me in the fall of 2020. I recently turned 6 years old and am an L2H1 Renault Trafic in a vibrant, life-affirming green color. I’m here to tell you all about my camper van conversion story!

I met my new family in Berlin. The young couple came all the way from Munich to check me out and see if they wanted to adopt me. Well, lucky for me, they signed the contract on the same day! Adoption costs: 9999€ – and I am worth every cent!

Barely a month later (both of them quit their jobs to take care of me full time) we drove to Karlsruhe, where Birgit’s mother and grandma live. It was very nice to meet her relatives and get to know my new extended family.

In the three months that followed, Johannes and Birgit took great care of me and took on a full-time project of van conversion to campervan. Like most people who take on a DIY project, I’m pretty sure they thought everything would be easier than it was.

But for anyone else out there who is thinking of a camper van conversion, read on to learn about their process. Maybe you’ll get some inspiration from my makeover story!

Essential Amenities for my Camper Van Conversion

Allow me to walk you through a few changes that happened during the story of my Renault Trafic camper conversion.

1. Insulation Against Heat and Cold

I was insulated with 19mm, 9mm, and 3mm Armaflex as well as sheep’s wool. After lots of research, Birgit and Johannes found out that wool is one of the best options for insulation: it insulates well against heat and cold, does not mold, and is eco-friendly (after all, it grows on sheep!).  So now, I can protect my family from heat and cold.

Johannes hard at work on the insulation

Johannes hard at work on the insulation

2. Click Vinyl Flooring

To create a liveable interior, Johannes and Birgit set about installing chic flooring. Unfortunately, the click vinyl flooring was much trickier than anticipated. Even I know that you should watch a video of how to lay vinyl flooring BEFORE trying to do it!

Birgit's mission: Move the flooring from the green grass to the green camper.

Birgit’s mission: Move the flooring from the green grass to the green camper.


Success! Finishing the edge of the vinyl flooring

Success! Finishing the edge of the vinyl flooring

3. A New Side Window and Skylight

In contrast with the difficult flooring installation, it was a snap to cut two new openings for my roof window and side window. That was done in just one day. I’m glad they chose high-quality Dometic windows. They even come with built-in screens and blackout blinds!

Once I got my new side window I really started to feel like a camper van!

Once I got my new side window, I really started to feel like a camper van!

4. Tigerexped Parking Heater for Winter Trips

The two decided early on that they would want to travel with me in the winter since I am perfect for a cozy retreat. For cold-weather trips, I got a parking heater from Tigerexped, which has 2 kilowatts of power.

I’m now able to heat the interior from 0 to 20°C (freezing to a comfortable room temperature) in just 10 minutes! They did all the installation themselves, aside from the gas tank tap, which was done by a pair of helpful hands from a local auto repair shop. I very much appreciate it, since the tank is one of my most sensitive components!

Autoterm Air 2D heater from Tigerexped

Autoterm Air 2D heater from Tigerexped

5. Stylish Side and Roof Panels for a Livable Interior

My side panels are made of multiplex panels that were sanded and painted white, plus 4-way stretch felt. Felting was fun for Jo & Bibs, I could tell they enjoyed it!

Luckily, felt is a forgiving material, so they didn’t have to be quite as precise as they had to be for other aspects of my van makeover. They simply applied adhesive spray to the Armaflex and pressed the felt on bit by bit.

Their oft-praised “secret weapon” was an orange peeler from Birgit’s mother’s kitchen. With it, they could stuff the felt into even the tightest cracks, and now I look nice and neat! 😉

The secret weapon: an orange peeler to help achieve a clean finish on the felt.

The secret weapon: an orange peeler to help achieve a clean finish on the felt.

My ceiling is made of 4mm-thick birch wood. Before installing, it was soaked with oil to prevent mold and keep it in good shape over the next several years.

It was the right plan in theory, however, they realized after the fact that they should have used a different type of oil. Unfortunately, my interior still has a distinct smell from the oil (even tho it is intended for living rooms!). I’m still getting used to it, but they would probably recommend a different one.

The smell is slowly fading away, and to accelerate the vaporization of the oil, they leave my closet doors open with the windows cracked whenever I’m parked.

Johannes admires my interior. My conversion from van to camper van is coming along!

Johannes admires my interior. My conversion from van to camper van is coming along!

6. Self-Sufficient Power for Camper Van Living

One of my coolest features is the 6 LEDs embedded in my ceiling- The front 3 can be switched on and off independently from the rear 3, and even from 2 different locations.

Alternate switching is the keyword here! All in all, they took great care of my electrical system. Especially Jo was very interested in this part of my camper van conversion, calculating all the cable strengths and figuring out the necessary fuses that I would need. 

Within my cozy cabin, I have a 180Ah AGM battery, a 300-Watt inverter for laptops, a 32-Liter cooler from Mobicool, a submersible pump, various USB chargers, and even a monitor so that Johannes and Birgit can hop in and travel with me while they work remotely.

The electrical heart of Hugo

The electrical heart of Hugo

And guess what – all of these devices are powered by the sun! My owners installed a 360-Watt solar panel on my roof. It’s a standard solar panel like the ones you see on house rooftops.

Johannes and I picked it up from a solar builder in the neighboring village. My owners first used industrial glue to attach 4 spoilers to my roof and then screwed the solar panel onto them.

The wires run into my interior and connect to the battery. I think it’s great that during my camper van conversion they figured out how to use the sun to generate green energy – after all, green is my favorite color!

360 W solar system on Hugo's roof

360 W solar system on Hugo’s roof

Update: Unfortunately the glue didn’t stick to the solar panel spoilers. Luckily Johannes and Birgit noticed before it was too late and dismantled the solar panel during their recent vacation in Italy.

So for now I don’t have a solar panel on my roof but Johannes and Birgit are working on a solution. Van conversion is a constant process!

In the meantime, I’m using a charge booster to charge the battery while driving. This can be switched on/off by a special switch in the driver’s compartment. Now that my interior battery cannot be loaded by the sun anymore, I’m very glad that this charge booster was installed.

Space-Saving Design Features

My interior living space is really cool and I have to say, very well thought out! It has to be, because as is the case with all camper van conversion projects, the space is limited: As a typical Renault Trafic before my camper conversion, I had about 5m² (54 square feet) of space in the living room – and a height of just 140 cm (55 inches). So it’s important to make the most out of every spare millimeter. 

Like most camper van conversion projects, I am full of hidden features and tons of practical space-saving tricks! Let me take you on a little tour of all the cool things inside 😉:

  • Funky LED sideboard with a corkboard and integrated USB charging station.
  • White cabinet wall with tons of storage space, the cabinet door is also the table. It’s made of beautiful acacia wood – for a camper van like me, fine wood is basically like fine jewelry. The external monitor is tucked behind the cabinet.
  • A camping stove that can be pulled out through a drawer, making it easy to cook outside if weather permits! Underneath that drawer is another drawer. Drawer-inception, so to speak. It serves as an additional area to cut vegetables when cooking.
Kitchen set up in a van conversion project

Drawer inception for expandable space in the kitchen

  • The entire space under the bed can be used for storage. There are 3 heavy-duty drawers + an area with space for either a folding box or a crate of beer. I’d love to say this was planned – but the fact that my humans chose these exact dimensions was pure coincidence.
  • I even have a small sink. The water comes from a 12-liter fresh water tank under the sink, flows through the kitchen faucet, and drains into the 12-liter waste water tank. By the way, the faucet can be pulled outside through the side window and used as an outdoor shower. Ideal after a strenuous hike!
  • The bed is flexible and adjustable, so it can either be used as a bench or a large bed measuring 200cmx125cm (about the size of a Full bed). If you want to sit at the table, the bed can be made into a U-shape and three people can sit.
  • The acacia cabinet door has two drive-in nuts, which allow you to screw in two large threaded bolts with feet to become the table legs. When it’s folded down, the table legs rest on a part of the bed, so it’s super stable.

The Final Touches for my Renault Campervan Conversion

My cozy interior really came together with the addition of the light gray “home-sewn” mattress (well… sewn by Birgit’s aunt – that was a 14-hour sewing marathon!).

The white curtains provide privacy and complement the white furniture and the dark brown acacia wood in the kitchen. Artificial ivy hides the electrical cables and creates a homey atmosphere.

With the ceiling lights on and a candle lit, I transform into quite a romantic little place! Seeing me now, you would hardly believe that I was once an empty Renault Trafic before my camper conversion makeover.

Bed arrangement in a camper van conversion project

DIY Van conversion project

Makeover complete! Can you believe how far I’ve come?

What’s Next for Campervan Hugo?

Originally, my new owners budgeted 2 months to convert me from van to campervan. That they overestimated themselves was clear to me from the beginning – but sometimes people have to learn the hard way!

I will probably never become a real full-time camper for the so-called ‘van life’. Even though Johannes and Birgit are very fond of each other, <5m² is a bit small for the long term.

In any case, the two had a great vacation with me this summer. We drove through Germany, Switzerland, and Italy together.

I’m not sure what our plans are for next year, but we will definitely go to the mountains for hiking or maybe a snowy getaway. If you’re interested in what the future brings for me, you can follow along at @hugo_campervan on Instagram. Maybe you’ll get inspiration for your own Renault Trafic camper conversion.

In closing, I just recently overheard a conversation that made me so happy, and I would like to share it with you. Maybe you as (future) van builders or owners see it exactly the same way:

“Hugo is our little second home and the whole world is our backyard!”

DIY Van Conversion

Meditation has been tagged with some interesting stereotypes over the years. Many people think you have to be in a dark, quiet room with your legs crossed and eyes closed, doing some kind of “ohm” chant to meditate properly.

That’s just not true.

Meditation can take many forms – including hiking and backpacking. If those are hobbies you already love, it’s time to consider how they can help you feel re-centered and reduce your stress levels while you’re on the trail.

Many spiritual leaders have touted the effectiveness of walking meditation, and you can apply those principles to your hikes by being more mindful on each journey. If you’ve never meditated before, it can take some practice to connect physical activity to a clearing of the mind. But, hiking is already a great way to improve your mental and physical health. Adding meditation to your walks can help you feel more connected with the earth, and yourself.

Let’s cover some of the benefits of hiking as meditation and how you can set clear intentions for your treks.

The Benefits of a Mindful Hike

There’s no question that simply spending time in nature is good for your health. It reduces stress and anxiety and can offer a boost of energy. Taking things one step further (no pun intended) through walking meditation can offer even greater benefits to your physical and mental well-being. Some of the “perks” you can expect from being more mindful on your hikes include:

  • Increased blood flow
  • Improved digestion
  • Reduced anxiety
  • Improved circulation
  • Better sleep quality
  • Enhanced balance

Walking meditation also helps with symptoms of depression and anxiety and can boost your creativity levels if it feels like you’ve been in a slump lately. Combining mindfulness with regular outdoor exercise, like hiking, is also a fantastic way to naturally boost testosterone levels (which can decrease with age). That will lead to a clearer mind and greater physical awareness while also promoting strength and vitality.

How to Meditate On the Trail

Ready to give hiking as meditation a try for yourself?

Again, you don’t have to worry about specific chants or keeping your eyes closed while you walk – that would probably do more harm than good with trees around! Walking meditation is easier than you might think. Try the following steps to break down the process until it becomes more familiar.

  1. Find a spot on the trail or a clearing in a wooded area that will allow you to freely walk back and forth about 10 to 15 feet.
  2. Stroll throughout that area slowly as you breathe deeply and take in your surroundings.
  3. Take slow, intentional, mindful steps, and focus on sensations that you usually don’t notice. That could include how your feet and legs feel while moving, or the rhythm of your breathing. It could even include the gentle “thud” your feet make with each step. The more you focus on yourself and the world around you at that moment, the more mindful and present you’ll be.

You may have other thoughts come to mind. That’s out of your control, and you don’t have to work to “block” those thoughts out. There’s nothing you can do to prevent both positive and negative ideas from entering your mind, but think of them like clouds passing by. Don’t hold onto them, and do your best to refocus on the present.

You can continue to be mindful throughout your hike, paying attention to how your body feels with each step forward while also observing the sights, sounds, and smells of your surroundings. It’s a wonderful way to manage your anxiety while hiking and to feel more relaxed by the time you’re finished.

Staying Safe

While meditating on a hike is a wonderful way to feel more connected with the earth and your natural surroundings, it’s important not to bite off more than you can chew. If you’re new to hiking, familiarize yourself with certain trails and build up your strength and stamina before you try to meditate on your journey. You’ll still enjoy wonderful mental and physical health benefits, simply by exercising in nature.

Additionally, if you deal with chronic pain or you’re trying to recover from an injury, use a pain scale to determine if you’re ready to be active again. Pushing through the pain or trying to force yourself to get back on the trail can end up hindering your performance. You’ll also be so focused on that pain that it will be nearly impossible to be mindful and present.

Whether you’re just getting into hiking or you’ve been hitting the trail for years, there are more benefits than we could ever think to list here. Using hiking as meditation, however, adds to that list and can help you feel more in tune with the world around you while reducing your stress levels. If you’re ready for that step, try to introduce walking meditation into your next hike.

There are a lot of considerations that go into finding and establishing the right career. Often this is about identifying what job meets your highest personal and values-led priorities in life.

You may be one of the increasing numbers of people wanting to find a position that sees you making a meaningful impact on the environment. Not just where eco-friendly methods are used but a career where you’re empowered to truly make a difference. 

At the same time, you may want to also take the opportunity to explore more of what the world has to offer. Making connections with other countries and cultures has never been more accessible.

As such, you’re likely to be searching for a sustainable travel job – work that involves travel and a job that enables you to travel across the country or internationally in the course of your duties. 

But are there options providing you with the best of both worlds? Let’s take a closer look at how you can identify sustainable travel jobs and even pursue a career involving sustainability and travel. 

Sustainable Travel Jobs in Development

As we have reached a point of climate emergency, there is an urgent need for change. This is beginning to occur at the infrastructural level with various civic, private, and scientific fields contributing to developing solutions.

This also presents opportunities for enriching sustainable travel jobs. Many development positions involve spending time in various areas of the country — or even the planet — and applying your expertise to making meaningful change. 

One of the key sectors to engage in this way is urban planning. Many towns, cities, and rural communities have committed to making sustainable alterations.

Urban planners are tasked with developing design strategies for both short- and long-term projects aiding revitalization and better health. Sustainability is an increasingly central part of this career path; not only in managing the environmental impact of projects but also in making design choices that reduce pollution and waste.

There tend to be opportunities to find work that involves travel, both to find inspiration from other sustainable communities and in moving from project to project. To engage in the field, you’ll generally need a degree in a relevant area — architecture, economics, and sustainability are good options. 

However, if city design isn’t in your wheelhouse you can still pursue development through a career in environmental science. Becoming an ecologist is a great choice as your work with institutes and government agencies will see you traveling to a variety of locations to research ecosystems.

Following periods of analysis in the laboratory you can then provide reports on your findings to help address both local and global environmental challenges. As with any science field, you’ll generally be expected to hold at least a bachelor’s degree, in this case, ecology, biology, zoology, or other related areas.  

Sustainable Travel Jobs in the Nonprofit Sector

How to Find a Career That Involves Sustainability and Travel

Find a Career in a Nonprofit that combines Sustainability and Travel

While some sustainability efforts are being made by large corporations and governments this tends to move at a glacial pace. At the moment it seems like dedicated environmentally-focused nonprofit organizations are doing a lot of the heavy lifting when it comes to educating the public and pursuing projects.

This means often your best route to a job that involves travel and sustainability is with a nonprofit. Just as volunteering holds travel opportunities, you can adopt paid professional careers with these organizations across the planet. 

While it’s certainly possible to get administrative positions, you’ll tend to find more success with specialized professions. Accountancy, legal expertise, and cybersecurity are common demands.

Sustainable nonprofits are also likely to be looking for those with technical skills for hands-on projects like solar electricity installation and community development. When applying for these positions in countries abroad, you’ll also find specialized sustainable travel jobs are often more eligible for visas than those jobs that can be performed by locals.     

It might seem like an insignificant thing, but when you are pitching your skills abroad, you need to make sure you’re mindful of local customs.

Australia is one of the common targets for those seeking nonprofit experience but the sustainable travel job market has some specific requirements for resume formatting and standards.

You need to adapt your resume for tone — don’t come across as overconfident, extend your 1-page summary to 3-4 pages of high detail, and nix the headshot. Small, culturally relevant considerations help indicate to sustainable nonprofits abroad that you’re respectful of their standards and keen to engage with them.   

Sustainable Travel Jobs in Tourism

Eco Tourism offers a job combining sustainability and travel

Eco Tourism offers a job combining sustainability and travel

The tourism sector has always been a good option for work that involves travel. However, it’s only natural that you might have some reservations regarding how jobs here reflect your environmental priorities.

After all, tourism is responsible for around 8% of global carbon emissions. The good news is there’s an increasing number of businesses in the travel and hospitality sectors that offer consumers sustainable options through eco-tourism.  

Ecotourism guiding is a popular choice for a sustainable travel job. It sees you operating both as a storyteller and environmental educator, helping to solidify tourists’ connection to the natural world and their responsibilities to it.

Guides can often find on-the-job training but in ecotourism, it certainly helps if you have knowledge or experience in conservation. Alternatively, you can target hospitality positions in sustainable hotels which are identifiable through apps like Expedia that allow you to search for businesses with eco-friendly practices.

While some simply have eco-conscious aspects, others are specifically aimed at providing holistically sustainable travel accommodation.   

Whichever position you pursue, it’s important to remember you’ll be interacting with the public. This means you also need to be committed to practicing COVID-safe protocols such as wearing your mask in public.

It’s vital, too, to get a vaccine, which is considered to be safe, having gone through rigorous testing and approval processes. While you may experience some initial side effects, immunization is a tool to keep you, your colleagues, and the general public safe and healthy. It also moves us closer to achieving herd immunity.

Conclusion

Finding a career that blends your sustainability priorities with your desire to travel is more achievable now than at any other time. Sustainable development, the nonprofit sector, and ecotourism are just a few of the current industries you can target.

Take time to explore the possibilities for a sustainable travel job where you can make a difference in far-flung destinations. 

Over the past year, many avid travelers have had to slow their roll and reduce their travel due to COVID-19. During this time of quiet reflection, the realities of human carbon emission have begun to fully sink in.

As cars cleared the streets and airplanes stayed grounded, the facts remained: One long-haul flight from London to New York can produce around 986kg of carbon dioxide per passenger, according to the Guardian (US). That amount is comparable to the average yearly carbon output of a person living in a country like Paraguay or Burundi. 

With the return of air travel and the alarming projected increase in aviation emissions, you may be seeking solutions to carbon offset travel while exploring all our beautiful planet has to offer.

The What & How of Carbon Offsets

Carbon offsetting involves recognizing and directly addressing your individual carbon emissions. Online calculators make it fairly easy to determine exactly how much carbon you emit in your daily life. However, when travel is thrown into the mix, transport and other activities may cause your carbon footprint to skyrocket.

By employing simple techniques to counteract your carbon emissions, you can fill your passport with stamps while still protecting the environment. Carbon offsets for travel take many forms, and you can choose which forms best fit your lifestyle. 

Whether you prefer planting trees, encouraging less wasteful farming techniques, or helping isolated communities install cookstoves to replace wood fireplaces, you’re sure to find a cause you can get behind. Canceling out your carbon emissions allows you to get back to what you love most: travel.

The Truth About Travel & Carbon Emissions

According to the Washington Post, “flights were responsible for 2.4 percent of global energy-related carbon dioxide emissions in 2018.” While this may seem a relatively small sliver, the statistic fails to tell the whole story. 

For one thing, those numbers are projected to soar to nearly three times their current level within the next few decades. For another, because of the vast inequity of carbon emissions on our planet, a flight is likely to take up a much larger percentage of your personal carbon footprint.

Lifestyle Changes to Carbon Offset Travel

Reduce Waste & Consumption

There are many ways in which you can reduce or help carbon offset your travels. One way is by adopting a minimalist lifestyle. Minimalism doesn’t mean getting rid of everything you own, though — it means recycling, avoiding single-use items, and maximizing the enjoyment of any collections you do have without relying on quantity over quality.

A minimalistic approach to life will reduce the amount of waste you produce, thereby making the Earth greener and more enjoyable when you travel.

Eco-Friendly Digital Solutions

While you’re on the road, you can make use of several digital solutions that allow you to travel while being kind to the Earth. Carbon and solar calculators permit you to measure your impact on the environment and take concrete steps toward living a zero-waste lifestyle. 

Eco-tourism apps, on the other hand, can help you locate local produce, find sustainable lodging, and rideshare, no matter where you are in the world. In the future, fully electric driverless cars will help accelerate this change even more!

Adopt Environmentally-Friendly Work Habits

Today’s work landscape is also rapidly evolving to accommodate more eco-friendly habits. Depending on your lifestyle and work preferences, some of these techniques may work better for you than others. Two of the most popular options for eco-friendly work are work-from-home and work exchange programs.

Working From Home

As we’ve come to realize over the past year, working from home has one rather major impact: no commute. Not only does working from home save you money and time, it also significantly reduces your carbon emissions for flights. 

When you reduce the amount of fossil fuels you produce on a daily basis, this helps carbon offset travel and travel-based carbon emissions. Freelancing writing is one popular way of achieving this flexible, work-from-home lifestyle.

Work Exchange Programs

For those unable to go freelance, consider participating in a work exchange program in the location you’d like to visit. The options available to you depend on your nationality and the country you wish to work in. 

Potential work exchange programs in the United States include ranch work, the hospitality sector, and childcare services. When you work and travel at the same time, you’re less likely to jet off to a new country each week, reducing your overall fossil fuel emissions and allowing you to enjoy a rich, authentic work-travel experience.

Other Ways to Carbon Offset Travel

If you still haven’t achieved the carbon-neutral lifestyle of your dreams, there are several other ways to offset your carbon footprint. Many companies are more than happy to take your donations, but you’ll want to ensure their projects are legitimate and high-quality.

Some airlines also offer options for passengers to manually offset their carbon emissions for flights.

No matter what your current lifestyle, there are always ways to reduce your carbon footprint while journeying across the planet. Take the first step today toward living a greener life and saving the planet you love to explore!