Campervan Hugo tells his story: Hi! I’m Hugo – at least that’s what my new owners (Johannes and Birgit) named me in the fall of 2020. I recently turned 6 years old and am an L2H1 Renault Trafic in a vibrant, life-affirming green color. I’m here to tell you all about my camper van conversion story!
I met my new family in Berlin. The young couple came all the way from Munich to check me out and see if they wanted to adopt me. Well, lucky for me, they signed the contract on the same day! Adoption costs: 9999€ – and I am worth every cent!
Barely a month later (both of them quit their jobs to take care of me full time) we drove to Karlsruhe, where Birgit’s mother and grandma live. It was very nice to meet her relatives and get to know my new extended family.
In the three months that followed, Johannes and Birgit took great care of me and took on a full-time project of van conversion to campervan. Like most people who take on a DIY project, I’m pretty sure they thought everything would be easier than it was.
But for anyone else out there who is thinking of a camper van conversion, read on to learn about their process. Maybe you’ll get some inspiration from my makeover story!
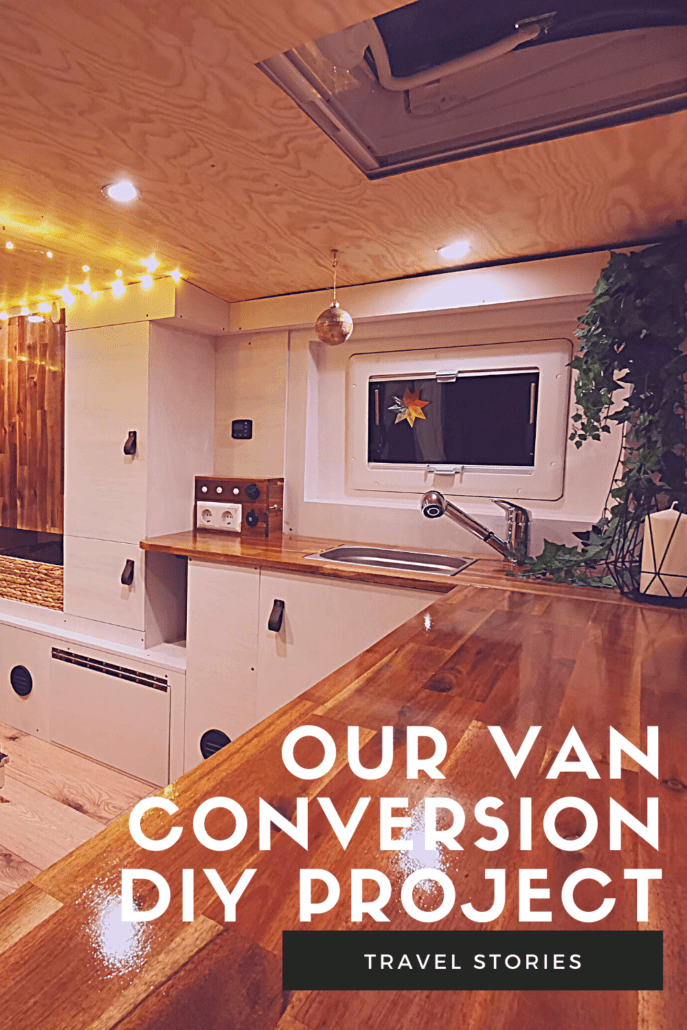
Essential Amenities for my Camper Van Conversion
Allow me to walk you through a few changes that happened during the story of my Renault Trafic camper conversion.
1. Insulation Against Heat and Cold
I was insulated with 19mm, 9mm, and 3mm Armaflex as well as sheep’s wool. After lots of research, Birgit and Johannes found out that wool is one of the best options for insulation: it insulates well against heat and cold, does not mold, and is eco-friendly (after all, it grows on sheep!). So now, I can protect my family from heat and cold.
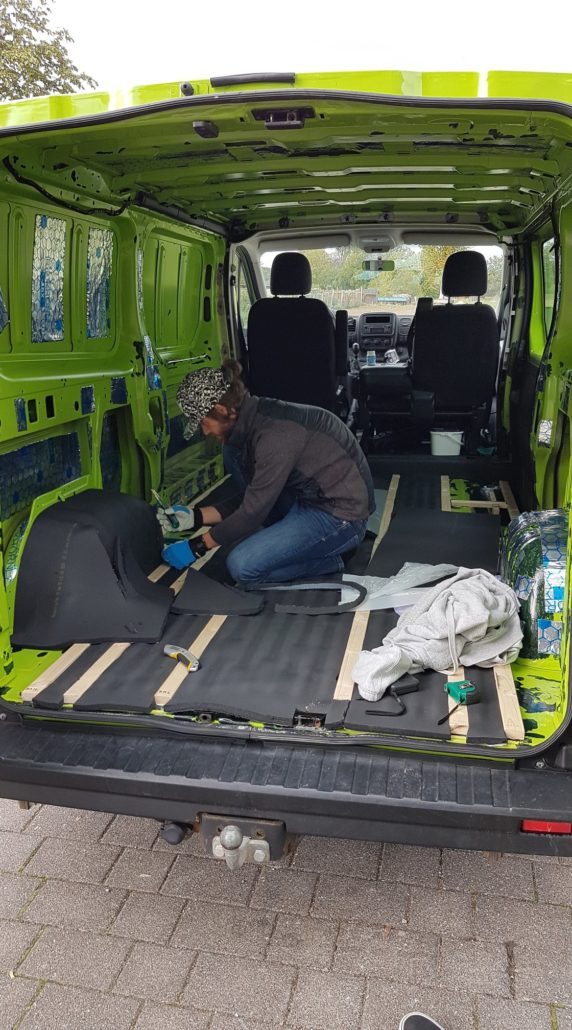
Johannes hard at work on the insulation
2. Click Vinyl Flooring
To create a liveable interior, Johannes and Birgit set about installing chic flooring. Unfortunately, the click vinyl flooring was much trickier than anticipated. Even I know that you should watch a video of how to lay vinyl flooring BEFORE trying to do it!
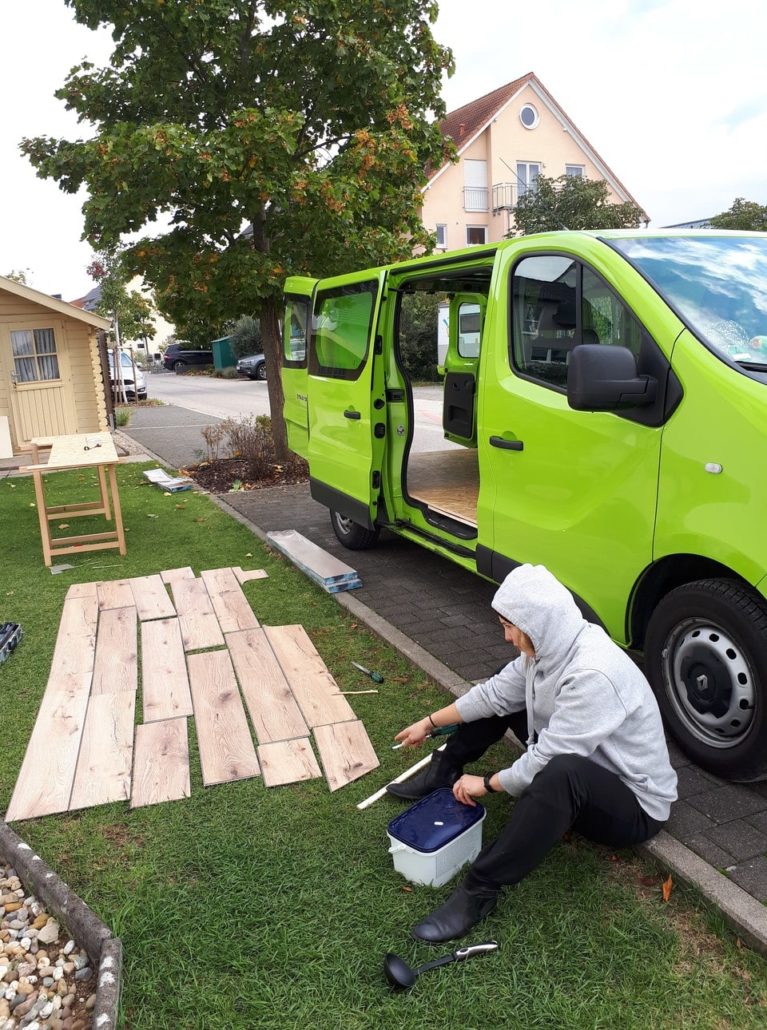
Birgit’s mission: Move the flooring from the green grass to the green camper.
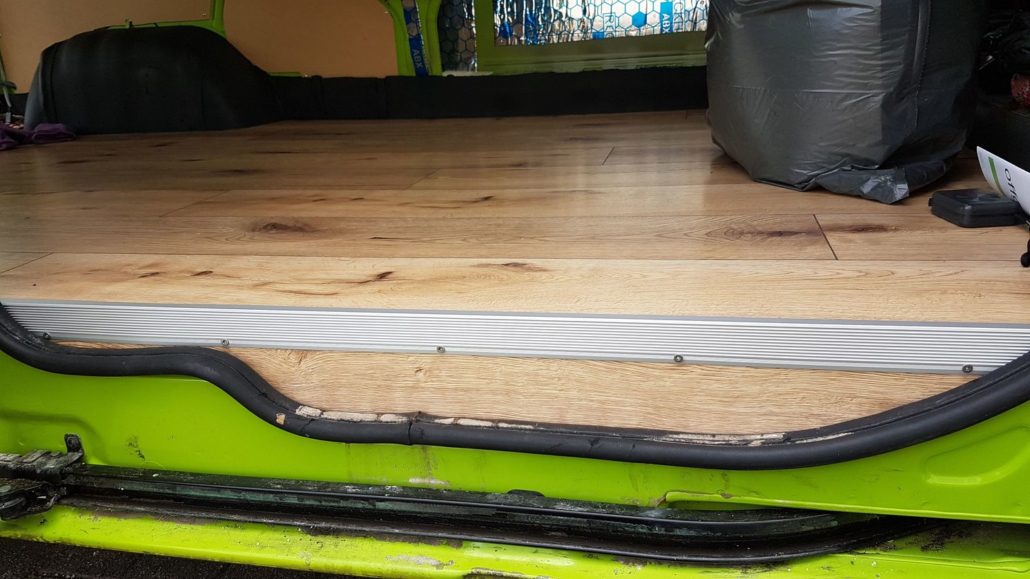
Success! Finishing the edge of the vinyl flooring
3. A New Side Window and Skylight
In contrast with the difficult flooring installation, it was a snap to cut two new openings for my roof window and side window. That was done in just one day. I’m glad they chose high-quality Dometic windows. They even come with built-in screens and blackout blinds!
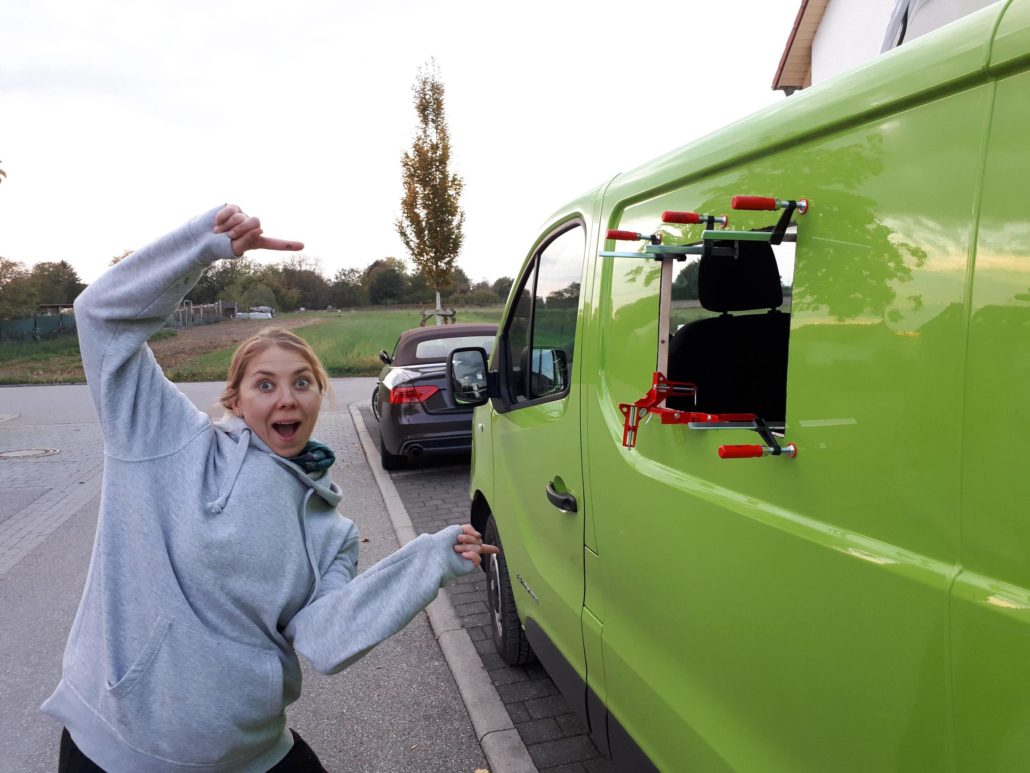
Once I got my new side window, I really started to feel like a camper van!
4. Tigerexped Parking Heater for Winter Trips
The two decided early on that they would want to travel with me in the winter since I am perfect for a cozy retreat. For cold-weather trips, I got a parking heater from Tigerexped, which has 2 kilowatts of power.
I’m now able to heat the interior from 0 to 20°C (freezing to a comfortable room temperature) in just 10 minutes! They did all the installation themselves, aside from the gas tank tap, which was done by a pair of helpful hands from a local auto repair shop. I very much appreciate it, since the tank is one of my most sensitive components!
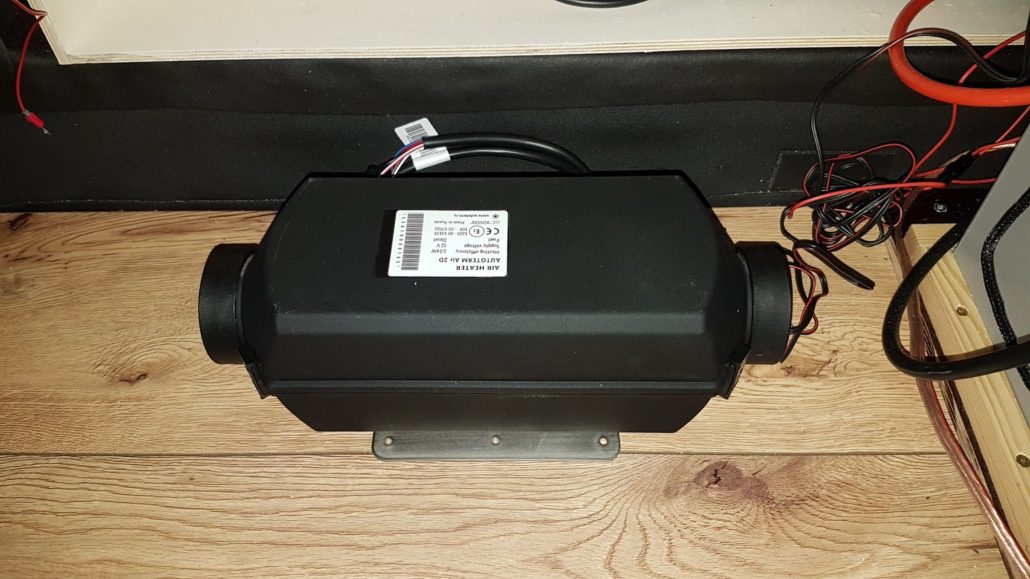
Autoterm Air 2D heater from Tigerexped
5. Stylish Side and Roof Panels for a Livable Interior
My side panels are made of multiplex panels that were sanded and painted white, plus 4-way stretch felt. Felting was fun for Jo & Bibs, I could tell they enjoyed it!
Luckily, felt is a forgiving material, so they didn’t have to be quite as precise as they had to be for other aspects of my van makeover. They simply applied adhesive spray to the Armaflex and pressed the felt on bit by bit.
Their oft-praised “secret weapon” was an orange peeler from Birgit’s mother’s kitchen. With it, they could stuff the felt into even the tightest cracks, and now I look nice and neat! 😉
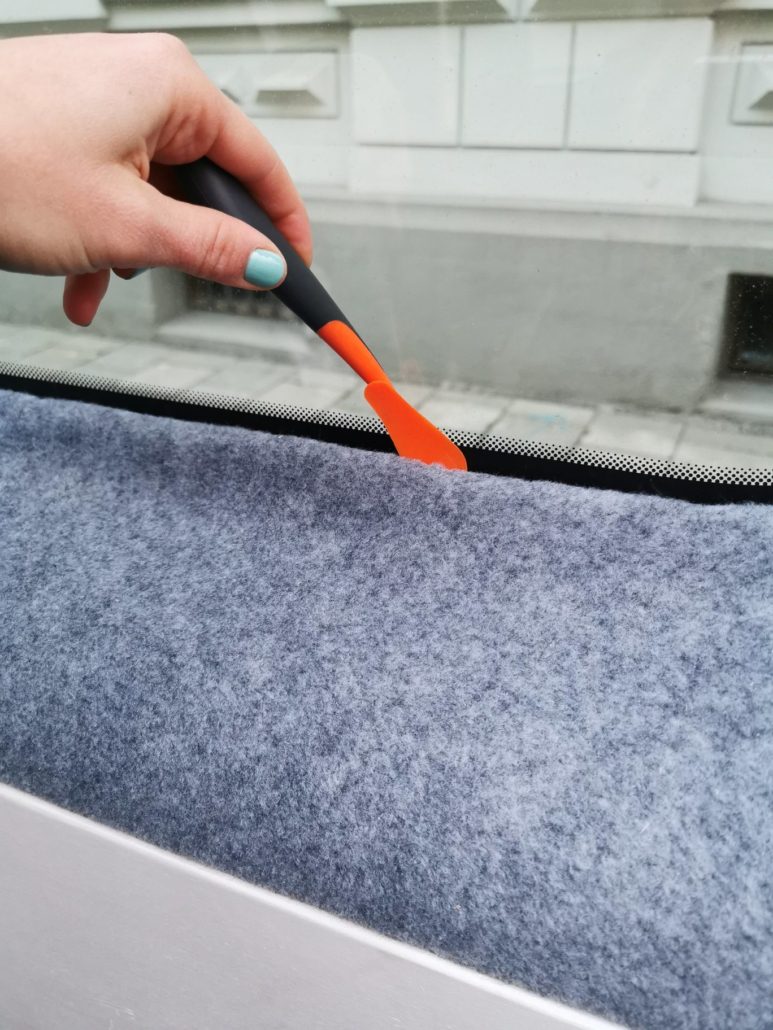
The secret weapon: an orange peeler to help achieve a clean finish on the felt.
My ceiling is made of 4mm-thick birch wood. Before installing, it was soaked with oil to prevent mold and keep it in good shape over the next several years.
It was the right plan in theory, however, they realized after the fact that they should have used a different type of oil. Unfortunately, my interior still has a distinct smell from the oil (even tho it is intended for living rooms!). I’m still getting used to it, but they would probably recommend a different one.
The smell is slowly fading away, and to accelerate the vaporization of the oil, they leave my closet doors open with the windows cracked whenever I’m parked.
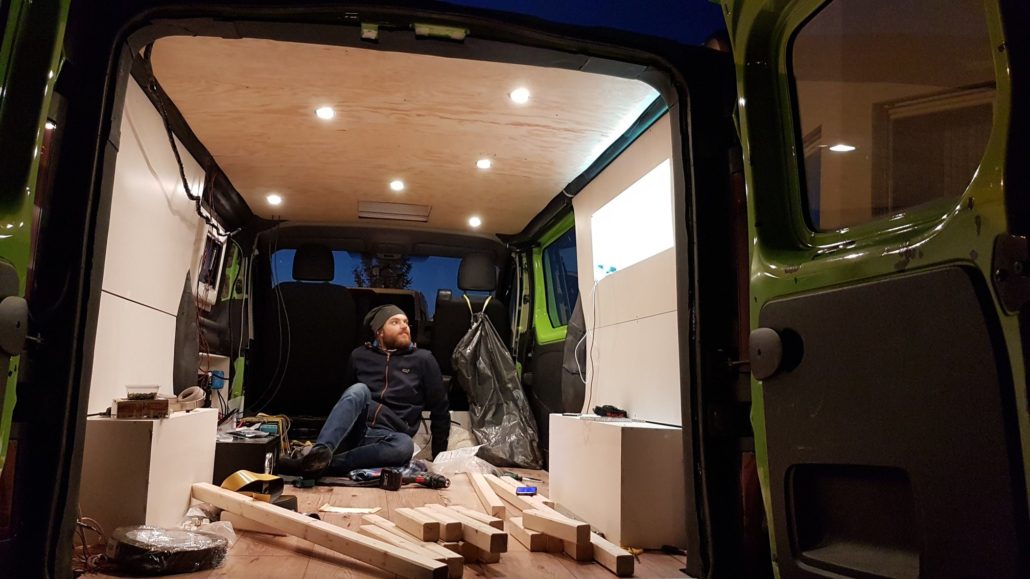
Johannes admires my interior. My conversion from van to camper van is coming along!
6. Self-Sufficient Power for Camper Van Living
One of my coolest features is the 6 LEDs embedded in my ceiling- The front 3 can be switched on and off independently from the rear 3, and even from 2 different locations.
Alternate switching is the keyword here! All in all, they took great care of my electrical system. Especially Jo was very interested in this part of my camper van conversion, calculating all the cable strengths and figuring out the necessary fuses that I would need.
Within my cozy cabin, I have a 180Ah AGM battery, a 300-Watt inverter for laptops, a 32-Liter cooler from Mobicool, a submersible pump, various USB chargers, and even a monitor so that Johannes and Birgit can hop in and travel with me while they work remotely.
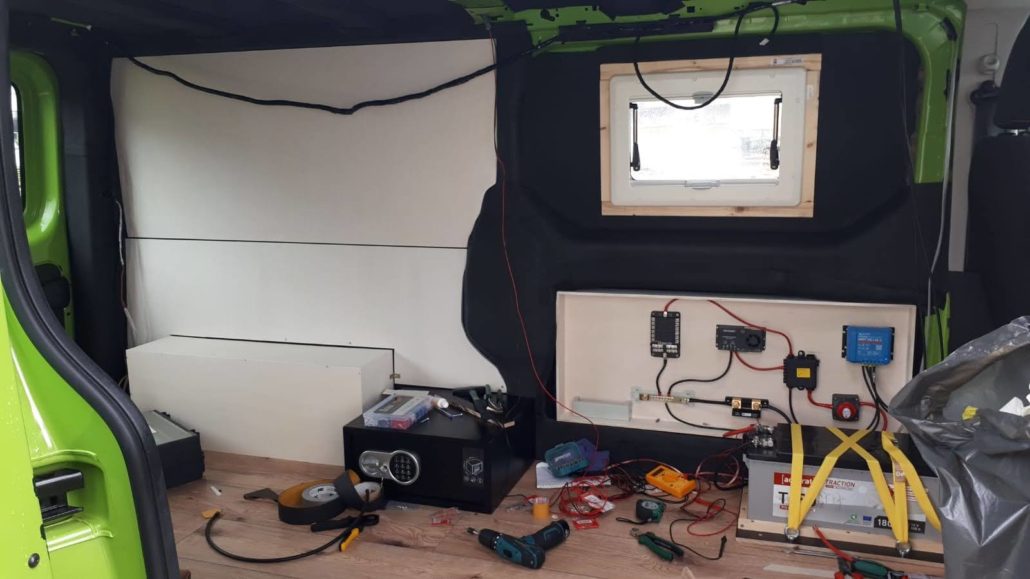
The electrical heart of Hugo
And guess what – all of these devices are powered by the sun! My owners installed a 360-Watt solar panel on my roof. It’s a standard solar panel like the ones you see on house rooftops.
Johannes and I picked it up from a solar builder in the neighboring village. My owners first used industrial glue to attach 4 spoilers to my roof and then screwed the solar panel onto them.
The wires run into my interior and connect to the battery. I think it’s great that during my camper van conversion they figured out how to use the sun to generate green energy – after all, green is my favorite color!
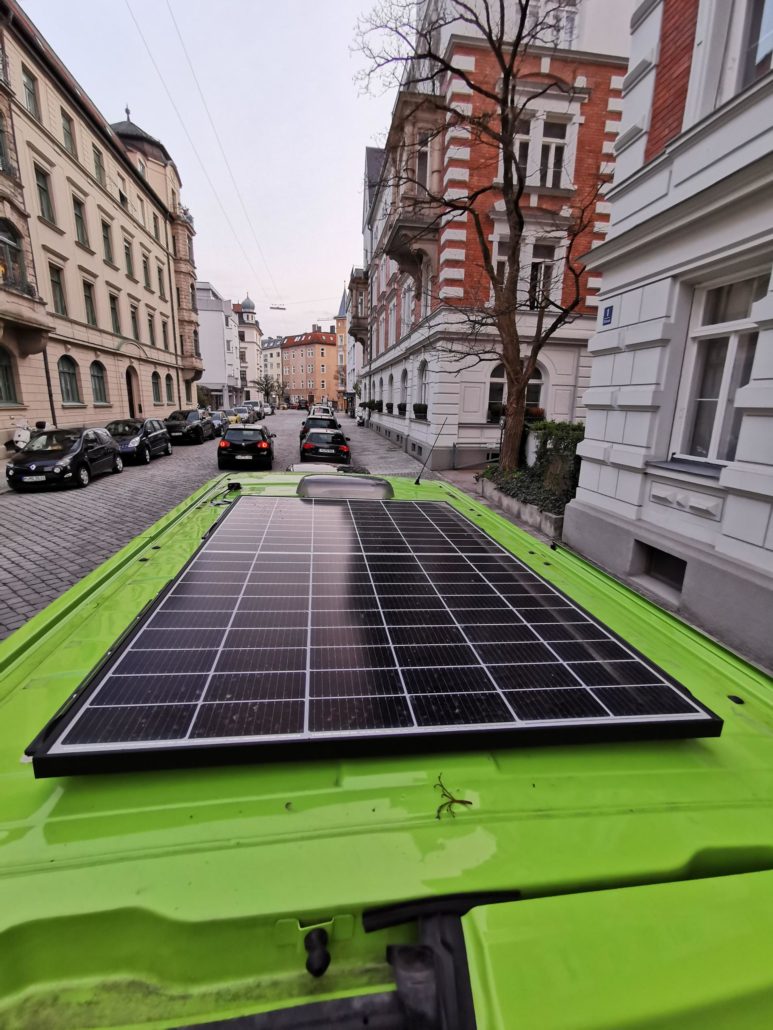
360 W solar system on Hugo’s roof
Update: Unfortunately the glue didn’t stick to the solar panel spoilers. Luckily Johannes and Birgit noticed before it was too late and dismantled the solar panel during their recent vacation in Italy.
So for now I don’t have a solar panel on my roof but Johannes and Birgit are working on a solution. Van conversion is a constant process!
In the meantime, I’m using a charge booster to charge the battery while driving. This can be switched on/off by a special switch in the driver’s compartment. Now that my interior battery cannot be loaded by the sun anymore, I’m very glad that this charge booster was installed.
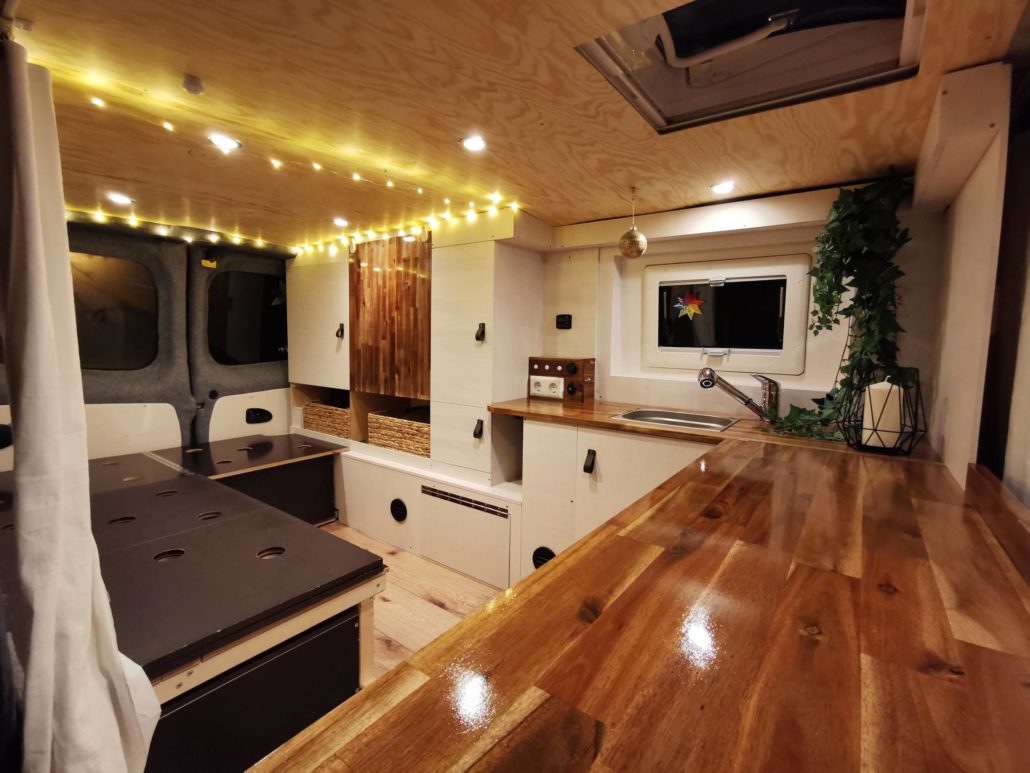
Space-Saving Design Features
My interior living space is really cool and I have to say, very well thought out! It has to be, because as is the case with all camper van conversion projects, the space is limited: As a typical Renault Trafic before my camper conversion, I had about 5m² (54 square feet) of space in the living room – and a height of just 140 cm (55 inches). So it’s important to make the most out of every spare millimeter.
Like most camper van conversion projects, I am full of hidden features and tons of practical space-saving tricks! Let me take you on a little tour of all the cool things inside 😉:
- Funky LED sideboard with a corkboard and integrated USB charging station.
- White cabinet wall with tons of storage space, the cabinet door is also the table. It’s made of beautiful acacia wood – for a camper van like me, fine wood is basically like fine jewelry. The external monitor is tucked behind the cabinet.
- A camping stove that can be pulled out through a drawer, making it easy to cook outside if weather permits! Underneath that drawer is another drawer. Drawer-inception, so to speak. It serves as an additional area to cut vegetables when cooking.
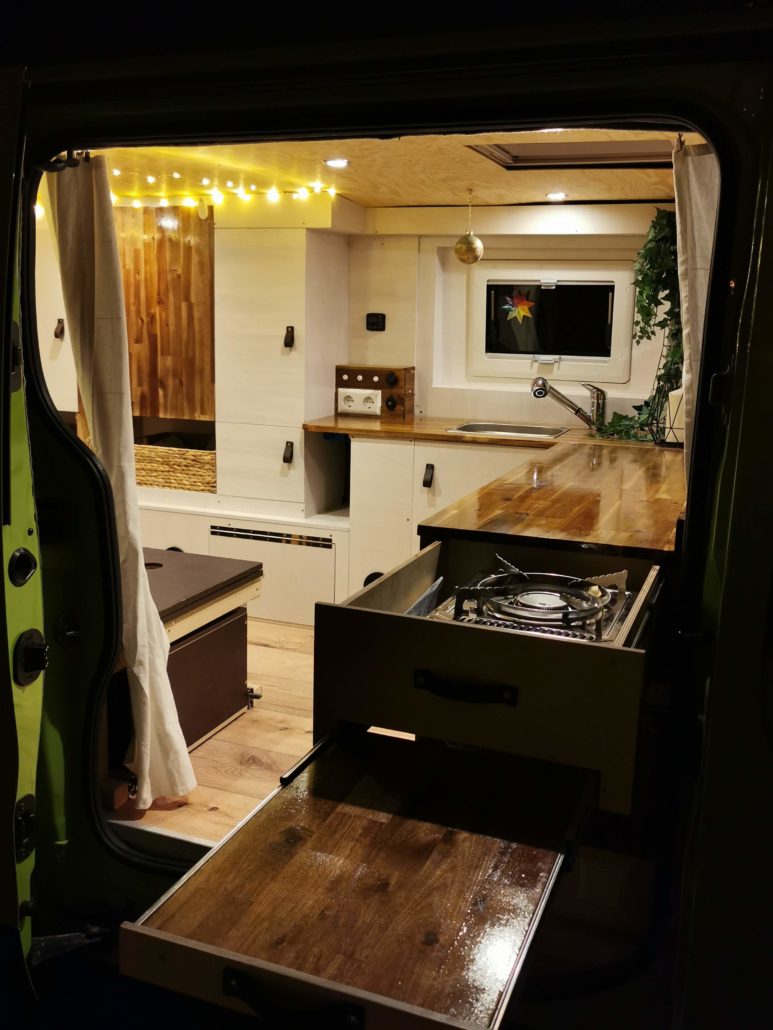
Drawer inception for expandable space in the kitchen
- The entire space under the bed can be used for storage. There are 3 heavy-duty drawers + an area with space for either a folding box or a crate of beer. I’d love to say this was planned – but the fact that my humans chose these exact dimensions was pure coincidence.
- I even have a small sink. The water comes from a 12-liter fresh water tank under the sink, flows through the kitchen faucet, and drains into the 12-liter waste water tank. By the way, the faucet can be pulled outside through the side window and used as an outdoor shower. Ideal after a strenuous hike!
- The bed is flexible and adjustable, so it can either be used as a bench or a large bed measuring 200cmx125cm (about the size of a Full bed). If you want to sit at the table, the bed can be made into a U-shape and three people can sit.
- The acacia cabinet door has two drive-in nuts, which allow you to screw in two large threaded bolts with feet to become the table legs. When it’s folded down, the table legs rest on a part of the bed, so it’s super stable.
The Final Touches for my Renault Campervan Conversion
My cozy interior really came together with the addition of the light gray “home-sewn” mattress (well… sewn by Birgit’s aunt – that was a 14-hour sewing marathon!).
The white curtains provide privacy and complement the white furniture and the dark brown acacia wood in the kitchen. Artificial ivy hides the electrical cables and creates a homey atmosphere.
With the ceiling lights on and a candle lit, I transform into quite a romantic little place! Seeing me now, you would hardly believe that I was once an empty Renault Trafic before my camper conversion makeover.
![]()
Makeover complete! Can you believe how far I’ve come?
What’s Next for Campervan Hugo?
Originally, my new owners budgeted 2 months to convert me from van to campervan. That they overestimated themselves was clear to me from the beginning – but sometimes people have to learn the hard way!
I will probably never become a real full-time camper for the so-called ‘van life’. Even though Johannes and Birgit are very fond of each other, <5m² is a bit small for the long term.
In any case, the two had a great vacation with me this summer. We drove through Germany, Switzerland, and Italy together.
I’m not sure what our plans are for next year, but we will definitely go to the mountains for hiking or maybe a snowy getaway. If you’re interested in what the future brings for me, you can follow along at @hugo_campervan on Instagram. Maybe you’ll get inspiration for your own Renault Trafic camper conversion.
In closing, I just recently overheard a conversation that made me so happy, and I would like to share it with you. Maybe you as (future) van builders or owners see it exactly the same way:
“Hugo is our little second home and the whole world is our backyard!”