Embarking on a travel trailer adventure is an exhilarating journey that offers boundless opportunities for exploration, freedom, and unforgettable experiences. Whether you’re a seasoned traveler or a novice adventurer, the world of travel trailers provides a unique way to discover new places while enjoying the comforts of home on wheels. In this comprehensive guide, we will delve into the ins and outs of preparing for a travel trailer adventure, from choosing the right trailer to exploring your destinations and fostering connections with fellow travelers. So, fasten your seatbelts, as we take you on a thrilling ride through the world of travel trailer adventures.
Why Choose a Travel Trailer Adventure?
Before we dive into the nitty-gritty details of planning your travel trailer adventure, let’s explore the compelling reasons why choosing a travel trailer is an excellent decision.
Flexibility
One of the most significant advantages of a travel trailer adventure is the flexibility it offers. Unlike other modes of travel, such as flying or staying in hotels, travel trailers allow you to change your itinerary on a whim. If you stumble upon a breathtaking view or a charming town, you can simply park your trailer and savor the moment, without worrying about hotel reservations or check-out times.
Cost-effectiveness
Traveling with a travel trailer can be a cost-effective option for adventurers. While there is an initial investment in purchasing a travel trailer, it can pay off in the long run. You can save money on accommodation and dining expenses, as you have the convenience of preparing your meals and enjoying the comfort of your own space.
Comfort
Travel trailers offer a level of comfort that is unparalleled in the world of adventure travel. You have a cozy bed, a fully-equipped kitchen, and your own bathroom facilities. It’s like taking your home with you on the road. No more discomfort from sleeping in unfamiliar beds or eating at restaurants with questionable hygiene.
Independence
When you have a travel trailer, you are in complete control of your adventure. You are not bound by hotel check-in and check-out times. You can choose your routes, change plans at will, and be self-sufficient wherever you go. The sense of independence and self-reliance is truly liberating.
How to Plan Your Travel Trailer Adventure
Now that you’re convinced of the advantages of a travel trailer adventure, let’s delve into the essential steps for planning your journey. To ensure a smooth and enjoyable experience, it’s crucial to consider various aspects of your adventure.
Setting Your Travel Goals
Before you hit the road, take some time to define your travel goals and objectives. Understanding what you want to achieve from your adventure will help you make informed decisions along the way.
Destinations
Start by selecting the destinations you wish to explore. Whether it’s national parks, coastal towns, or historic cities, having a clear list of places you want to visit will give your adventure purpose.
Duration
Determine the duration of your travel trailer adventure. Will it be a short getaway, a month-long expedition, or a full-time lifestyle change? Your choice will influence your planning and budgeting.
Budget
Create a budget for your adventure, taking into account expenses such as fuel, campground fees, food, and maintenance. Having a budget will help you manage your finances and make informed spending decisions on the road.
Choosing the Right Travel Trailer
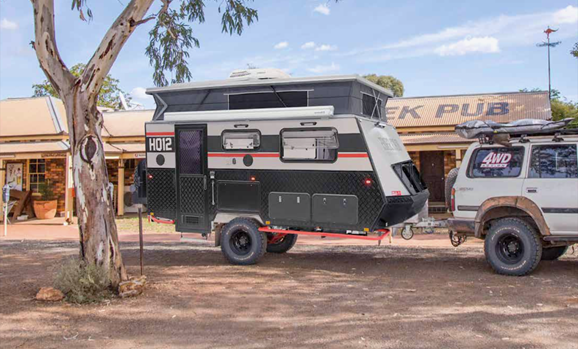
Selecting the perfect travel trailer from Black Series for your adventure is a great decision. Consider the following factors when making your choice:
Size and Layout
The size and layout of your travel trailer should align with your travel goals. Do you need a compact trailer for easy maneuverability, or do you prefer a larger one with more living space? Think about your comfort and convenience.
Weight Capacity
Ensure that your towing vehicle can safely handle the weight of your chosen travel trailer. Exceeding the towing capacity can lead to safety hazards and mechanical issues.
Features and Amenities
Review the features and amenities offered by different travel trailers. Some may come with luxurious extras like slide-out rooms, entertainment systems, and outdoor kitchens, while others focus on simplicity and functionality.
Preparing Your Vehicle
Before hitting the road, it’s essential to prepare your towing vehicle for the journey. Pay attention to the following aspects:
Towing Capacity
Confirm that your towing vehicle has the required towing capacity for your travel trailer. Consult your vehicle’s manual or a professional if you’re unsure.
Hitch Installation and Setup
Proper hitch installation and setup are essential for safe towing. Ensure that your hitch is securely attached and adjusted according to the specifications of your trailer.
Safety Checks
Perform thorough safety checks on both your towing vehicle and travel trailer. Check tire pressure, brakes, lights, and all mechanical components to minimize the risk of breakdowns on the road.
Packing Essentials for Your Adventure
Packing for a travel trailer adventure requires careful consideration of your needs and priorities. Here’s a breakdown of essential items to pack:
Clothing and Personal Items
Pack clothing suitable for various weather conditions, as well as personal items like toiletries, medications, and personal documents. Consider storage space when packing.
Kitchen Essentials
Your travel trailer’s kitchen is your culinary haven on the road. Pack cookware, utensils, dishes, and ingredients for your favorite meals. Don’t forget essentials like coffee makers and toasters if they’re part of your routine.
Bedding and Linens
Ensure a comfortable sleep by bringing bedding, pillows, and linens. Consider the climate of your destinations and pack accordingly.
Camping Gear
Depending on your outdoor activities, pack camping gear such as chairs, a portable grill, hiking boots, and outdoor sports equipment. Tailor your gear to your planned adventures.
How to Stay Safe and Comfortable
Safety and comfort are paramount during your travel trailer adventure. Here are some tips and guidelines to ensure both:
Safety First
Prioritize safety by equipping yourself with the necessary tools and knowledge for emergencies:
First Aid Kit
Pack a comprehensive first aid kit that includes bandages, medications, antiseptics, and any personal medical supplies.
Fire Safety
Install smoke detectors and fire extinguishers in your travel trailer. Learn how to use them effectively and practice fire safety at all times.
Navigation Tools
Equip yourself with reliable navigation tools, whether it’s a GPS device, maps, or a smartphone with offline maps. Familiarize yourself with your routes in advance.
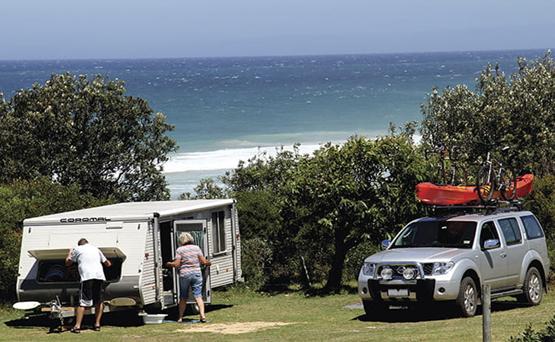
Setting Up Camp
Setting up your campsite efficiently contributes to your overall comfort. Follow these steps:
Leveling and Stabilizing
Ensure that your travel trailer is parked on a level surface. Use leveling blocks or jacks to stabilize your trailer and prevent wobbling.
Hooking Up Utilities
Connect your travel trailer to the campground’s utilities, including water, electricity, and sewage hookups. Follow proper procedures to avoid any issues.
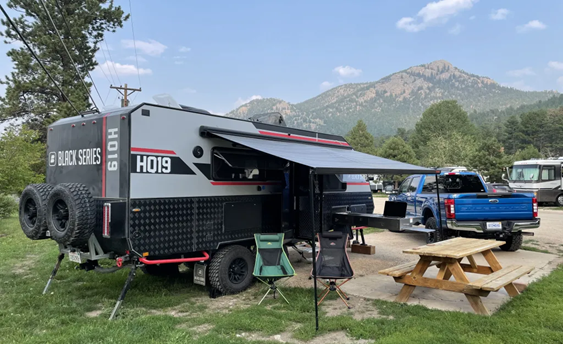
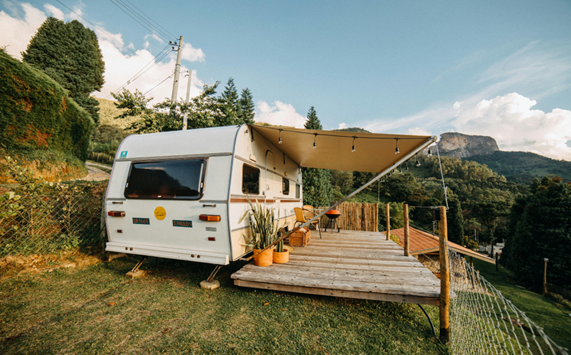
Awning and Outdoor Setup
If your travel trailer has an awning, set it up to create shaded outdoor space. Arrange outdoor furniture and create a cozy atmosphere for relaxation.
Cooking and Meal Planning
Delicious meals are an essential part of your adventure. Explore these tips for cooking and meal planning:
Campfire Cooking
Embrace the joy of campfire cooking by preparing meals over an open flame. Learn basic cooking techniques for campfires and invest in campfire cooking equipment.
RV Kitchen Essentials
Maximize your RV kitchen by utilizing space-efficient cookware and appliances. Plan your meals ahead and stock your pantry with versatile ingredients.
Cooking Hacks
Discover cooking hacks and tips for preparing tasty meals with limited resources. Adapt your recipes to fit your travel kitchen.
Maintenance and Repairs
Staying proactive with maintenance and troubleshooting is crucial for a smooth journey. Here’s what you need to know:
Routine Checks
Regularly inspect your travel trailer for signs of wear and tear. Check tires, brakes, lights, and all mechanical components. Address issues promptly to avoid breakdowns.
Common Issues and Solutions
Familiarize yourself with common travel trailer issues and their solutions. Be prepared to handle minor repairs and maintenance tasks on the road.
When to Seek Professional Help
Recognize when an issue requires professional assistance. Having a trusted list of RV service providers can save you time and stress in critical situations.
Exploring Your Destinations
Now that you’ve covered the essentials of preparation, it’s time to focus on making the most of your travel trailer adventure by exploring your chosen destinations.
Adventure Activities
Your travel trailer adventure opens doors to a wide range of exciting activities. Embrace the outdoors and explore these adventure options:
Hiking and Nature Trails
Immerse yourself in the beauty of nature by hiking through scenic trails. Research the best hiking spots at your destinations and pack appropriate gear.
Water Sports
If your adventure takes you near lakes, rivers, or oceans, consider water sports like kayaking, paddleboarding, or fishing. Rent equipment or bring your own.
Cultural Experiences
Discover the rich culture and heritage of your chosen destinations. Visit museums, historical sites, and attend local festivals to gain a deeper understanding of the area.
Local Cuisine and Dining
Exploring the local food scene is an integral part of any travel adventure. Here’s how to make the most of your culinary experiences:
Food Markets
Visit local food markets to sample fresh produce, artisanal goods, and regional specialties. Engage with local vendors to learn about their products.
Restaurants and Eateries
Dine at local restaurants and eateries to savor authentic dishes and flavors. Ask locals for recommendations to find hidden culinary gems.
Cooking Local Dishes
If you enjoy cooking, try your hand at preparing local dishes using ingredients you’ve picked up at food markets. Experiment with new recipes in your travel trailer kitchen.
Connecting with Fellow Travelers
Part of the magic of a travel trailer adventure is the opportunity to connect with like-minded travelers. Foster these connections on the road:
Joining RV Clubs and Communities
Consider joining RV clubs and online communities dedicated to travel trailer enthusiasts. Benefits include:
Networking
Connect with fellow travelers to share tips, experiences, and recommendations. Building a network can enhance your adventure.
Sharing Experiences
Participate in forums and discussions to exchange stories and gain insights from others who have traveled similar paths.
Tips and Advice
Receive valuable tips and advice from seasoned travelers who can provide guidance on routes, campgrounds, and travel trailer maintenance.
Campground Socializing
Campgrounds and RV parks often serve as hubs for social interaction. Embrace the community spirit by engaging in these activities:
Campfire Gatherings
Join campfire gatherings to meet fellow travelers, share stories, and enjoy the warmth of a roaring fire.
Potluck Dinners
Organize or participate in potluck dinners with other campers. It’s a fantastic way to try different dishes and bond with new friends.
Game Nights
Host or attend game nights with board games, card games, or outdoor activities. It’s a fun way to unwind and create lasting memories.
Sustainability and Responsible Travel
As responsible travelers, it’s essential to minimize our environmental impact and promote sustainability while enjoying travel trailer adventures. Follow these guidelines:
Leave No Trace Principles
Practice responsible outdoor ethics by adhering to the Leave No Trace principles:
Minimizing Impact: Minimize your impact on natural and cultural environments by staying on designated trails, respecting wildlife, and leaving no litter behind.
Waste Disposal: Dispose of waste properly by using designated receptacles and following campground rules for sewage and trash disposal.
Conservation Efforts: Support conservation efforts by volunteering or donating to organizations that protect the areas you visit.
Eco-Friendly RVing
Embrace eco-friendly RVing practices to reduce your carbon footprint:
Solar Panels: Consider installing solar panels on your travel trailer to harness renewable energy for your power needs.
Water Conservation: Be mindful of water usage by fixing leaks, using water-saving appliances, and practicing water conservation habits.
Green Camping Gear: Choose environmentally-friendly camping gear, such as biodegradable cleaning products and reusable containers, to reduce waste.
Travel Trailer Adventures – Final Thoughts
In conclusion, preparing for a travel trailer adventure is an exciting endeavor that requires careful planning, a sense of adventure, and a commitment to responsible travel. By choosing a travel trailer, you unlock the freedom to explore diverse destinations while enjoying the comforts of home. From setting travel goals and selecting the right trailer to ensuring safety and connecting with fellow travelers, this guide has covered all the essential aspects of planning a memorable travel trailer adventure.
As you embark on your journey, remember to leave no trace, practice sustainability, and immerse yourself in the beauty of nature and culture. By following these guidelines and principles, you can create lasting memories and enjoy the ultimate travel trailer adventure.
So, pack your bags, hitch your trailer, and hit the open road—it’s time to embark on an unforgettable adventure that will leave you with stories to tell and experiences to cherish for a lifetime.